This is an old revision of the document!
Automated Irrigation System
Student: Negulescu Razvan-Adrian, ACES
Youtube demo:
1. Introduction. Description of the project
In recent years, smart agriculture has experienced considerable developement, productivity and efficiency, being the main descriptive terms of this process. With the developement of controlled technology a lot of methods and systems have been developed for monitoring the paramters specific to agriculture. In this case, farmers can control the main factors that influence the agricultural process, obtaining a maximum productivity, advantageous from an economic point of view.
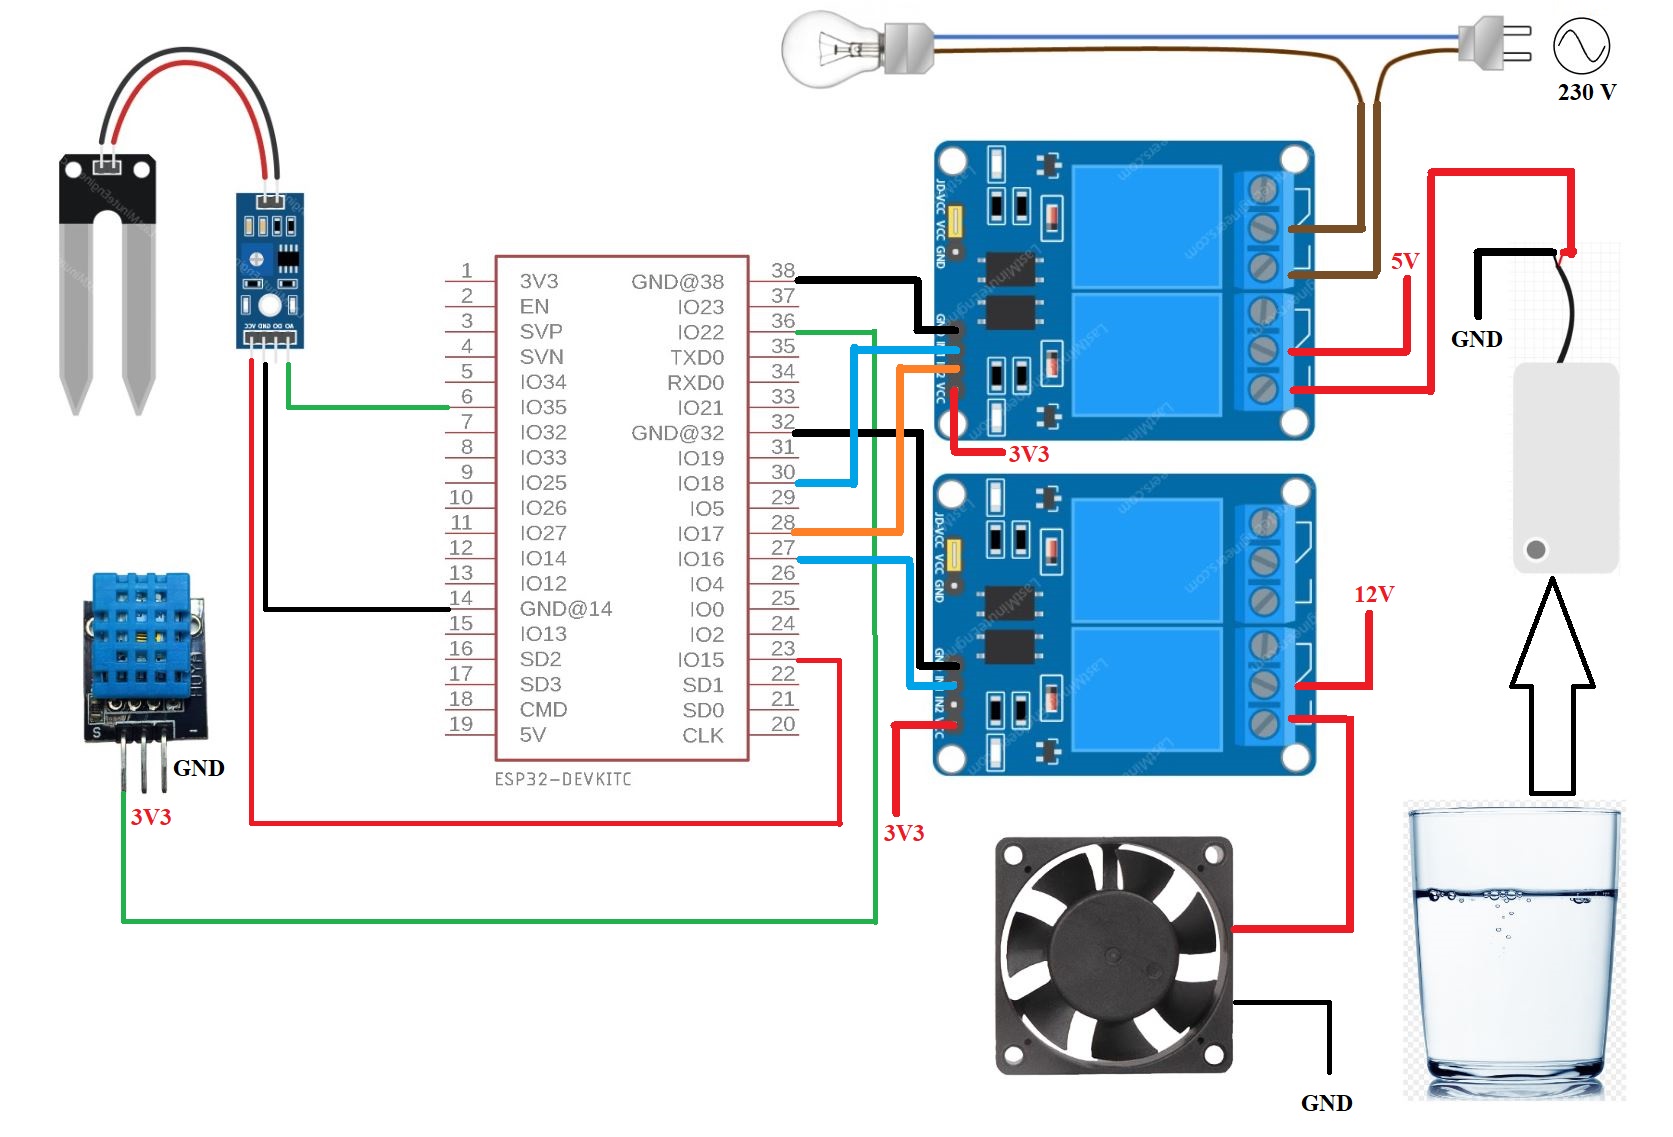
In this project we are using an ESP32 CH340 developement board connected to a soil moisture sensor, a DHT11 temperature and humidity sensor and a water pump and other peripherals to create an smart irrigation system redesigned on a smaller scale, for a potted plant that can be found in everyone's home.
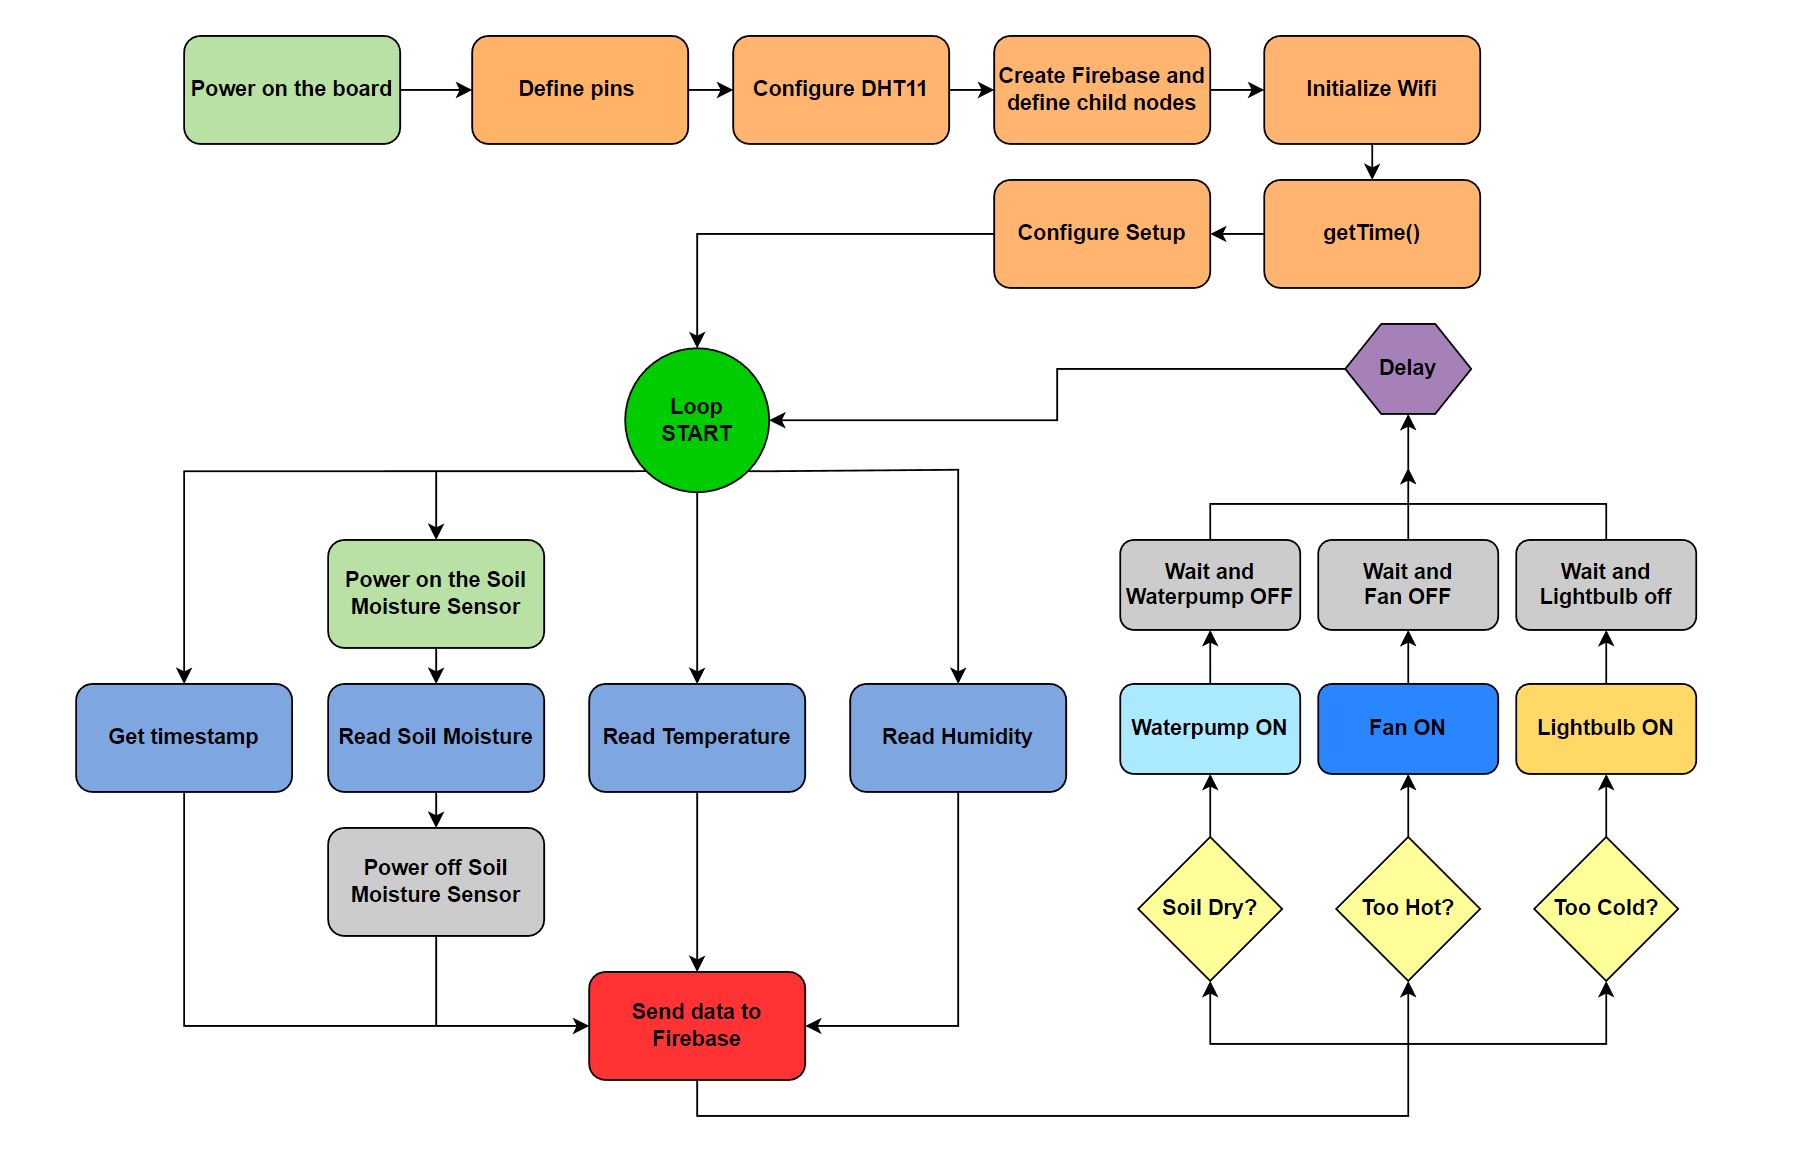
For programming the board I used Arduino IDE, being compatible and having a special set of libraries for ESP32. The soil moisture sensor is used to measure the moisture level of the soil, and based on a predefined threshold it automatically waters the plant using the submersible water pump.
Also to keep the plant in a friendly enviroment (a good temperature) we are using a DHT11 sensor to read the temperature and humidity, and using a cooling fan and a heating element (incandescent light), based on a set threshold we can chage the temperature in the plant proximity.
I created a Firebase database to store all extracted values, and I implemented a Web Application to have a better vizualization on the data using figures such as gauges and linear graphs.
2. Hardware components and wiring
The hardware components needed for this project are:
- 1 x ESP32 CH340
- 1 x Submersible Water Pump
- 1 x 5V / 3V3 regulators board
- 1 x Soil Moisture Sensor
- 1 x DHT11
- 1 x 12V DC Power Supply
- 1 x 12V Cooling Fan
- 1 x Lightbulb
- 2 x 2 channel Relay
- 1 x Breadboard
- Jumper wires
- Micro USB data cable
- PC with an internet connection and with Arduino IDE
3. Software implementation
4. Demonstration
This setup was implemented to measure the moisture level and the other parameters once a day. To create a demo video, I changed the thresholds in the ESP32 code, so that the room temperature and the moisture of the soil don't create any difficulties. At the start of the wiki is a Youtube link to the demo.


