3D Object Representation
author: Nita Andrei-Daniel
ACES
Project Objective
The main objective of the project is to obtain readings of an object position and to display it on a web server. This concept can be used as an IoT application in a smart environment where all the object positions are tracked.
Project Description
The gyroscope/accelerometer/temperature measurements will be read from the sensor at regular time intervals.
These measurements will be stored on the ESP32. The server running on the ESP32 will transmit the data to the client side, where it will be displayed on the web page.
Hardware Description
1. ESP32-WROOM-32
For this project development I have used the ESP32-WROOM-32 development board. ESP32-WROOM-32 is a low-cost, low-power system on a chip microcontroller with integrated Wi-Fi and Bluetooth modules.
2. MPU-6050
The object position readings are acquired using an MPU-6050 sensor. MPU-6050 is a 3-axis accelerometer and gyroscope sensor, also capable of temperature sensing. The gyroscope measures rotational velocity (rad/s). The accelerometer the rate of change of velocity on the three axes. These two readings help us calculate the position and orientation of the sensor.
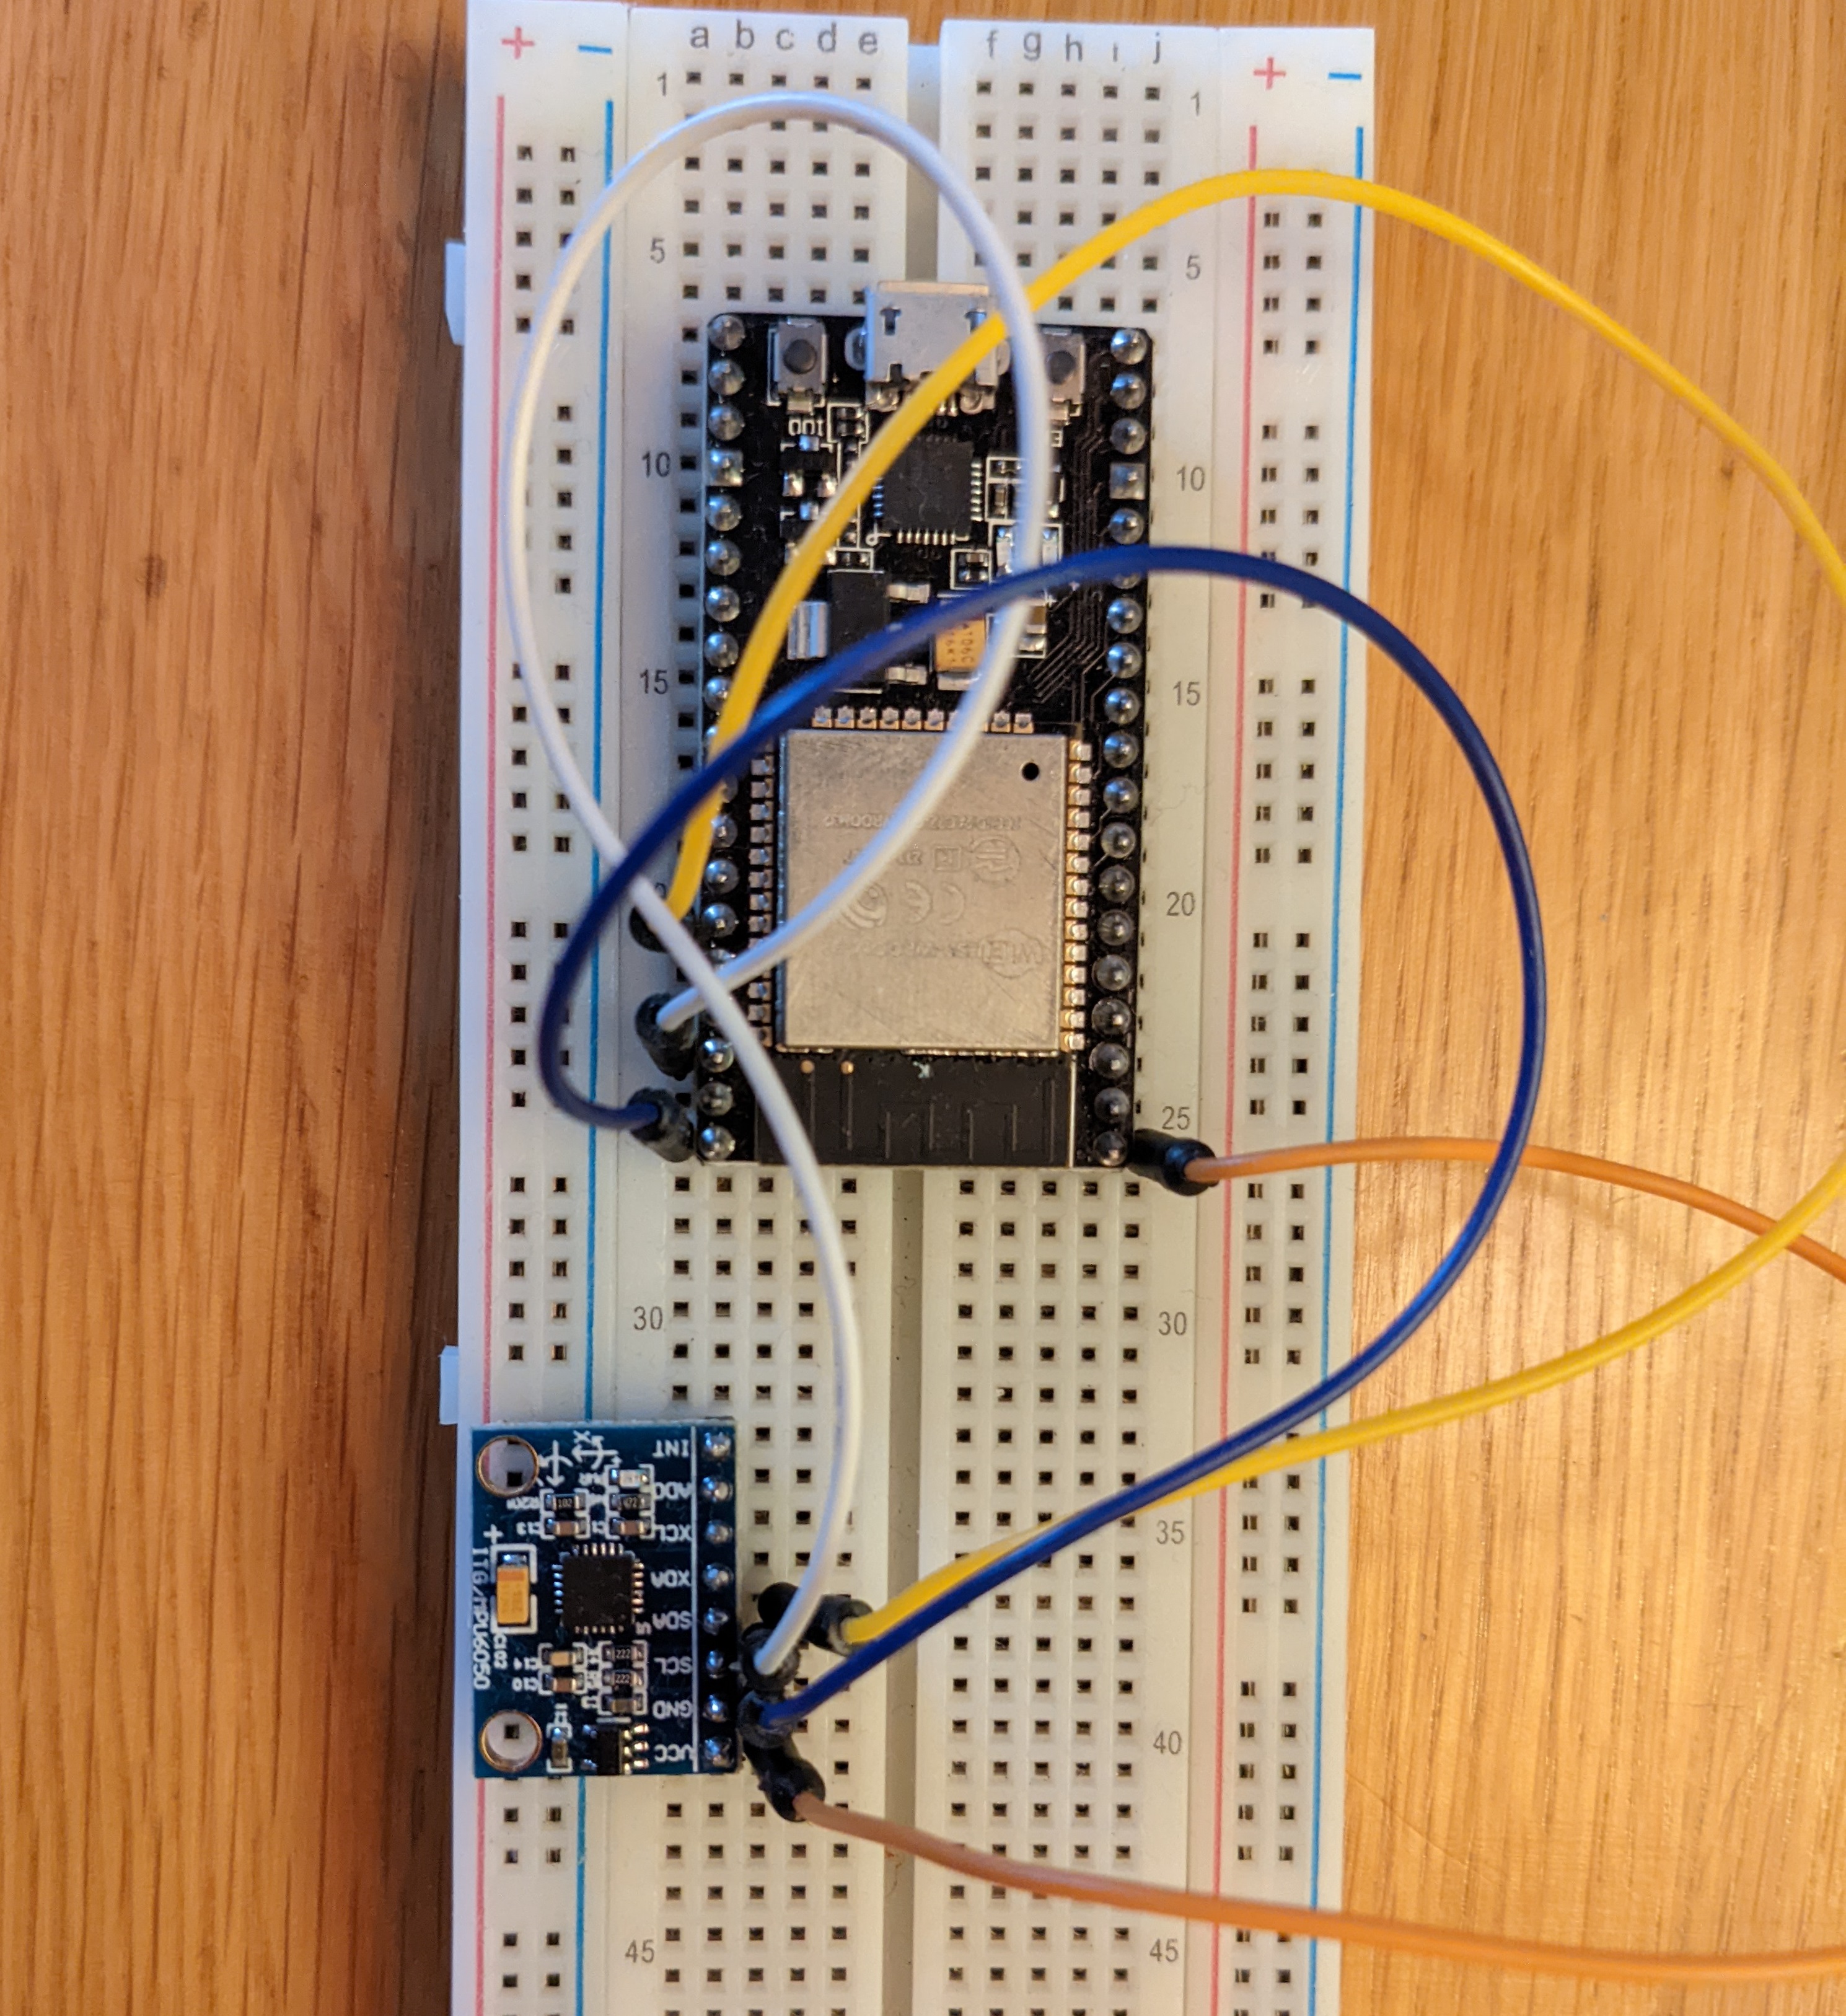
3. Circuit Diagram
The communication between the ESP32 board and the MPU module is done through I2C (Inter-Integrated Circuit).
Connections (MPU - ESP32):
- Vcc - 3V3
- GND - GND
- SCL - GPIO 22
- SDA - GPIO 21
4. BOM
| Item | Amount | Price |
|---|---|---|
| ESP32 WROOM-32 | x1 | 77 RON |
| MPU-6050 | x1 | 20 RON |
Software Description
1. Arduino IDE C Code
In order to use our sensor readings, communicate with the ESP32, connect to the WiFi and handle the web server, we are going to need the following libraries:
- Adafruit MPU6050
- Adafruit Unified Sensor
- Adafruit BusIO
- ESPAsyncWebServer
- AsyncTCP
- WiFi
- Arduino_JSON
Functions
 initMPU() - initialize MPU-6050 sensor
 initSPIFFS() - mount SPIFFS
 initWiFi() - connect to the WiFi network with the ssid and password provided
 getGyro() - get gyroscope readings
 getAcc() - get accelerometer readings
 getTemp() - get temperature readings
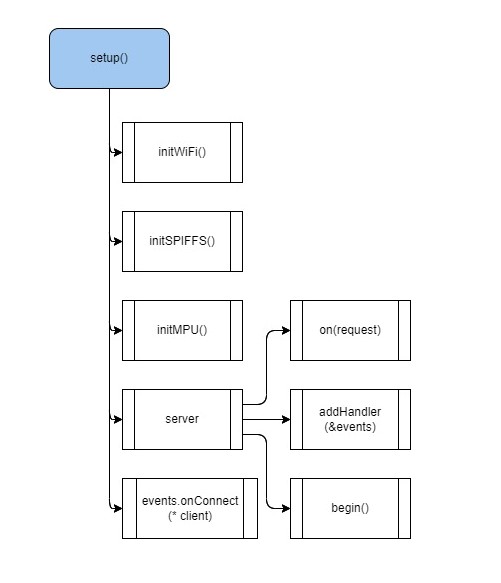
Setup and Loop Functions
Server Handling
The asynchronous web server is created on port 80. The Wi-Fi connection is established and SPIFFS is mounted. The sensor readings are sent to the server every time a new reading occurs.
The server handler is created to handle requests such as the reset position request.
server.on("/reset", HTTP_GET, [](AsyncWebServerRequest *request){
    gyroX=0;
    gyroY=0;
    gyroZ=0;
    request->send(200, "text/plain", "OK");
  });
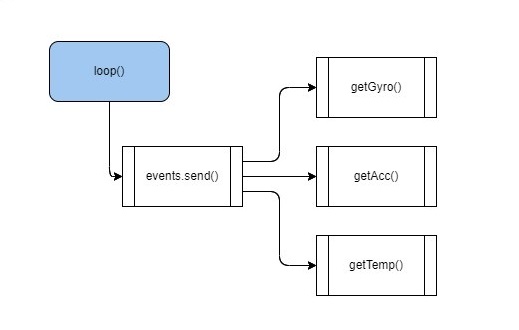
Sensor Readings
The sensor readings consist of: gyroscope, accelerometer and temperature readings. The gyroscope measurements have a standard deviation: 0.07 on X, 0.03 on Y and 0.01 on Z. Each new reading is acquired after a predefined delay: for gyro - 10 ms, for accelerometer - 200 ms, for temperature - 1000 ms. The readings are converted to JSON format and then to strings and sent to the server through the event handler.
if ((millis() - lastGyro) > delayGyro) {
    // Send Events to the Web Server with the Sensor Readings
    events.send(getGyro().c_str(),"gyro_readings",millis());
    lastGyro = millis();
  }
Process Flowchart Diagram
2. HTML and JS
The HTML index.html file contains the visual elements on the web page: gyroscope readings, accelerometer readings, temperature readings, reset position buttons and the 3D object. The CSS file asserts the positions and the colors of the elements on the web page.
<div class="card">
   <p class="card-title">GYROSCOPE</p>
   <p><span class="reading">X: <span id="gyroX"></span> rad</span></p>
   <p><span class="reading">Y: <span id="gyroY"></span> rad</span></p>
   <p><span class="reading">Z: <span id="gyroZ"></span> rad</span></p>
</div>
Inside the JS file, the 3D object is created using the three.js library. The 3D object rotation is only influenced by the gyroscope readings.
The sensor readings sent by the event handler are processed (the JSON string is parsed) and the corresponding html fields are modified with the new data.
source.addEventListener('gyro_readings', function(e) {
    var obj = JSON.parse(e.data);
    document.getElementById("gyroX").innerHTML = obj.gyroX;
    document.getElementById("gyroY").innerHTML = obj.gyroY;
    document.getElementById("gyroZ").innerHTML = obj.gyroZ;

    // Change cube rotation after receiving the readinds
    cube.rotation.x = obj.gyroY;
    cube.rotation.z = obj.gyroX;
    cube.rotation.y = obj.gyroZ;
    renderer.render(scene, camera);
  }, false);
Conclusion
In this project I have used the readings from the MPU-6050 sensor in order to display its 3D position on a web server running on a ESP32 WROOM 32 board.
This IoT project puts into perspective the possible application of object monitoring in a smart environment.
This concept could be useful for a Smart House project or for a dangerous environment which needs remote handling.
Bibliography
https://electropeak.com/learn/create-a-web-server-w-esp32/
https://www.freecodecamp.org/news/render-3d-objects-in-browser-drawing-a-box-with-threejs/
https://randomnerdtutorials.com/esp32-mpu-6050-accelerometer-gyroscope-arduino/
https://randomnerdtutorials.com/esp32-web-server-spiffs-spi-flash-file-system/


