This is an old revision of the document!
Weather Station
Popa Malina
Introduction
A weather station using an Arduino Uno is a project that utilizes various sensors to measure atmospheric conditions such as temperature, humidity, and pressure. The Arduino Uno is a microcontroller board programmed to read and process the data from these sensors and display the information on an LCD display.
General Description
The project typically involves connecting the sensors to the Arduino Uno using jumper wires and programming the board to read the data from each sensor. The temperature sensor measures the ambient temperature, while the humidity sensor measures the amount of moisture in the air. The pressure sensor measures the atmospheric pressure. Once the Arduino Uno has collected the data, it can display the results on an LCD display. The display can show the current temperature, humidity, and pressure readings, as well as additional information such as the time and date.
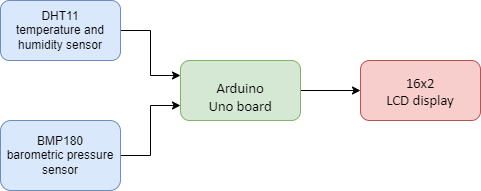
Block Diagram
Hardware Design
Components
- Arduino Uno board
- DHT11 temperature and humidity sensor
- BMP180 barometric pressure sensor
- 16×2 LCD display
How is everything connected
For the BMP180 sensor
1. VCC pin of the BMP180 sensor to the 5V pin on the Arduino Uno;
2. GND pin of the BMP180 sensor to one of the GND pins on the Arduino Uno;
3. SDA pin of the BMP180 sensor to the SDA (data - pin A4) pin on the Arduino Uno;
4. SCL pin of the BMP180 sensor to the SCL (clock - pin A5) pin on the Arduino Uno;
For the DHT11 sensor
1. VCC pin of the DHT11 sensor to the VCC pin on the BMP180 sensor;
2. GND pin of the DHT11 sensor to the GND pin on the BMP180 sensor;
3. DATA pin of the DHT11 sensor to digital pin 2 on the Arduino Uno board;
For the LCD 16x2
1. VSS pin on the LCD to the GND pin on the sensor DHT11;
2. VDD pin on the LCD to the VCC pin on the sensor DHT11;
3. RS pin on the LCD to digital pin 12 on Arduino Uno;
4. E pin on the LCD to digital pin 11 on Arduino Uno;
5. D4 pin on the LCD to digital pin 5 on Arduino Uno;
6. D5 pin on the LCD to digital pin 4 on Arduino Uno;
7. D6 pin on the LCD to digital pin 3 on Arduino Uno;
8. D7 pin on the LCD to digital Pin 6 on Arduino Uno;
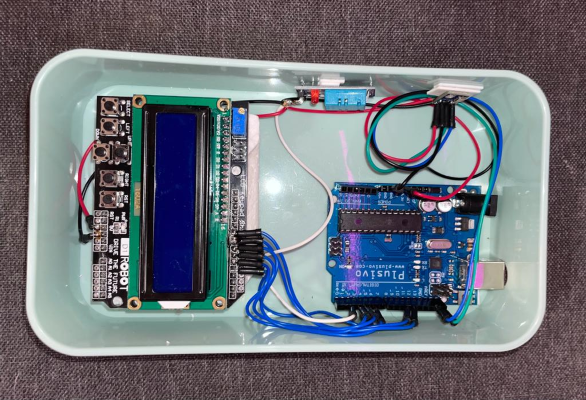
Physical Project