
This is an old revision of the document!
NFC Payment System
Introducere
Using an Arduino microcontroller and an NFC module, a Near Field Communication (NFC) Payment System is a system that enables contactless payments. The system initiates and completes a payment transaction by exchanging data between the NFC module and a compatible device, such as a smartphone or contactless card.
When a user initiates a payment, the Arduino microcontroller processes the transaction and transmits a signal to the NFC module in order to establish communication with the user's device. The user then affirms the transaction via their device, after which the system verifies the transaction and completes it.
Overall, an Arduino-based NFC Payment System provides a basic and efficient method for making contactless payments that can be implemented in a variety of applications, from vending machines to transportation systems.
Descriere generală
Block Schema:
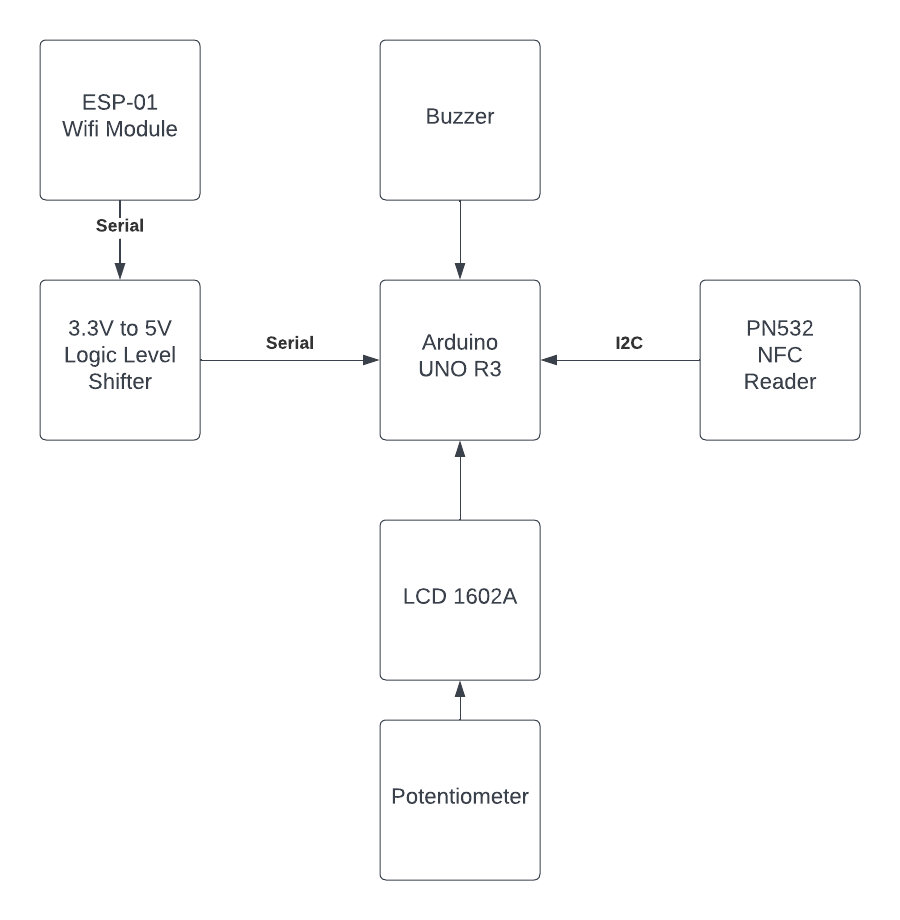
Hardware Design
List of parts
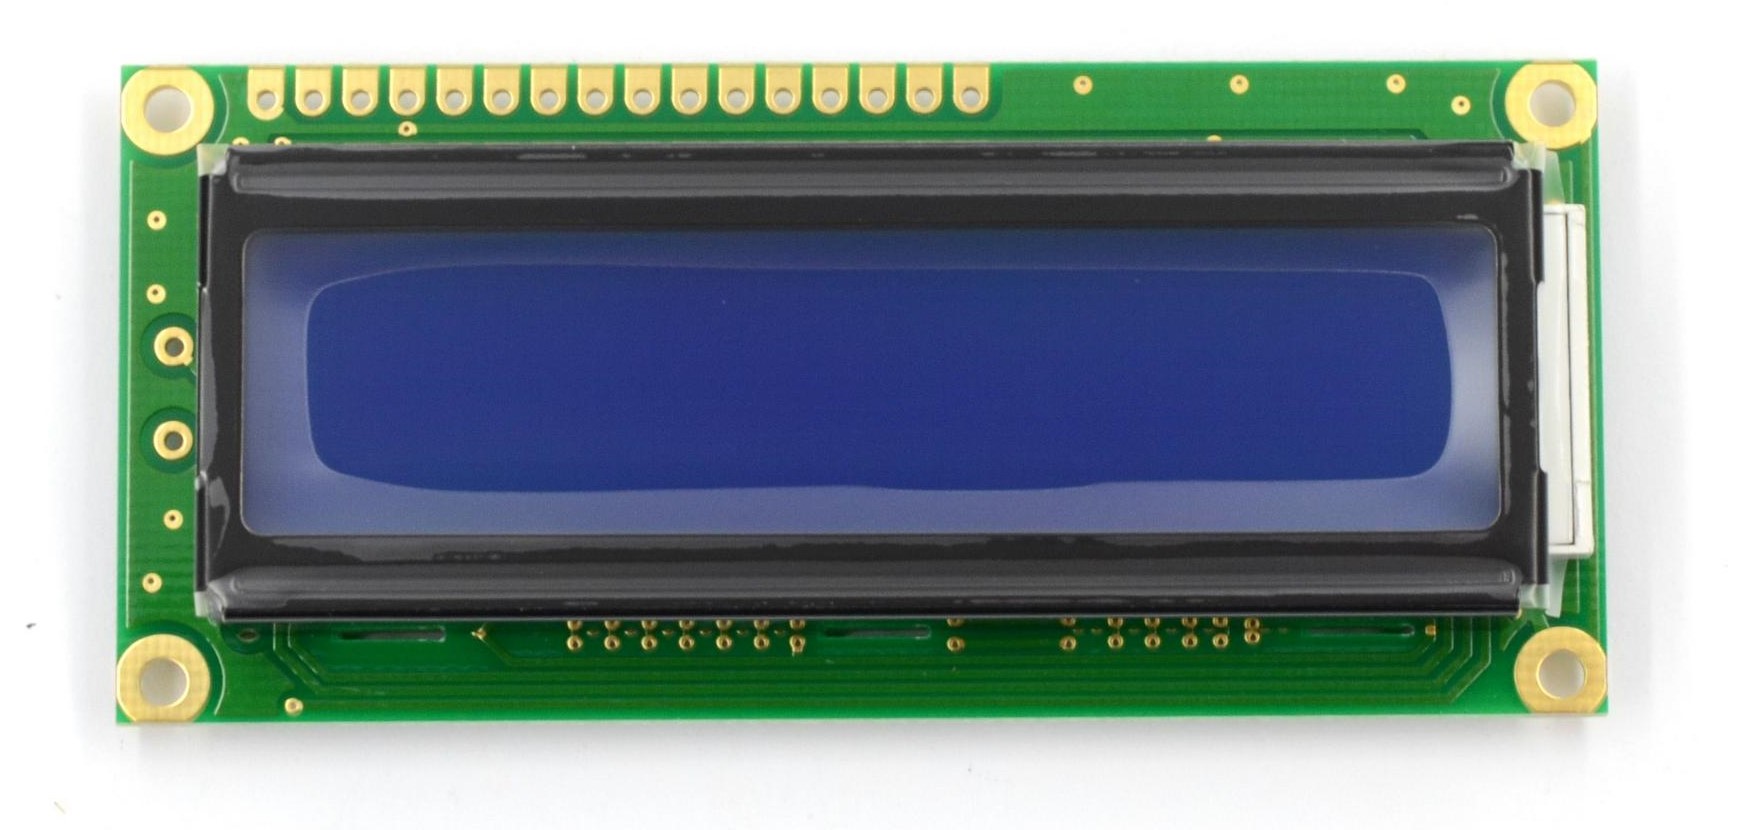
LCD 1602A: The LCD 1602A is a common character display module seen in embedded systems and electronic projects. It has a 16×2 character display, therefore it can show up to 16 characters per line for a total of 32 characters. It interfaces with microcontrollers via a 4-bit or 8-bit parallel interface and is controlled by a Hitachi HD44780 controller.
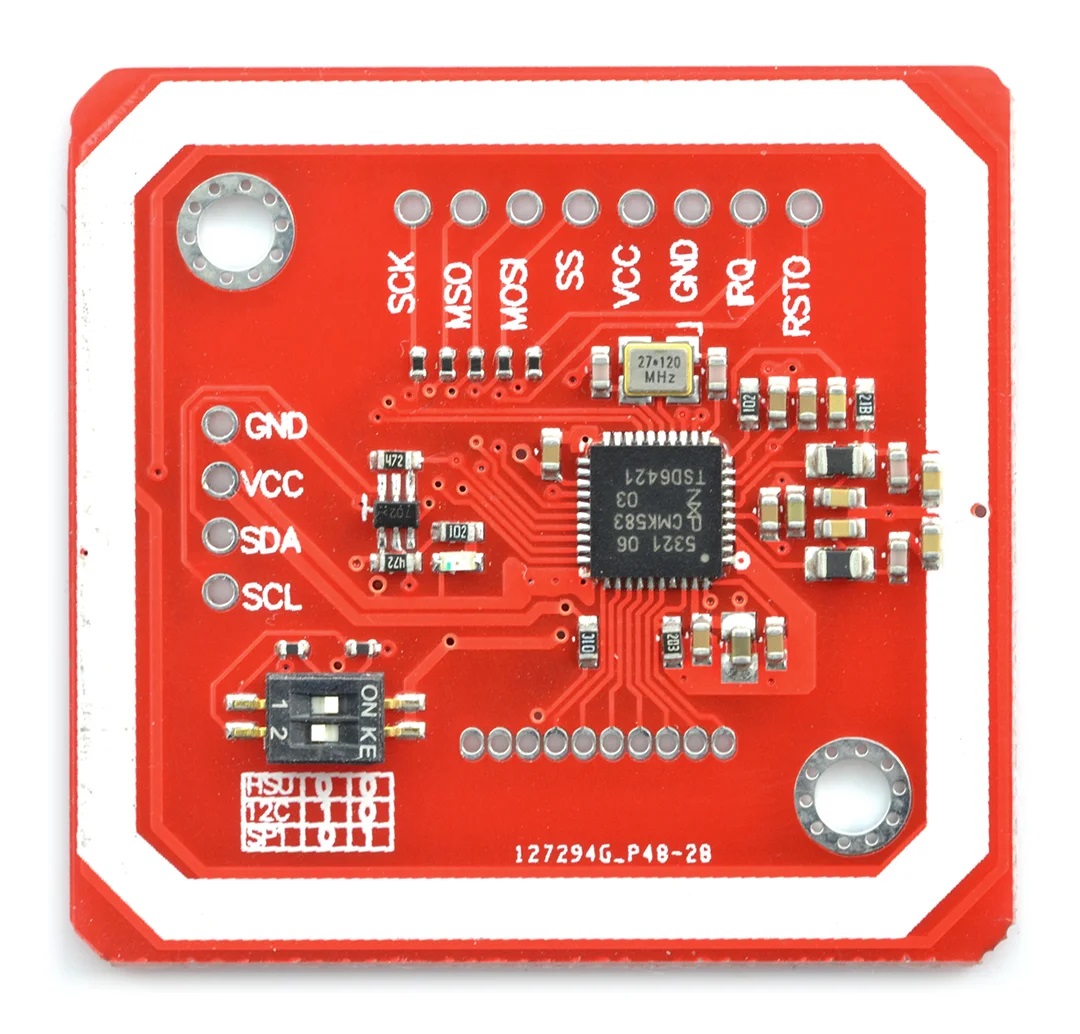
PN532: The PN532 is a highly integrated NFC (near-field communication) controller chip that enables device-to-device contactless communication. It is compatible with a variety of NFC standards, including ISO/IEC 14443 Type A/B, FeliCa, and ISO/IEC 15693. It has a wide range of uses, including payment systems, access control, and mobile devices.
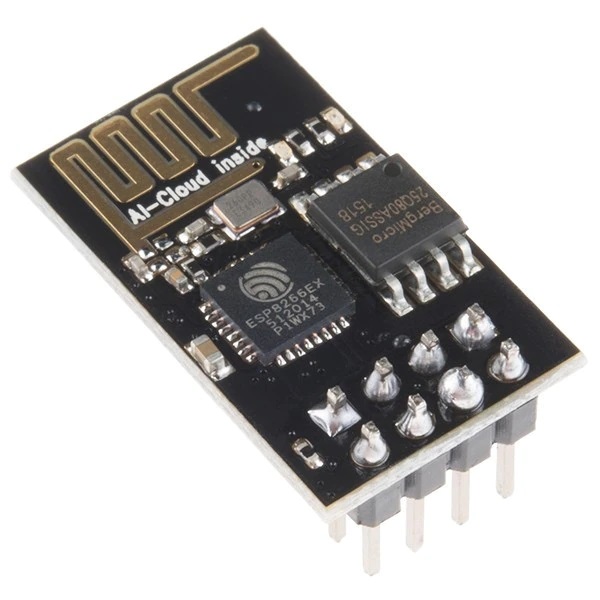
ESP-01: The ESP-01 is a popular Wi-Fi module based on the ESP8266 chip. It has a small form factor and can be easily integrated into various electronic projects. It supports 802.11 b/g/n Wi-Fi standards and can be programmed using AT commands or with the NodeMCU firmware. It is commonly used in Internet of Things (IoT) applications such as home automation, smart sensors, and remote control systems.
Arduino UNO - a microcontroller board based on the ATmega328P processor. It is one of the most popular Arduino boards and is intended to be a simple foundation for constructing a variety of electronic projects.

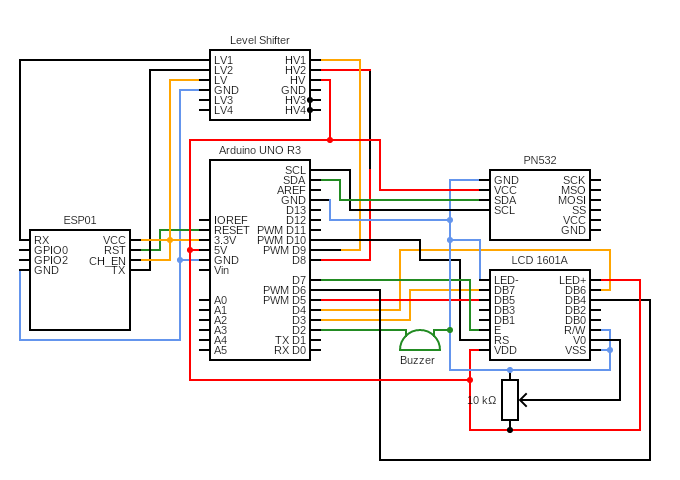
Electrical Schema
Software Design
This app was written using Arduino IDE and Visual Studio Code. The workflow of the application is as follows:
1. First, we include all the libraries we need to use for this project.
#include <Wire.h>
#include <PN532_I2C.h>
#include <PN532.h>
#include <NfcAdapter.h>
#include <LiquidCrystal.h>
#include <SoftwareSerial.h>
#include <SerialESP8266wifi.h>
2. Next, we define the pins of the LCD, NFC, buzzer and ESP01 modules, as noted in the electrical schema.
3. In the setup() function, we initialize the serial communication between Arduino and computer, and between Arduino and ESP01 module, with the baud rate of 115200.
4. We call the initLCD() function, which initialises the LCD screen, the initNFC() function , which turns the NFC module on, and the initWifi() function. which starts and connects the WiFi module to the internet. We also send a packet to the server, so that it knows that the Arduino is online.
5. We display on the LCD “Awaiting Transaction”. During this time, a server is open which awaits packets from the orders server.

6. When a packet is received (a transaction initiated from the web interface), the value of the transaction is displayed on the LCD, along with the indication to tap a payment card to the NFC reader, which is activated.
7. If a card is presented, its information is sent to the server for the processing of the transaction and balance updates.
Rezultate Obţinute
Concluzii
Download
Fişierele se încarcă pe wiki folosind facilitatea Add Images or other files. Namespace-ul în care se încarcă fişierele este de tipul :pm:prj20??:c? sau :pm:prj20??:c?:nume_student (dacă este cazul). Exemplu: Dumitru Alin, 331CC → :pm:prj2009:cc:dumitru_alin.
Bibliografie/Resurse
LCD 1602A - http://wiki.sunfounder.cc/index.php?title=LCD1602_Module
SerialESP8266wifi - https://github.com/ekstrand/ESP8266wifi
PN532 - https://github.com/Seeed-Studio/PN532
NDEF - https://github.com/don/NDEF (NFC communication protocol)
