This is an old revision of the document!
Lab 04 - Backend
Introduction
In this lab we are going to get comfortable coding in Javascript and learn how to create a backend RESTful web service that can talk to a database.
By the end of this lab, you should have a basic understanding of how to build a simple 3-tier web application consisting of these three layers:
- Frontend (or client/browser)
- Backend (or server)
- Storage (or database)
The previous lab taught you how to use Javascript and frameworks such as Vue JS to build the Client. This lab will focus on how to build a backend service and how to connect it to a database.
We are mainly going to be using technologies from the Javascript ecosystem, so in our case we will be using Vue JS for the frontend, Node JS + Express for the backend, and Mongo DB for the storage.
Setting up your environment
If you have not done so already, please install Node, NPM, and a code editor like VS Code or Atom by following the instructions on their websites.
Node JS
NodeJS is the Javascript runtime that allows us to run Javascript on the server. Any server code you will write in Javascript will run on top of Node so it's a good idea to get a basic understanding of node before attempting to build anything with it.
Go through the first 6 sections of this tutorial:
$ npm install -g learnyounode # use sudo if you run into permission issues
$ learnyounode
Express
Express JS is a server framework that allows you to quickly build a RESTful backend on top of Node JS.
Let's write a simple hello world service using Express. Open up a bash shell and follow along:
$ mkdir my-express-server
$ cd my-express-server
$ npm init # initialise this directory to be a Node NPM module
$ [... hit enter and go with the default options for initiating the NPM module ...]
$ ls # let's inspect the project directory and see that we have new package.json file
package.json
$ cat package.json
{
  "name": "my-express-server",
  "version": "1.0.0",
  "description": "",
  "main": "index.js",
  "scripts": {
    "test": "echo \"Error: no test specified\" && exit 1"
  },
  "author": "",
  "license": "ISC"
}
$ npm install express --save # ok, now let's add express as a dependency to our module
[... express gets downloaded from the NPM repository ...]
$ ls # let's check our project directory again
node_modules package-lock.json package.json
$ ls node_modules # notice that NPM pulled express and its dependencies into this directory
[...express and dependant Node modules]
$ touch index.js # create a file to put the code in for our Node/Express application
$ atom index.js
[...edit index.js and put the following code inside...]
$ cat index.js
const express = require('express')
const app = express()

app.get('/', function (req, res) {
  res.send('Hello World!')
})

app.listen(3000, function () {
  console.log('Example app listening on port 3000!')
})
$ node index.js # now start the express server on port 3000
Example app listening on port 3000!
# open your browser at http://localhost:3000
Awesome, now you have a basic Express server running.
Try tweaking the app so that if you point your browser to http://localhost/api/courses, you get:
{
  "courses": [
    {
      "name": "Startup Engineering",
      "lecturer": "Alice"
    },
    {
      "name": "Linear Algebra",
      "lecturer": "Bob"
    },
    {
      "name": "Operating Systems",
      "lecturer": "Trudy"
    }
  ]
}
Mongo DB
Now that you have a functioning backend service, let's do something more interesting. It's generally a good idea to keep your application's data in a database. This allows us to make the data persistent between multiple user sessions, as well as providing an efficient way to store and read the data. In this lab we are going to make our Node/Express app talk to a Mongo DB Database, but the basic principle is the same regardless of what database you are using.
Key concepts in Mongo DB
In order to start working with Mongo, it's useful to first understand a few key concepts related to how Document Oriented Storage works.
- Database - A database is a physical container for collections. Each database gets its own set of files on the file system. A single MongoDB server typically has multiple databases
- Collection - A collection is a group of MongoDB documents. It is the equivalent of an RDBMS table. A collection exists within a single database. Collections do not enforce a schema. Documents within a collection can have different fields. Typically, all documents in a collection are of similar or related purpose.
- Document - A document is a set of key-value pairs. Documents have dynamic schema. Dynamic schema means that documents in the same collection do not need to have the same set of fields or structure, and common fields in a collection's documents may hold different types of data. The following example shows the document structure of a blog site, which is simply a JSON document:
- _id - An id is a 12 bytes hexadecimal number which assures the uniqueness of every document. You can provide _id while inserting the document. If you don’t provide then MongoDB provides a unique id for every document. These 12 bytes can be broken up like this: first 4 bytes for the current timestamp, next 3 bytes for machine id, next 2 bytes for process id of MongoDB server and remaining 3 bytes are simple incremental VALUE.
- Field - A field is a key-value pair in a document. A document has zero or more fields. Fields are analogous to columns in a relational database.
- Cursor - The cursor is a pointer to the result set of a query. Clients can iterate through a cursor to retrieve results.
The Mongo Shell
The Mongo shell is an interactive command line interface to MongoDB that features a Javascript-like syntax. You can use the mongo shell to query and update data as well as perform administrative operations.
If you don't already have Mongo installed, first install MongoDB by following the instructions on their website.
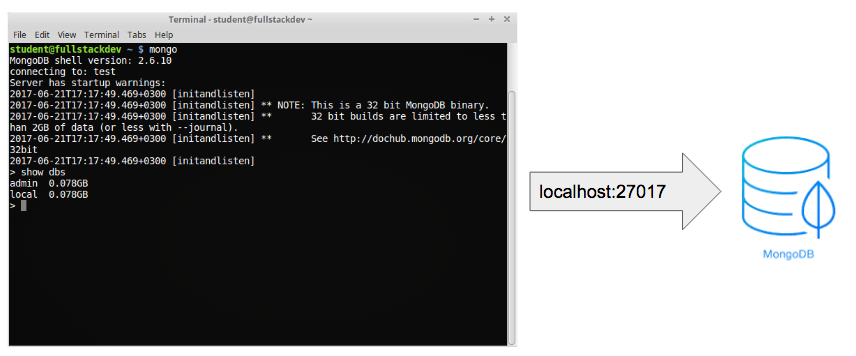
Once installed, you can start a local mongo daemon like this:
$ mongod --dbpath /path/to/some/empty/directory/for/storing/my/data
Leave it running. Mongo is now listening on port 27017 for incoming client connections.
Fire up a different terminal and open the Mongo shell. This will connect to the Mongo daemon and provide you with a set of commands that you can use to interact with the database.
$ mongo
> help
[...see available mongo shell commands...]
> exit
If you prefer a more graphical way of interacting with the database, try installing a tool like Robo 3T or MongoDb Compass. These provide you with an easy-to-use graphical client that can essentially accomplish the same tasks as the Mongo Shell.
Connecting the server to the database
Now that we have a running MongoDB database, let's make our Express server talk to it.
First, let's put some records in our Mongo database via the Mongo Shell:
> use university-db
[... creates and selects a new database called university-db ...]
> show dbs
[... wa can now see it's bee created ...]
> db
[... shows the current selected database: university-db ...]
> db.courses.insert({name: "Startup Engineering", lecturer: "Alice"})
WriteResult({ "nInserted" : 1 })
> db.courses.insert({name: "Linear Algebra", lecturer: "Bob"})
WriteResult({ "nInserted" : 1 })
> db.courses.insert({name: "Operating Systems", lecturer: "Trudy"})
WriteResult({ "nInserted" : 1 })
[... this will insert 3 new documents in a new collection called courses ...]
db.courses.find()
[... gets all the documents in the collection we've just created ...]
Great, now we have a Mongo database with our courses collection. Let's get our express server to pull the data from the database instead of just having it return some hard coded data.
In our express app directory, let's first install a Mongo DB client library from npm:
$ cd /path/to/my-express-server # the same one we created in the Express section before
$ npm install --save mongodb
$ atom index.js
[...edit index.js so that our server pulls the courses list from the database ...]
$ cat index.js
const express = require('express')
const mongodb = require('mongodb')

const app = express()

let db = null

app.get('/api/courses', function (req, res) {
  db.collection('courses').find().toArray((err, result) => {
    if (err) return console.log(err)
    res.send({
      courses: result
    })
  })
})

mongodb.MongoClient.connect('mongodb://localhost:27017/demo', (err, client) => {
  if (err) return console.log(err)
  console.log('Connected to database')
  db = client.db('university-db');
  app.listen(3000, function () {
    console.log('Example app listening on port 3000!')
  })
})
$ node index.js # now run the express server and hit http://localhost:3000/api/courses with your browser
You will notice that the server now returns the list from the database. Try adding one more document to the database via the Mongo Shell and then refresh the browser.
Connecting the client to the server [tasks]
You now have a fully functioning backend service that can talk to a database. Create a new project using the Vue JS framework that fetches and displays the courses list from the server (http://localhost:3000/api/courses) via an AJAX request.
- Hint 1: use the Vue CLI to create a new Vue JS project
- Hint 2: start the project using: npm run dev
- Hint 3: change the starter app template so that it displays a list of courses
- Hint 4: install an http client library like axios into the vue js project: npm install axios –save
- Hint 5: add a created hook inside your Vue component, and use axios to make a request to the server.
- Hint 6: you will probably notice a cross domain javascript error when trying to make a request to the server. Use the CORS middleware for Express to allow your server to receive requests from any domain.
- Hint 7: when the server replies, update the component's data. Vue will take care of rendering the HTML template to the browser DOM.
- Bonus: add ability to create/update/delete courses
If you are having trouble with the Vue JS part, please review the Front-end lab (you need to be able to do this on your own). Since it is not the focus of this lab you can find a solution here to help you move on and do the Node / Express part.
Feedback
Please take a minute to fill in the feedback form for this lab.


