This is an old revision of the document!
05. [30p] NetfilterQueue
Netfilter is a framework for packet mangling, outside the normal Berkeley socket interface. It has four parts. Firstly, each protocol defines “hooks” (IPv4 defines 5) which are well-defined points in a packet’s traversal of that protocol stack. At each of these points, the protocol will call the netfilter framework with the packet and the hook number.
Next, we will look at two examples of Netfilter Queue analysis programs that also alter the traffic. First, download the demo scripts. Also, make sure that you install all dependencies before starting the tasks:
$ sudo apt update
$ sudo apt install -y python3-pip wireshark openssh-server libnetfilter-queue1 libnetfilter-queue-dev nfqueue-bindings-python python3-scapy
$ pip3 install NetfilterQueue
[15p] Task A - DNS hijack
In this task we will intercept all DNS responses and alter the returned IP address for a certain domain name. Before proceeding with the following commands, make sure you have a ssh server running on your machine (we will mess around with that later on). The main goal is to understand how it all works, so make sure you read the script.
If you feel that you need a better understanding of the DNS message format, check out Let's hand write DNS messages.
$ dig +short fep.grid.pub.ro
$ sudo iptables -I INPUT -p udp --sport 53 -j NFQUEUE --queue-num 1
$ sudo ./mitm-dns_hijak.py fep.grid.pub.ro. 127.0.0.1

$ dig +short fep.grid.pub.ro
$ ssh student@fep.grid.pub.ro
    Password: student
$ sudo iptables -D INPUT 1
- first, we use dig to obtain the IP address of fep.grid.pub.ro and it should be 141.85.241.99 or something along those lines
- next, we add an iptables rule: redirect all UDP incoming traffic that originated from port 53 to queue number 1 for validation in userspace
- then, we run the python3 script that will subscribe to queue number 1 and will replace all DNS reponses to fep's domain with 127.0.0.1
- after checking the IP again with dig, we notice that the script worked
- what may be a possible implication? Well… let's try connecting to fep via ssh
- finally, we stop the script and delete the iptables rule:
[15p] Task B - TLS downgrade & Wireshark
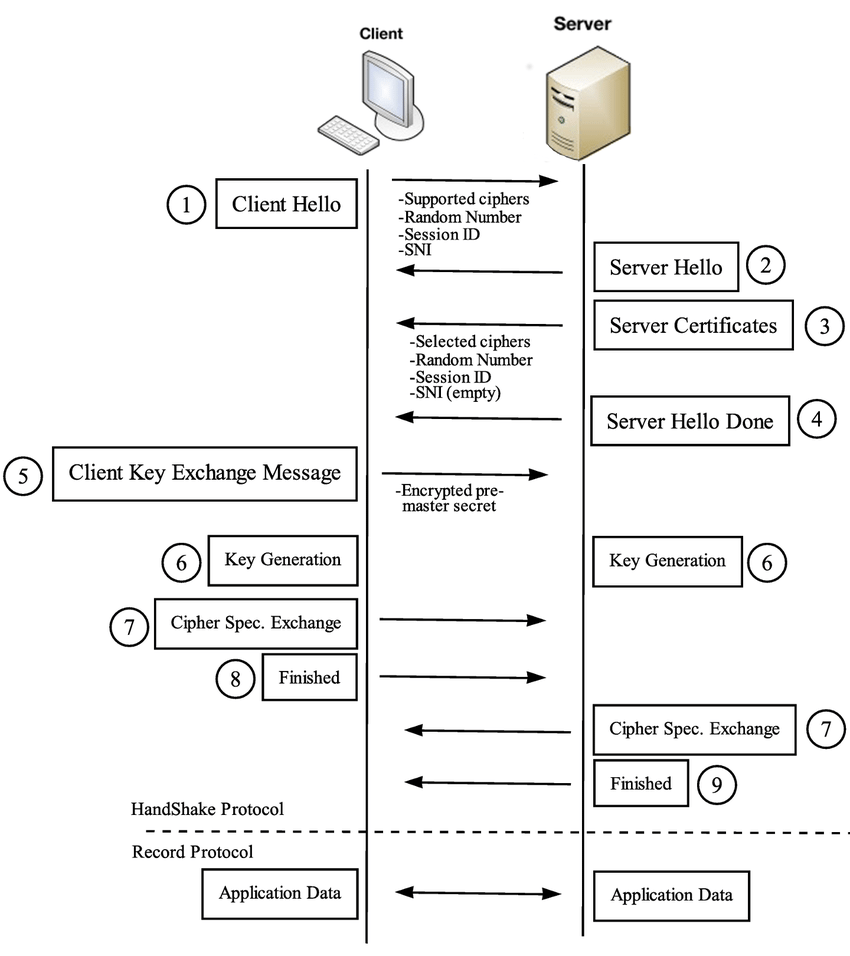
So we know how Netfilter Queues and TLS work. In this task we will use wireshark to detect abnormal traffic. This time, our script will intercept all Client Hello messages and replace the supported cipher suite list with a single (weaker) item that the server will be forced to select. Let's try to connect to ocw.cs.pub.ro and see what cipher suite it normally chooses:
$ echo | openssl s_client -connect ocw.cs.pub.ro:443
The answer should be ECDHE-RSA-AES256-GCM-SHA384. Now, make sure you have wireshark installed and get a network capture of this unaltered handshake. Save it for later.
Next, set up the iptables rule and run the process:
$ sudo iptables -I OUTPUT -p tcp --dport 443 -j NFQUEUE --queue-num 1
$ sudo ./mitm-tls_downgrade.py

$ sudo iptables -D OUTPUT 1
Try to capture the Client Hello once again with wireshark.
![]()
![]() NON-DEMO TASK
NON-DEMO TASK
Add in the submission the capture of the unaltered handshake and the capture after running the script.
Place the two captures side by side and identify the cipher suites lists. Explain briefly which algorithm did our script force the server to accept.


