
This is an old revision of the document!
Lab 05 - Docker Swarm
Objectives
- TODO
- TODO
- TODO
- TODO
Contents
Tasks
Introduction
In this lab, we will make the transition from Docker Compose to Docker Swarm, the service orchestrator provided by Docker. Its role is to manage Docker services on one or more machines in a network (i.e., a cluster) of physical and/or virtual machines. Unlike Docker Compose, which runs containers on a single host, Docker Swarm runs services between multiple hosts. Like Compose, Docker Swarm uses YAML configuration files.
Docker Swarm architecture
In the image below (taken from the official documentation), you can see the architecture of a Docker Swarm cluster.
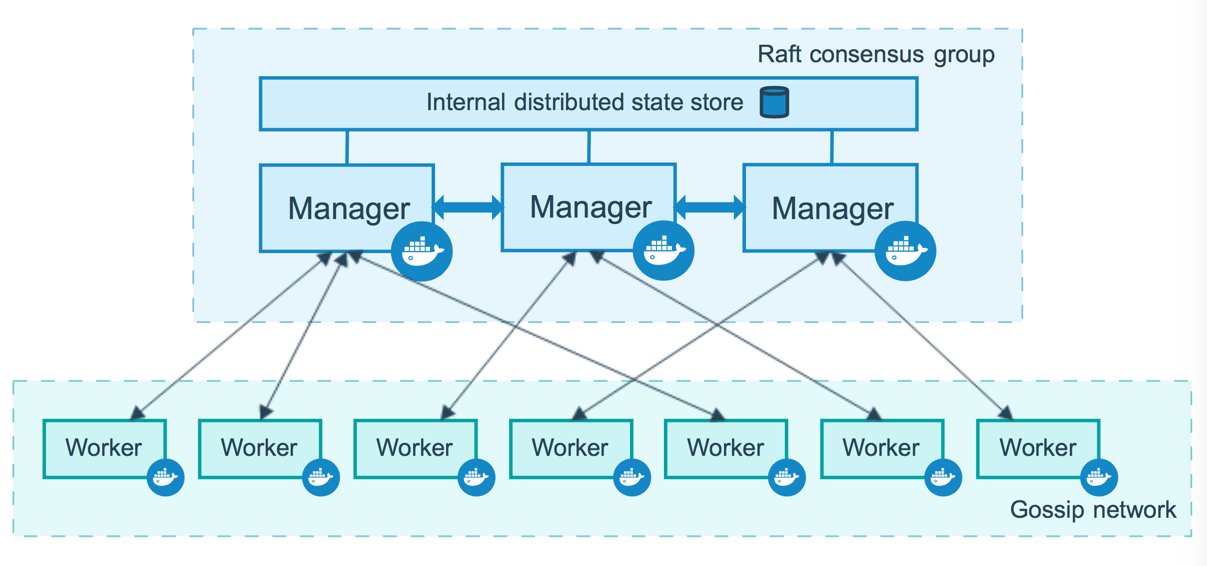
Host machines that are part of a Swarm are called nodes and can have two roles:
- manager - administrative and functional role; maintains cluster consistency, launches services, exposes network endpoints
- worker - functional role; runs services.
Of all the manager nodes, only one node is the leader, which has the role of creating tasks and logging. The tasks are then distributed to the other nodes.
Creating a Docker Swarm
Once we have a cluster of machines running Docker, we can initialise a Docker Swarm. Thus, we can run the following command on the node that will be the leader (the option --advertise-addr is required when the node has several network interfaces and it must be specified which of them is advertised):
$ docker swarm init --advertise-addr 192.168.99.100

Swarm initialized: current node (qtyx0t5z275wp46wibcznx8g5) is now a manager.
To add a worker to this swarm, run the following command:
    docker swarm join --token SWMTKN-1-4hd41nyin8kn1wx4bscnnt3e98xtlvyxw578qwxijw65jp1a3q-32rl6525xriofd5xmv0c1k5vj 192.168.99.100:2377
To add a manager to this swarm, run 'docker swarm join-token manager' and follow the instructions.
We can verify that the swarm was created successfully by running the command below on the leader (where we have two nodes called node1 and node2, the former being the leader, and the latter being the worker):
$ docker node ls

ID                            HOSTNAME     STATUS       AVAILABILITY      MANAGER STATUS
qtyx0t5z275wp46wibcznx8g5 *   node1        Ready        Active            Leader
0xbb9al1kuvn0jcapxiqni29z     node2        Ready        Active
Docker Swarm services and service stacks
When we talk about deploying an application in Docker Swarm, we move from the notion of container to the notion of service. A Docker service is a collection of (one or more) tasks, and a task is a container. Therefore, a service consists of one or more identical containers. The service monitors the lifecycle of the containers, always trying to maintain the condition of the containers provided in the configuration. In other words, a service is a set of containers with orchestration.
Furthermore, a service stack represents several such services grouped in the same namespace. We can view a service stack as a multi-service Docker application. The easiest way to define a service stack is through a Docker Compose file, as we saw in lab 4. The behaviour of services in a stack is similar to that of Docker Compose containers, except that the naming policy is different.
Docker Swarm has access to a new collection of options in the Compose YAML file, which will be specified in the deploy attribute of a service. Below, you can see a snippet of a Docker Compose file showing some of these new options:
[...]
services:
  web:
    image: myimage
    deploy:
      replicas: 4
      resources:
        limits:
          cpus: "0.2"
          memory: 50M
      restart_policy:
        condition: on-failure
[...]
In the YAML file fragment above, we run a service called web, which has four copies. Thus, there will be four different containers running the myimage image, each of which can respond to requests for the web service, depending on the load. Also, each instance is limited to 20% CPU (on all cores) and 50 MB of RAM. Last but not least, a container of the web service is restarted as soon as it encounters an error (the ultimate goal is to have 4 copies of the container on the network at any time).
Swarm networks
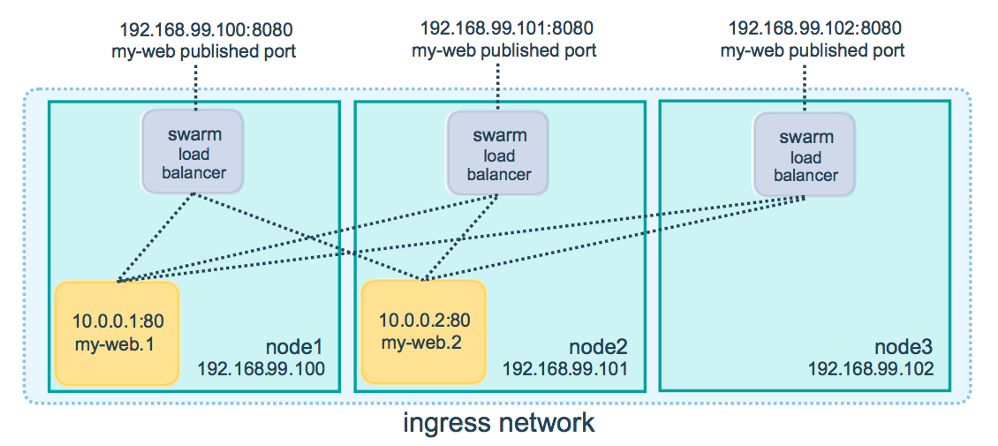
Unlike classic Docker and Docker Compose, networks created in Swarm no longer use the bridge driver, but the overlay driver. An overlay network is a network that spans all nodes in a swarm. For this reason, the exposed public ports will be unique per network. Therefore, two 3000 ports from two different services that connect to the same overlay network cannot be exposed.
A service that has been deployed to a particular port will always have that port reserved, no matter which node the container or containers actually run on. The diagram below (taken from the official Docker documentation) shows a situation where we have a service called my-web published on port 8080 in a three-node cluster. It can be seen that if we connect to port 8080 from any node IP address in the cluster, we will be redirected to a container running the 8080 external port-specific service, regardless of the node it is running on.
Differences between Docker Swarm and Docker Compose
There are several key differences between Docker Swarm and Compose in YAML configuration files:
- because Swarm is running services over the network, the build keyword cannot be used; services must be run based on images that already exist in a registry
- service stacks do not support .env files (unlike Docker Compose)
- Docker Compose runs single-host containers, while Docker Swarm orchestrates multi-host services.
Starting a service stack in Docker Swarm
Once the Docker swarm has been created and initialised, the command to deploy a service stack is as follows (where the configuration is in the file my_stack.yml and the stack's name will be lab5):
$ docker stack deploy -c my_stack.yml lab5
Once a service stack has been started, we can see its status by the following command:
$ docker stack ps lab5

ID             NAME                   IMAGE                               NODE      DESIRED STATE    CURRENT STATE           ERROR               PORTS
cuktma92gm62   lab5_adminer.1         adminer:latest                      node2     Running          Running 9 minutes ago
njak2qzaobtt   lab5_db.1              postgres:latest                     node1     Running          Running 8 minutes ago
m811buil7e63   lab5_backend.1         mobylab/backend:ia1                 node1     Running          Running 9 minutes ago
jnfw37e34kz3   lab5_backend.2         mobylab/backend:ia1                 node2     Running          Running 9 minutes ago
lkmy60wpy0gv   lab5_visualizer.1      dockersamples/visualizer:latest     node1     Running          Running 9 minutes ago
num87yijgxrg   lab5_backend.3         mobylab/backend:ia1                 node2     Running          Running 9 minutes ago
We can see the list of running service stacks using the following command:
$ docker stack ls

NAME      SERVICES      ORCHESTRATOR
lab5      4             Swarm
Furthermore, we can list all the services from all running stacks using the following command:
$ docker service ls

ID               NAME                 MODE           REPLICAS               IMAGE                                  PORTS
dekzzyais8g7     lab5_adminer         replicated     1/1                    adminer:latest                         *:8080->8080/tcp
ns9mxet1rkx5     lab5_db              replicated     1/1                    postgres:latest
dh3sv3q74fy6     lab5_backend         replicated     3/3 (max 2 per node)   mobylab/backend:ia1                    *:5555->80/tcp
ru0rd7g2ypu8     lab5_visualizer      replicated     1/1                    dockersamples/visualizer:latest        *:8081->8080/tcp
Useful commands
Service interaction
$ docker service create --name <SERVICE_NAME> <DOCKER_IMAGE>   # creates a service based on an image
$ docker service ls                                            # lists all running services
$ docker service inspect <SERVICE_NAME>                        # shows information about a service
$ docker service logs –f <SERVICE_NAME>                        # shows a service's logs
$ docker service ps <SERVICE_NAME>                             # shows a service's tasks and their statuses
$ docker service update --replicas <N> <SERVICE_NAME>          # updates a service by replicating its containers N times
$ docker service rm <SERVICE_NAME>                             # removes a service
Stack interaction
$ docker stack deploy -c <COMPOSE_FILE> <STACK_NAME> # creates a service stack based on a Compose file
$ docker stack rm <STACK_NAME>                       # stops a service stack
$ docker stack ps <STACK_NAME>                       # lists the tasks of a running service stack
$ docker stack ls                                    # lists all running service stacks
Cluster interaction
$ docker node ls                             # lists the nodes in the cluster
$ docker node promote <NODE_NAME>            # promotes a worker node to a manager
$ docker node demote <NODE_NAME>             # demotes a manager node to a worker
$ docker swarm init [--advertise-addr <IP>]  # creates a Docker Swarm cluster
$ docker swarm join --token <TOKEN> <IP>     # joins a Docker Swarm cluster
Tasks
00. [00p] Getting started
In order to solve the tasks, you need to have Docker installed, or you need to use Play with Docker, as described in lab 4.
01. [30p] Running a multi-container application
Subtasks
- based on the sources and the Dockerfile in the backend folder from the lab archive, build an image with the name lab5-api-image
- create a bridge network called lab5-db-network
- create another bridge network called lab5-adminer-network
- create a volume named lab5-db-volume
- from the parent folder of backend, launch a container in the background for a database with the following features:
- a bind mount will be attached that will map between the "$(pwd)"/database/init-db.sql file on the local machine (this will be the source to the bind mount flag and can be found in the lab archive) and the /docker-entrypoint-initdb.d/init-db.sql file in the container to be run (this will be the destination)
- attach the previously-created lab5-db-volume volume (as source) to the /var/lib/postgresql/data path in the running container (as destination)
- the container will be part the previously-created lab5-db-network network
- the following environment variables will be specified (in a docker run command, this is done as follows: docker run -e NAME=value):
- variable POSTGRES_USER with value admin
- variable POSTGRES_PASSWORD with value admin
- variable POSTGRES_DB with value books
- the container will be called lab5-db
- the container will run the postgres image from the official register
- add the lab5-db container to the lab5-adminer-network network
- launch a container in the background for a database admin with the following features:
- the container will expose port 80 and map it to 8080 on the local machine
- the container will be called lab5-adminer
- the container will be part the previously-created lab5-adminer-network network
- the container will run the adminer image from the official register
- start a container in the background based on the previously-created lab5-api-image image, with the following features:
- the container will be part of the previously-created lab5-db-network network
- the following environment variables will be specified:
- variable PGUSER with value admin
- variable PGPASSWORD with value admin
- variable PGDATABASE with the value books
- variable PGHOST with value lab5-db
- variable PGPORT with value 5432
- the container will be called lab5-api
- the container will expose port 80 and map it to port 5555 on the local machine
02. [10p] Testing a web application using Postman
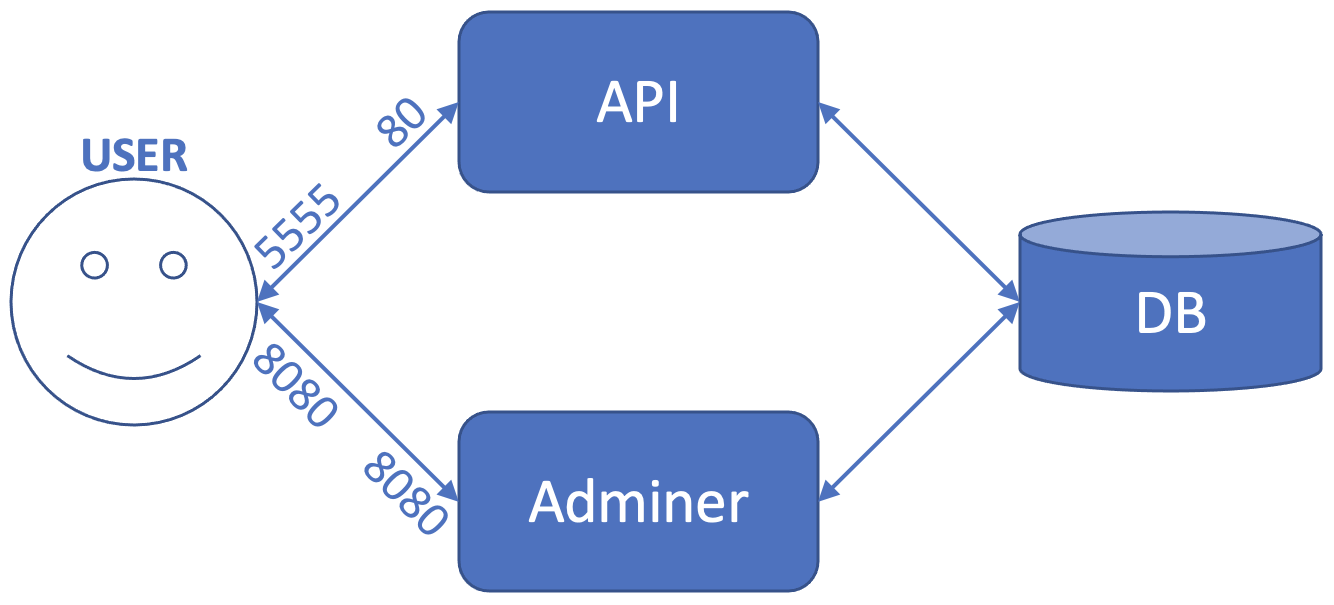
The application started earlier is a web application that does not have a graphical interface (i.e., a frontend). For this reason, it can only be tested by sending HTTP requests using a tool such as Postman. We will now show how to use Postman to connect to a web application backend.
In the Postman application, we can create the two types of requests that we want to test:
- GET - requests information from the backend (in our case, the list of books in the library)
- POST - sends information to the backend (in our case, adds a book to the library).
The steps to accomplish this are outlined below. Firstly, once we have opened the Postman application, we press the + button, as can be seen in the image below (the button is circled in red).
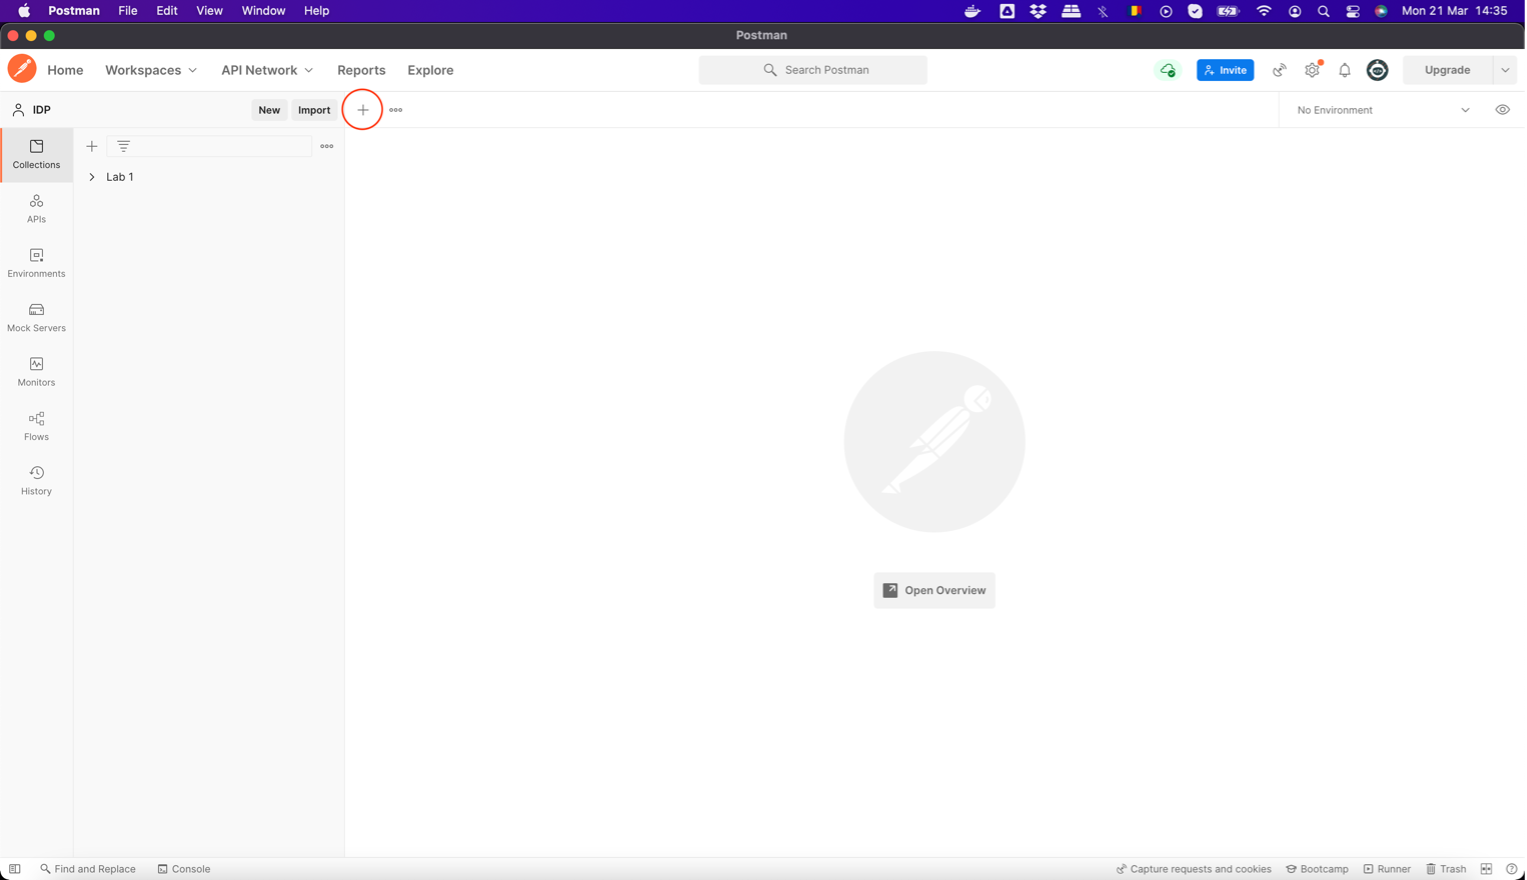
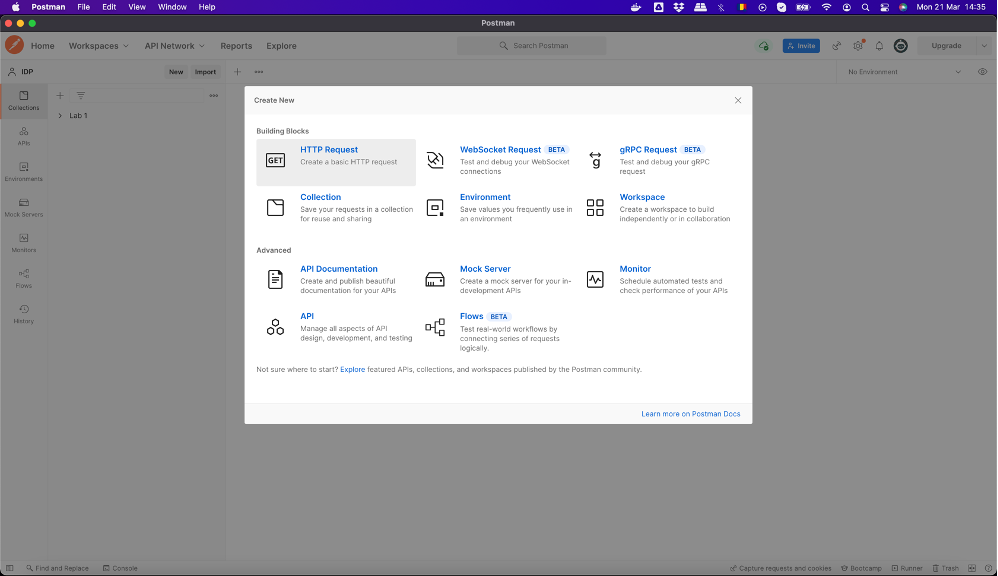
Next, we select the HTTP Request option, as shown below.
We add the first request, whose type should be GET. In the address bar, we write localhost:5555/api/books/ and then we press the Send button (shown in red in the image below).
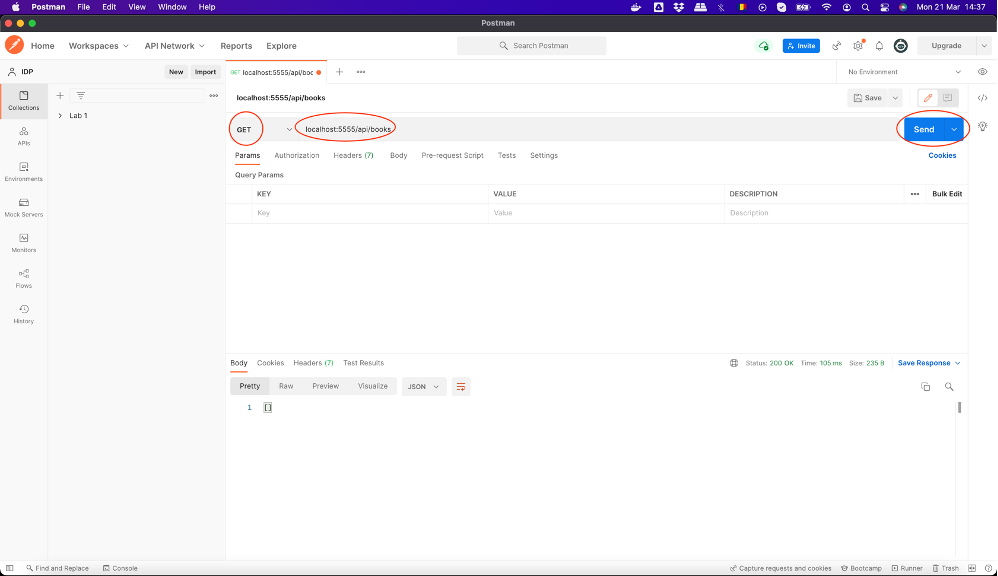
Once the request is sent and everything is in order, we should receive a reply with the status 200 OK (circled in the image below), which contains an empty string (because there are currently no books in the library), as shown below.

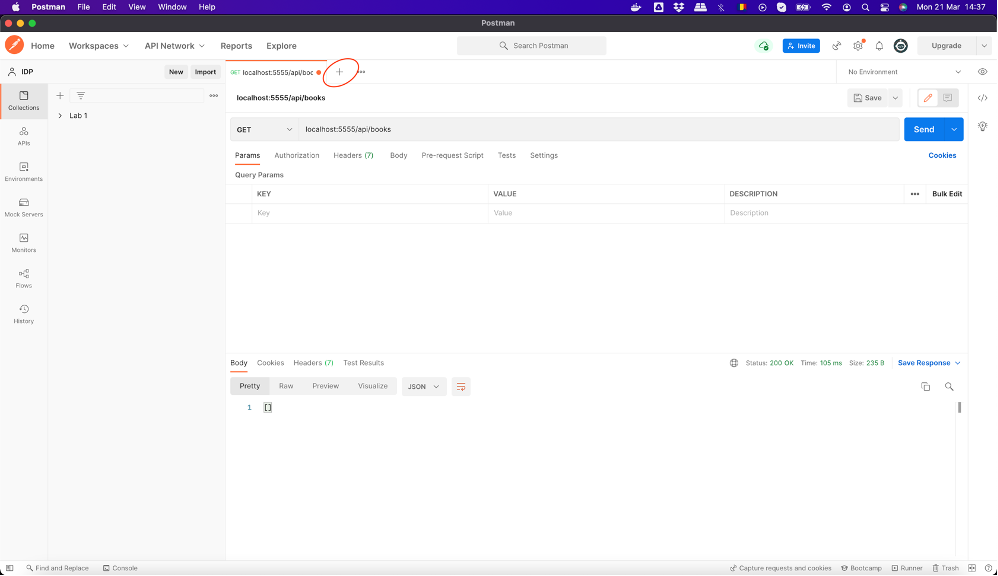
Next, we can create a POST request. We start by pressing the circled + button in the image below.
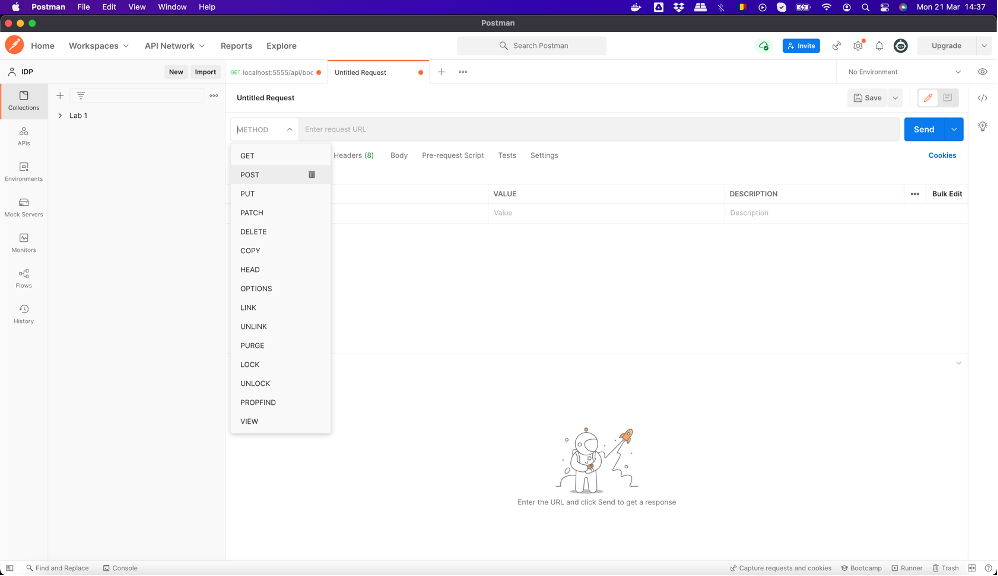
Next, we set the request type to POST and then put the same address as before.
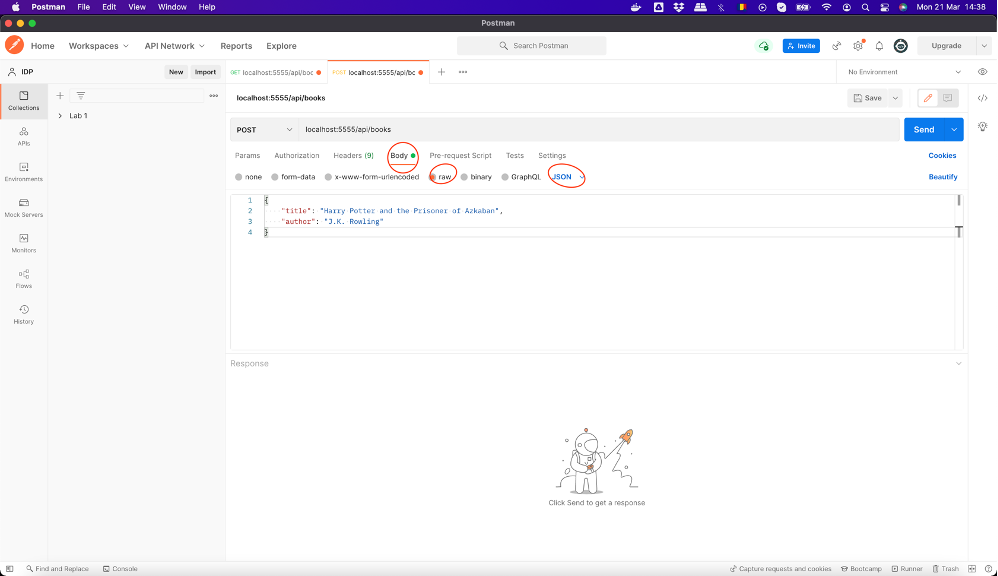
Because we are now adding a book, we need to place the book information in the POST request we are making. This is done by selecting the Body component of the request (circled in red in the image below), marking the data as Raw and JSON (also in red in the image) and adding the book information in JSON format (see below an example for “Harry Potter and the Prisoner of Azkaban”):
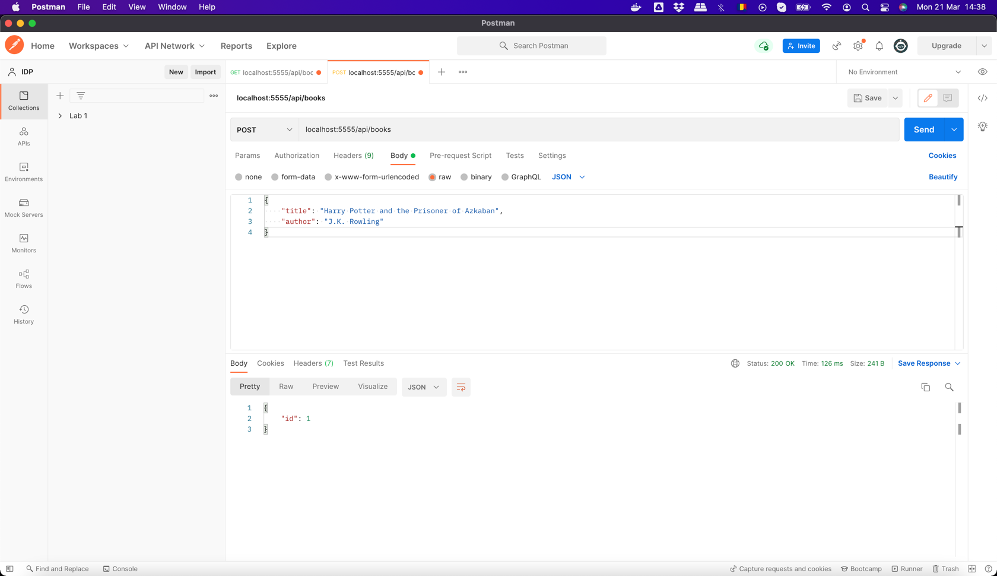
When we press the Send button, if everything is fine, we will receive a reply with the status 200 OK and the ID of the newly-added book, as can be seen in the image.
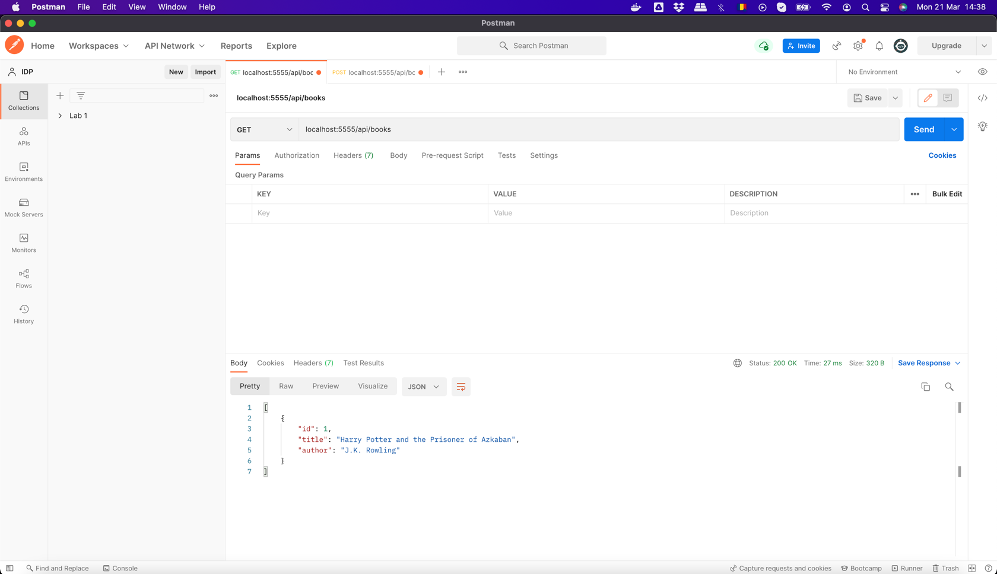
Finally, if we run the GET request again, we can check the existence of the book we added in the library.
Subtasks
- install Postman
- send a GET request to your application based on the steps above and check that it returns 200 OK and an empty list of books
- add a book of your choosing in the library using a POST request based on the steps above and check that it returns 200 OK
- send a GET request again and check that you can see the book you just added
03. [10p] Testing for data persistence
Subtasks
- stop and delete the three containers started at exercise 1
- start them again using the same commands given at exercise 1
- send a POST request using Postman and verify that the book you added at exercise 2 is still in the library
04. [10p] Administrating a database
Subtasks
- go to the Adminer interface on http://localhost:8080 (or see lab 4 if you are working on Play with Docker)
- log into the database using the following details:
- System: PostgreSQL
- Server: lab5-db
- Username: admin
- Password: admin
- Database: books
- check that you can observe a table called books and click on it
- click the Select data button to see the books already in the database (you should see the book you previously added)
- click the New item button and add a new book (you should only fill in the title and author text boxes and then press Save)
- using Postman, send a GET request and check that the backend also returns the book you added in Adminer
05. [10p] Cleaning up
Subtasks
- stop and remove the three containers created previously
- remove the two networks created previously
- remove the volume created previously
06. [20p] Working with Docker Compose
Subtasks
- write the entire configuration from exercise 1 in a Docker Compose file called docker-compose.yml
- deploy the configuration from the docker-compose.yml file using docker-compose -f docker-compose.yml up
- use Postman and Adminer to verify that everything works just as before
- stop all the containers using docker-compose -f docker-compose.yml down
- remove the remaining volume
07. [10p] Splitting the Docker Compose file
Subtasks
- split the docker-compose.yml file from exercise 6 into two separate YAML files:
- one of them will contain the API and database services
- the other one will contain the Adminer service
- deploy the configuration from the two files using Docker Compose
- use Postman and Adminer to verify that everything works just as before
- stop all the containers
- remove the remaining volume

