Eve-ng on-premise setup
If you want to install on your local host/own server/cloud this eve-ng machine, you can look over the next steps to make sure the process is done corectly.
Download here the iso file eve-ng free edition, then in vmware workstation/vmware esx create a new VM with the following configuration:
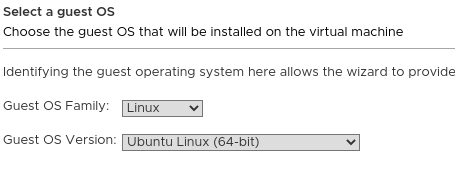
As eve-ng is an ubuntu 16.04 with x86_64 arch, select:
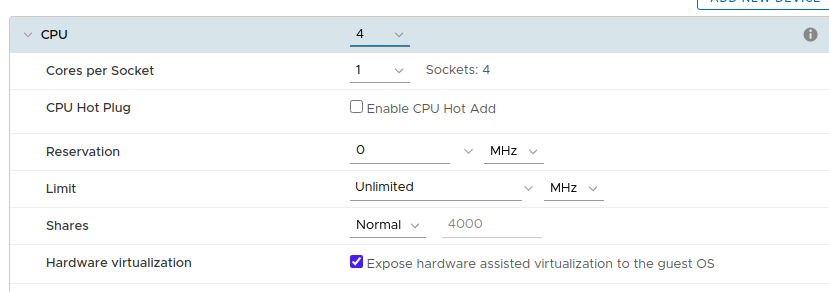
Use 4 vCPUs and do not forget to tick: expose hw assisted virtualization to guest OS (necessary to run other VMs on this VM):
Add at least 8 GB of RAM and 50 GB for storage. Add the VM in your local management network and choose the installation ISO file downloaded above:

Finish and boot the machine. Click Install VM > English or any other language you want:
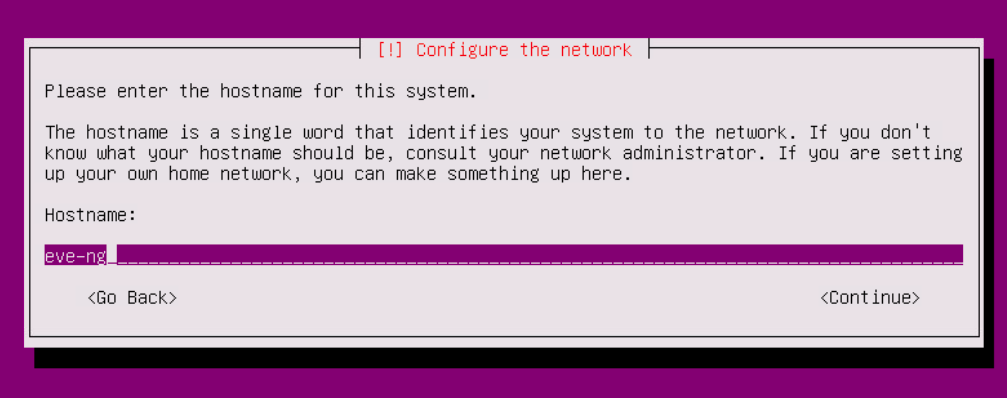
Add the hostname for the machine:
Accept the location area for current time, then wait for system installation and keep proxy manager with no config.
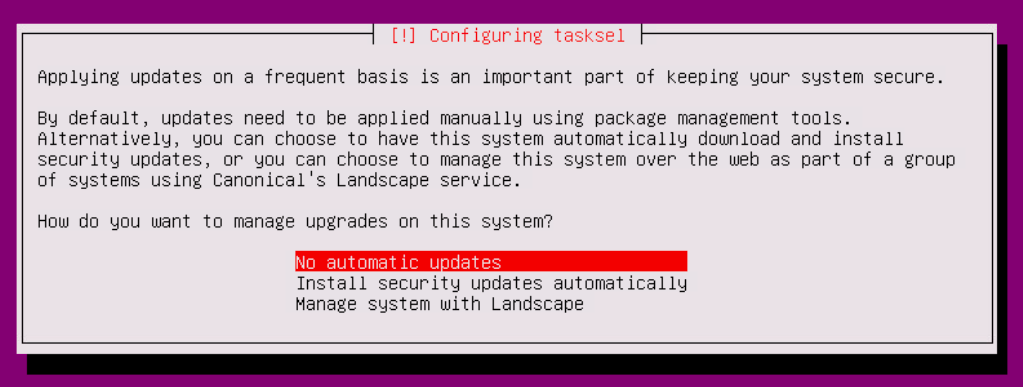
Select here no automatic updates (we want to select ourselves the packages to update as it may broke the server):
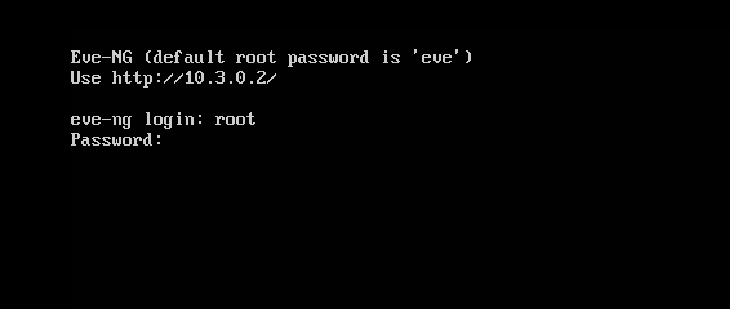
Finish the installation and boot the eve-ng machine. After booting the device (takes 2-3 mins to install every required package), login with user: root and password: eve (the default ones).
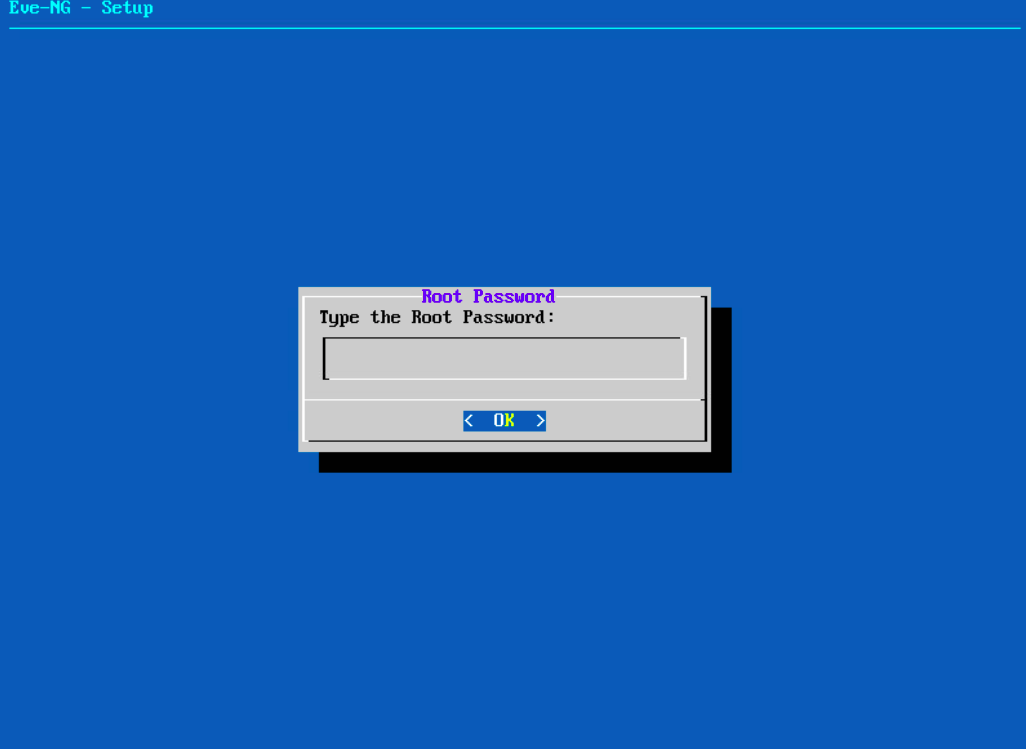
Add a new password for the root account (student used for labs):
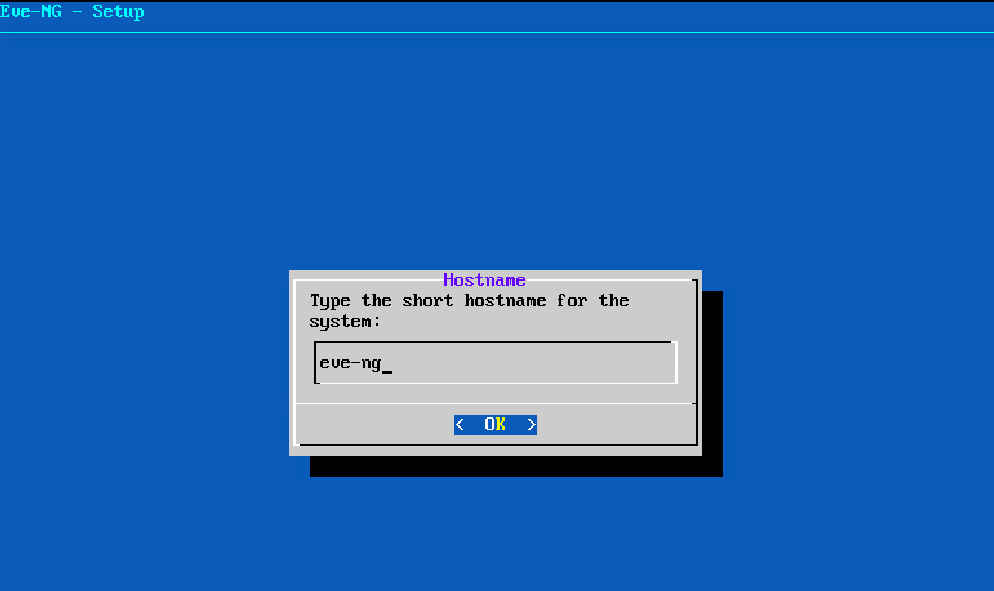
You can keep the default hostname (eve-ng):
DNS domain name leave as blank:
For mgmt interface, use dhcp for ip config (more explanation about this interface are given below):
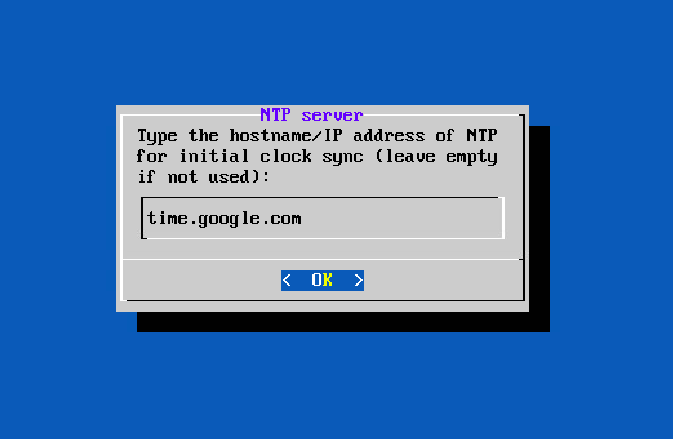
For ntp server, use time.google.com:
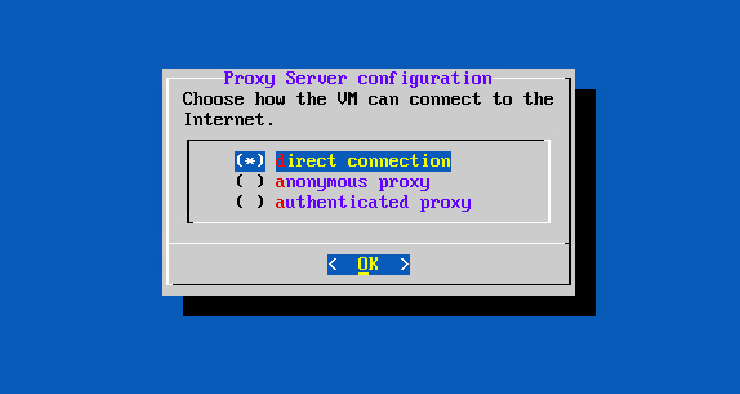
Keep direct connection with exernal:
Then, the machine will reboot automatically and login with your newly added credentials (here - user: root and password: student):
Check firstly if the apache2 service is up and listening to default port 80:
root@eve-ng:~# netstat -atupn | grep apache2
tcp6       0      0 :::80                   :::*                    LISTEN      2711/apache2
If not, restart the service and make sure is up:
root@eve-ng:~# sudo service apache2 restart
root@eve-ng:~# sudo service apache2 status
● apache2.service - LSB: Apache2 web server
[...]
Oct 20 15:49:04 eve-ng systemd[1]: Starting LSB: Apache2 web server...
Oct 20 15:49:04 eve-ng apache2[30867]:  * Starting Apache httpd web server apache2
Oct 20 15:49:05 eve-ng apache2[30867]:  *
Oct 20 15:49:05 eve-ng systemd[1]: Started LSB: Apache2 web server.
See the machine responds with 200 OK for GET requests on localhost:
root@eve-ng:~# curl -I localhost:80
HTTP/1.1 200 OK
Date: Tue, 20 Oct 2020 12:58:06 GMT
Server: Apache/2.4.18 (Ubuntu)
[...]
Then, verify if the pnet0 interface has an ip address assigned:
root@eve-ng:~# ip a s dev pnet0
3: pnet0: <BROADCAST,MULTICAST,UP,LOWER_UP> mtu 1500 qdisc noqueue state UP group default qlen 1000
    link/ether 00:50:56:b8:ab:0b brd ff:ff:ff:ff:ff:ff
    inet 10.3.0.2/16 brd 10.3.255.255 scope global pnet0
       valid_lft forever preferred_lft forever
    inet6 fe80::250:56ff:feb8:ab0b/64 scope link
       valid_lft forever preferred_lft forever
root@eve-ng:~# brctl show pnet0
bridge name	bridge id		STP enabled	interfaces
pnet0		8000.005056b8ab0b	no		eth0
For more information about this pnet interfaces, see here.
In the VM, check that the Internet is reachable and a nameserver is added in /etc/resolv.conf (use 8.8.8.8 or 8.8.4.4).
For adding VM images and binaries for Cisco devices, 2 paths are important here:
- /opt/unetlab/addons/dynamips - used for cisco images. See here a tutorial for Cisco Dynamips.
- /opt/unetlab/addons/qemu - used for ISOs (Linux, firewalls: fortigate, firepower, palo alto etc.). See here tutorial for Linux.
Check also if the private ip address is reachable from the host machine and if so, try to access with ssh (which is enabled by default):
user@local_host:~$ ping -c 3 10.3.0.2
PING 10.3.0.2 (10.3.0.2) 56(84) bytes of data.
64 bytes from 10.3.0.2: icmp_seq=1 ttl=63 time=6.46 ms
64 bytes from 10.3.0.2: icmp_seq=2 ttl=63 time=6.18 ms
[...]
user@local_host:~$ ssh -l root 10.3.0.2 # here use your mgmt ip
root@10.3.0.2's password:
Welcome to Ubuntu 16.04.3 LTS (GNU/Linux 4.20.17-eve-ng-ukms+ x86_64)

 * Documentation:  https://help.ubuntu.com
 * Management:     https://landscape.canonical.com
 * Support:        https://ubuntu.com/advantage
Last login: Tue Oct 20 02:33:24 2020 from 10.128.0.6
root@eve-ng:~#
The last thing to do here is access the webui application of eve-ng (the main thing). Go to the browser and type exactly the interface pnet0 ip address. You must get this:
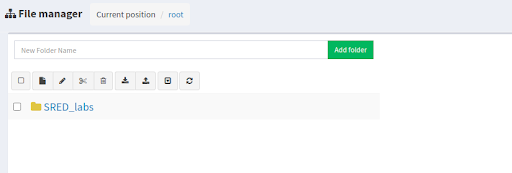
Type user: admin and password: eve and from file manager, create a new folder:
Add a new lab (we will use different file for each one):
In the end, you should see this interface:


