Milestone 1
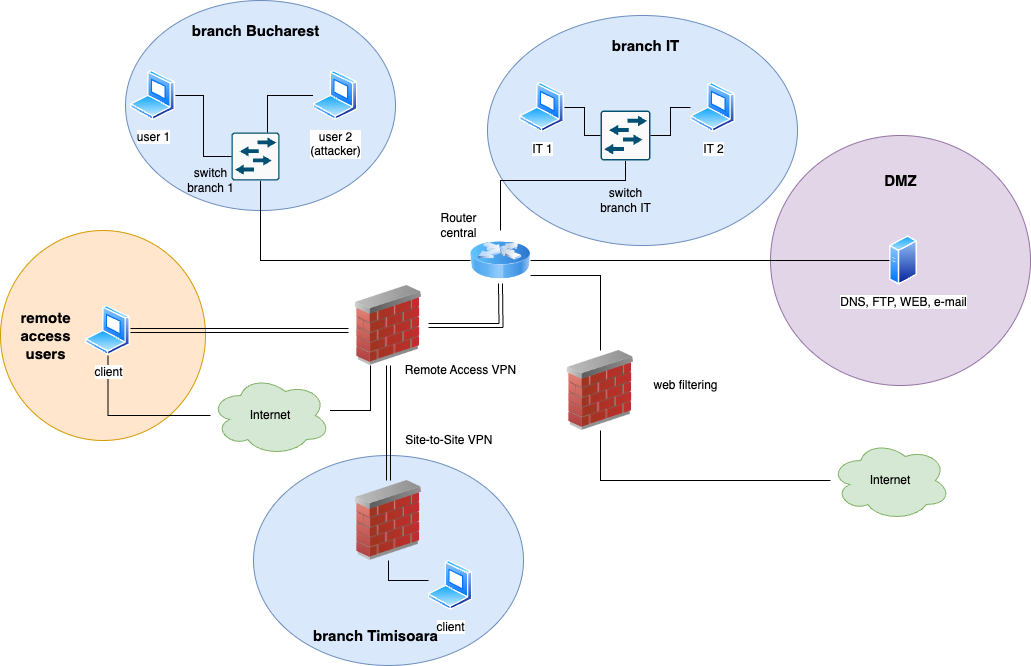
The final topology for the entire project should look like the one found below:
For the first milestone we are going to work only with the first 2 branches (Bucharest and IT), the DMZ area (where servers are found), and the router.
Week 1
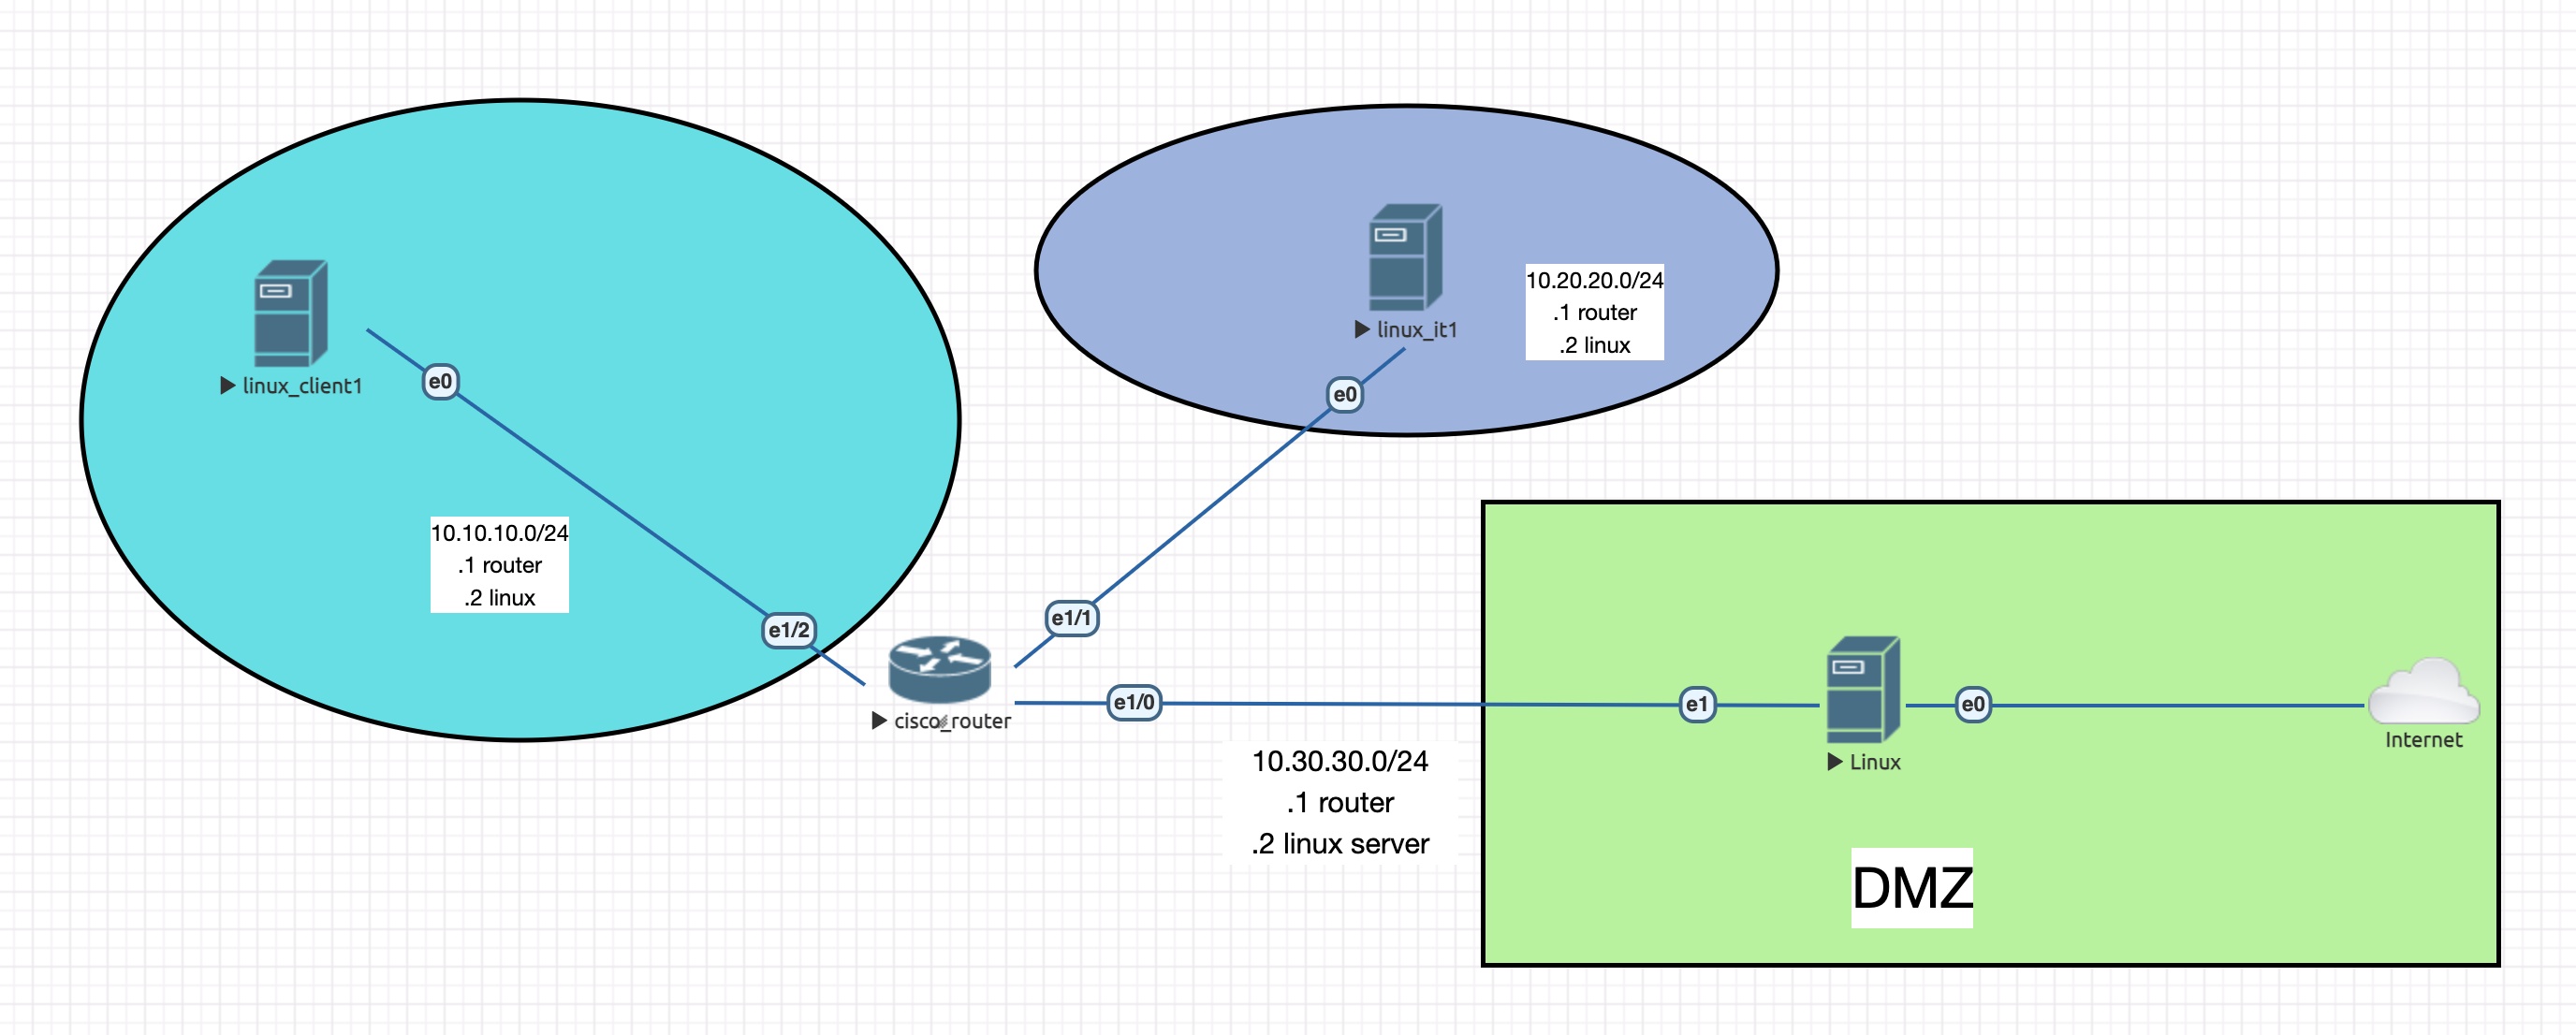
In the first week, let's start with a simpler topology:
Your tasks are the following:
1. Create the nodes (see here the tutorial) and connect them accordingly. For server, add 2 interfaces (make sure to select them when creating the node) - the first one connect to Cloud0 and the second to router.
2. Add IPs based on the topology (.1 for router and .2 for linux machine) and the required routes. At the end, make sure that linux machines are ping-able from one to another.
For a reminder for Cisco, use this link.
3. Install docker (engine and client) on the server instance (hint: snap) and start a webserver on port 80 (using image httpd).
For a docker tutorial, use this page.
4. Make sure that webserver is reachable from linux_client1 and linux_it1
5. Deny all traffic from any ip to port 80 on server by adding a rule in INPUT chain. Does it work? Why not?
6. Add an iptables entry to DOCKER-USER chain to permit only access from 10.10.10.0/24 subnet, but not from 10.20.20.0/24. More details can be found here (understand the difference between INPUT and DOCKER-USER). Test that server is not accessible from it instance, but from client1 is.
7. Install and start service ssh on server machine. Do not permit traffic from 10.10.10.0/24, but permit from 10.20.20.0/24. On which chain you will need to add it? Test the ssh connection from both machines (branch 1 and 2).
Week 2
We should continue now with adding new more servers to our DMZ area. Then, filter the traffic using the already added router.
1. Using the docker image delfer/alpine-ftp-server (more details here), create a new container for ftp service and add credentials with user=student and password=student.
2. Permit traffic to ftp only from it computer and deny from client one. Use an extended ACL and make sure to add it where it's required, on in side. For more information, check the chapter 4 (Standard and extended access lists) from this link.
3. Test using cli that traffic from it works (authenticate with provided credentials) and denied from client.
it@host# ftp 10.30.30.2
Connected to 10.30.30.2.
220 Welcome Alpine ftp server[...]
4. Next, we will create a time-range period on router, to permit traffic to ftp only during 12:00 to 20:00 (or an interval on which the entry is active). Check chapter 6 (Temporary access control) from this link and filter tcp port 21 from host 10.20.20.2 to host 10.30.30.2.
5. Check again that ftp works from it client host.
6. At last, let's permit traffic from client to webserver only if it's authenticated to telnet service. Check lock-and-key from chapter 6 from above. Add on router the credentials user=student and password=student, timeout 60, permit tcp port 80 on inbound, and permit tcp from any to any on outbound.
7. Apply the ACLs to in and out on e1/2, check that access to webserver does not work (using cli), login using telnet, and check again. It should work.


