Lab 1: Raspberry Pi Setup
Raspberry Pi 3
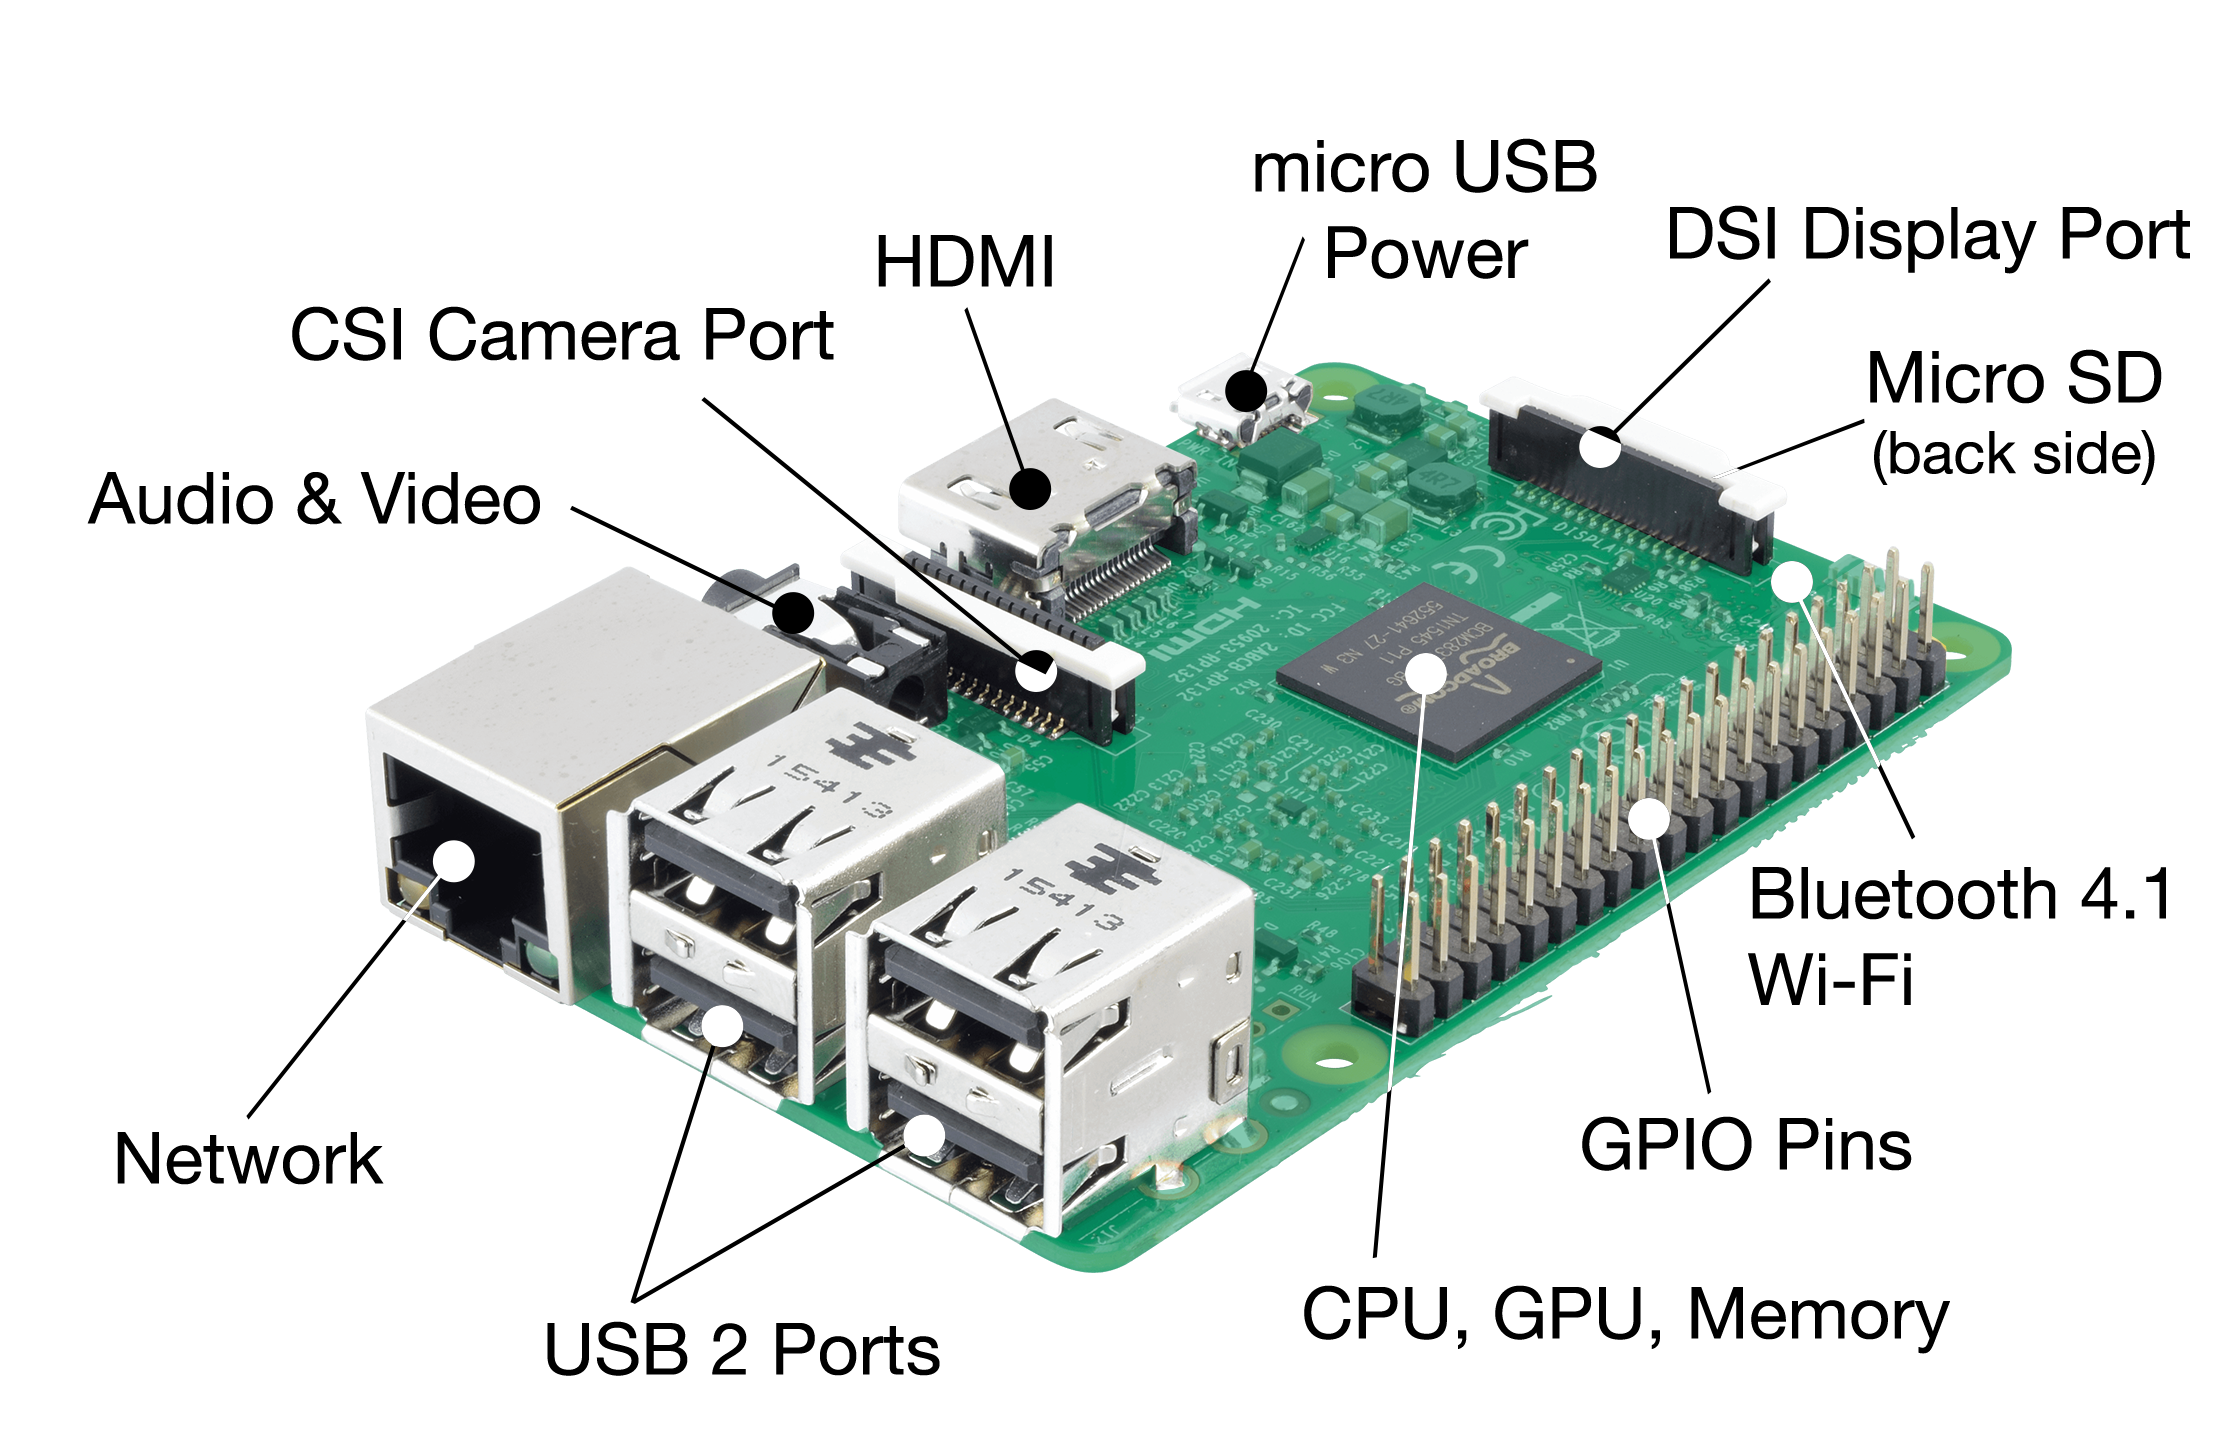
The Raspberry Pi is a very small computer that has the characteristics of the computers people would use 15 years ago. Raspberry Pi 3 characteristics:
- Broadcom BCM2837 SoC (4 ARM Cortex-A53);
- GB of RAM;
- integrated WiFi and BLE;
- HDMI port, an Ethernet port and four USB ports;
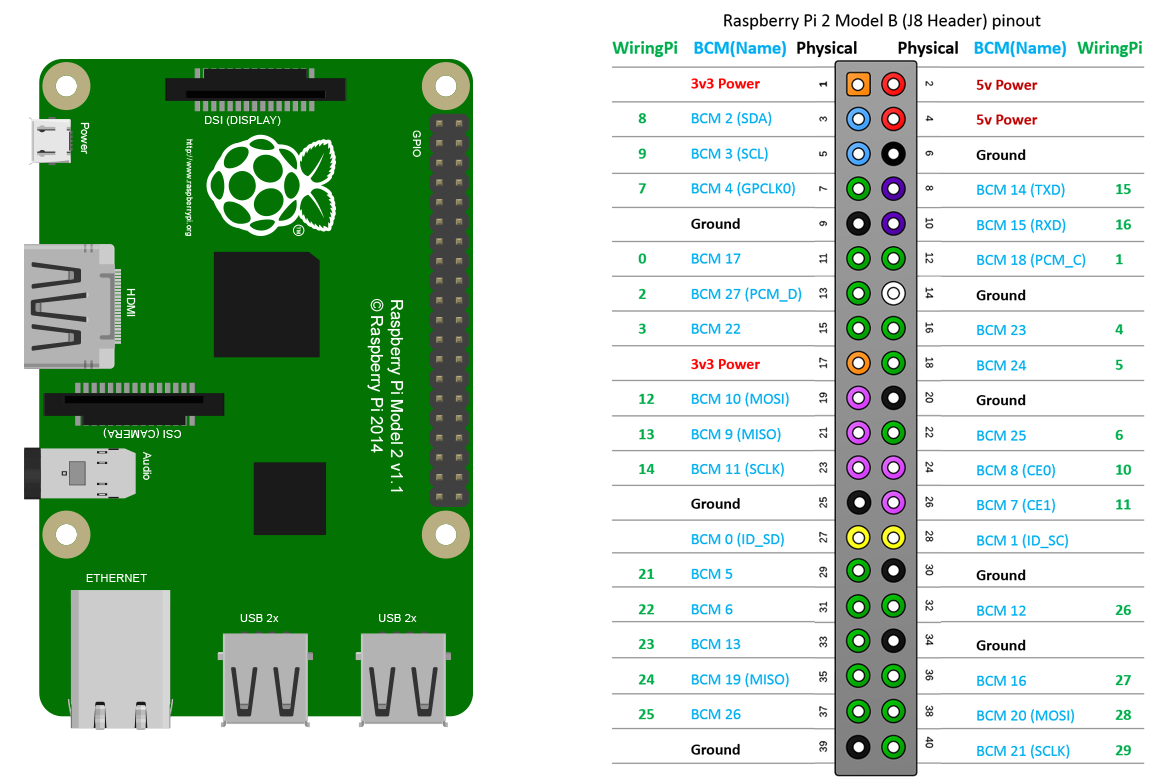
- several pins to use for electronics:
- two 5V pins;
- two 3.3V pins;
- 8 ground pins;
- 26 data pins;
- 1 PWM pin.
The Raspberry Pi 3 has 26 GPIO soldered pins and 5 GPIO pins that you need to solder. These may be used to control electronics connected to the Raspberry Pi. Among the things that can be done are:
- light up LEDs;
- place buttons;
- use relays;
- control motors.
It is important to know how these pins can be accessed. For the Raspberry Pi, Wyliodrin uses the WiringPi pins layout described below.

Wyliodrin STUDIO
Wyliodrin STUDIO is a web-based platform for Internet of Things applications development. You are going to use this platform throughout the course for programming and controlling the Raspberry Pi.
In order to connect the Raspberry Pi to Wyliodrin STUDIO you will need an SD Card with minimum 4 GB (class 10 is recommended). You also need to assure the Raspberry Pi has a network connection or a serial connection to your computer (Ethernet or serial cable).
Setting up the board requires the following steps:
- Install Wyliodrin STUDIO;
- Download the Raspberry Pi SD Card Image;
- Write the image to an SD Card;
- Connect the board to your computer;
- Connect the board to Wyliodrin STUDIO
Install Wyliodrin STUDIO
Go to Wyliodrin STUDIO. There are two ways you can use WyliodrinSTUDIO, one is to download the application and the other one is to use it in the browser.
Set up the Raspberry Pi
In Wyliodrin STUDIO so to Menu and select Documentation. Choose Raspberry Pi and follow the steps.Connect the Raspberry Pi to the network via the Ethernet cable, then connect it to the platform. The default username is pi and the default password is raspberry.
Once the board is connected double click its name and give it a more suggestive name so you can recognize it. Then, go to network manager and set the WiFi credentials.
So you make sure nobody connects to your board, open the Shell tab and type passwd. Set another password for the user pi.
Disconnect the board from the Ethernet cable and now you will be able to connect to it via WiFi.
Exercises
- Create a new Python application that prints your name in the console.
- Load the Music example application, connect a speaker or headphones to the Raspberry Pi and make it sing.
- Install Math.Pi using the package manager.
- Create a Python application that prints your name every one second.
- Run the previously created application. Using the task manager identify the corresponding task and kill it.


