
This is an old revision of the document!
Lab 04 - Docker Compose
Objectives
- TODO
- Understand what a software container is
- Get familiar with the Docker environment
- Learn how to build, publish, and deploy containers
Contents
Tasks
Introduction
Normally, in order to run containers we need to execute the corresponding run command (docker run) and set all the necessary parameters. This process can be difficult and repetitive when we need to start multiple containers. One way to “save” the running configuration is to create scripts. The problem with running multiple scripts is the loss of uniformity in configuration (which container connects to which network, who communicates with whom, etc.).
Docker Compose is a utility created by Docker that is used to centralise the configuration process of a container-based application in a declarative manner, using Yet Another Markup Language (YAML) configuration files.
Moreover, the format for Compose files is also used in Docker Swarm, the orchestrator created by Docker for managing Docker services, which we will discuss in lab 5.
Installation
For Windows and MacOS, Docker Compose is part of the Docker Desktop installation. For Linux, the installation is done according to the official guide.
Key items
YAML file format
YAML files are generally used to write declarative configurations. The format is very easy to understand and employ, as follows:
- key:value elements are used
- indented paragraphs are children properties of the previous paragraphs
- lists are delimited by -.
Docker Compose file example
# docker-compose.yml
version: "3.8"

services:
    api:
        build: . # builds the image from a Dockerfile
        image: register-image-name:version # uses an image from a registry
        environment:
            ENVIRONMENT_VARIABLE: value
        ports:
            - "5000:80"
        networks:
            - lab4-network

    postgres:
        image: postgres:12
        volumes:
            - lab4-volume:/var/lib/postgresql/data
            - ./scripts/init-db.sql:/docker-entrypoint-init.d/init-db.sql
        networks:
            - lab4-network

volumes:
    lab4-volume:

networks:
    lab4-network:
Version
The version attribute describes what functionalities will be loaded when running the Docker Compose utility.
Services
The services attribute describes the services/containers that will run after the configuration is started by Compose. Each service represents a container that will have the name and configuration of the service. In the example above, the containers will be named api and postgres. The most important properties of services are the following:
- build - specifies the path where the Dockerfile the container will be built from is located
- image - specifies the name of the image used to run the container
- ports - a list of entries with the format “host_port:service_port”, which specifies which ports are exposed and/or mapped
- volumes - a list of entries with the format “host_volume:service_path” where the volume mappings are specified; the same rules that apply to CLI commands are maintained here as well; “host_volume” can be a standard volume or a bind mount
- networks - the list of networks which the service/container belongs to
- environment - object with entries of type “service_variable_name: value” which injects the environment variables specified when running the service/container.
Volumes
The volumes attribute describes the volumes used in the configuration. Volumes are passed as objects. If we do not want to change the default configuration, the value is an empty field.
Networks
The networks attribute describes the networks used in the configuration. Networks are passed in the form of objects. If we do not want to change the default configuration, the value is an empty field. An example of a network configuration is the following (where we use a network that already exists because it was created independently of the Docker Compose file):
networks:
    my-network-that-actually-exists:
        external: true
        name: the-original-network-that-already-exists
In the example above, my-network-that-actually-exists is just a “renaming” of an existing network.
Docker Compose Commands
The commands for interacting with Docker Compose are syntactically similar to the classic Docker commands for both version 1 and version 2. Below, you can see the most used commands. For version 1, the utility is docker-compose, while for version 2 the utility is docker with the compose parameter. For more information, you can read the official documentation for version 1 and the official version 2 documentation. The main difference between versions 1 and 2 is that there are several additional commands in version 2.
$ docker-compose start                        # starts containers (V1)
$ docker-compose stop                         # stops containers (V1)
$ docker-compose pause                        # pauses containers using a SIGPAUSE signal (V1)
$ docker-compose unpause                      # removes containers from the pause state (V1)
$ docker-compose ps                           # lists active containers (V1)
$ docker-compose up                           # builds, recreates, starts and attaches containers to a service (V1)
$ docker-compose up -d                        # starts services in the background, detached from the terminal that initialised them (V1)
$ docker-compose up --build                   # creates images before starting containers (V1)
$ docker-compose -f my-compose.yml up         # uses the specified Compose file instead of the default one (V1)
$ docker-compose down                         # stops containers and deletes them, along with the networks, volumes, and images created (V1)
$ docker-compose rm                           # deletes all stopped containers (V1)
$ docker-compose rm -s -v                     # with -s all containers are stopped and with -v the anonymous volumes attached are also deleted (V1)

$ docker compose start                        # starts containers (V2)
$ docker compose stop                         # stops containers (V2)
$ docker compound pause                       # pauses containers using a SIGPAUSE signal (V2)
$ docker compose unpause                      # removes containers from the pause state (V2)
$ docker compose ps                           # lists active containers (V2)
$ docker compose ls                           # lists all container stacks (V2)
$ docker compose -p my-proj -f my-comp.yml up # uses the specified Compose file instead of the default one and sets a project name (V2)
$ docker compose down                         # stops containers and deletes them, along with the networks, volumes, and images created (V2)
$ docker compose rm                           # deletes all stopped containers (V2)
$ docker compose rm -s -v                     # with -s all containers are stopped and with -v the anonymous volumes attached are also deleted (V2)
Combining multiple Docker Compose files
Docker Compose is recommended for use only at the local development stage. Docker Swarm (or other orchestrators, such as Kubernetes) should be used for testing or production environments.
Precisely because it is used in the development stage, Docker Compose has a mechanism to combine several Compose files to create different running configurations without replicating the common parts.
To run a Compose configuration based on multiple YAML files, you can use the command below:
$ docker-compose -f file-compose-1.yml -f file-compose-2.yml up --build # V1
$ docker compose -f file-compose-1.yml -f file-compose-2.yml up --build # V2
In the command above, the information in file-compose-2.yml will overwrite or complete the information in file-compose-1.yml. This is useful for quickly testing various configurations (or combinations pf configurations).
Tasks
00. [00p] Testing the Docker installation
Subtasks
- start a container that runs the official hello-world image and check that everything functions correctly
01. [20p] Running containers
Subtasks
- pull the busybox image from the official Docker registry to the local cache
- run a busybox container that executes the uptime command
- run an interactive busybox container; once you enter it, run the command wget google.com, then exit
- run a busybox detached interactive container (daemon); once you have started it, attach to it and run the id command, then exit
- delete all containers and images created at the previous points
02. [20p] Building an image
Subtasks
- go to the flask_app folder from the lab archive
- modify the images array in the app.py file to make the application display other images of your choice
- modify the templates/index.html file to display a different title related to your chosen images (i.e., change line 22)
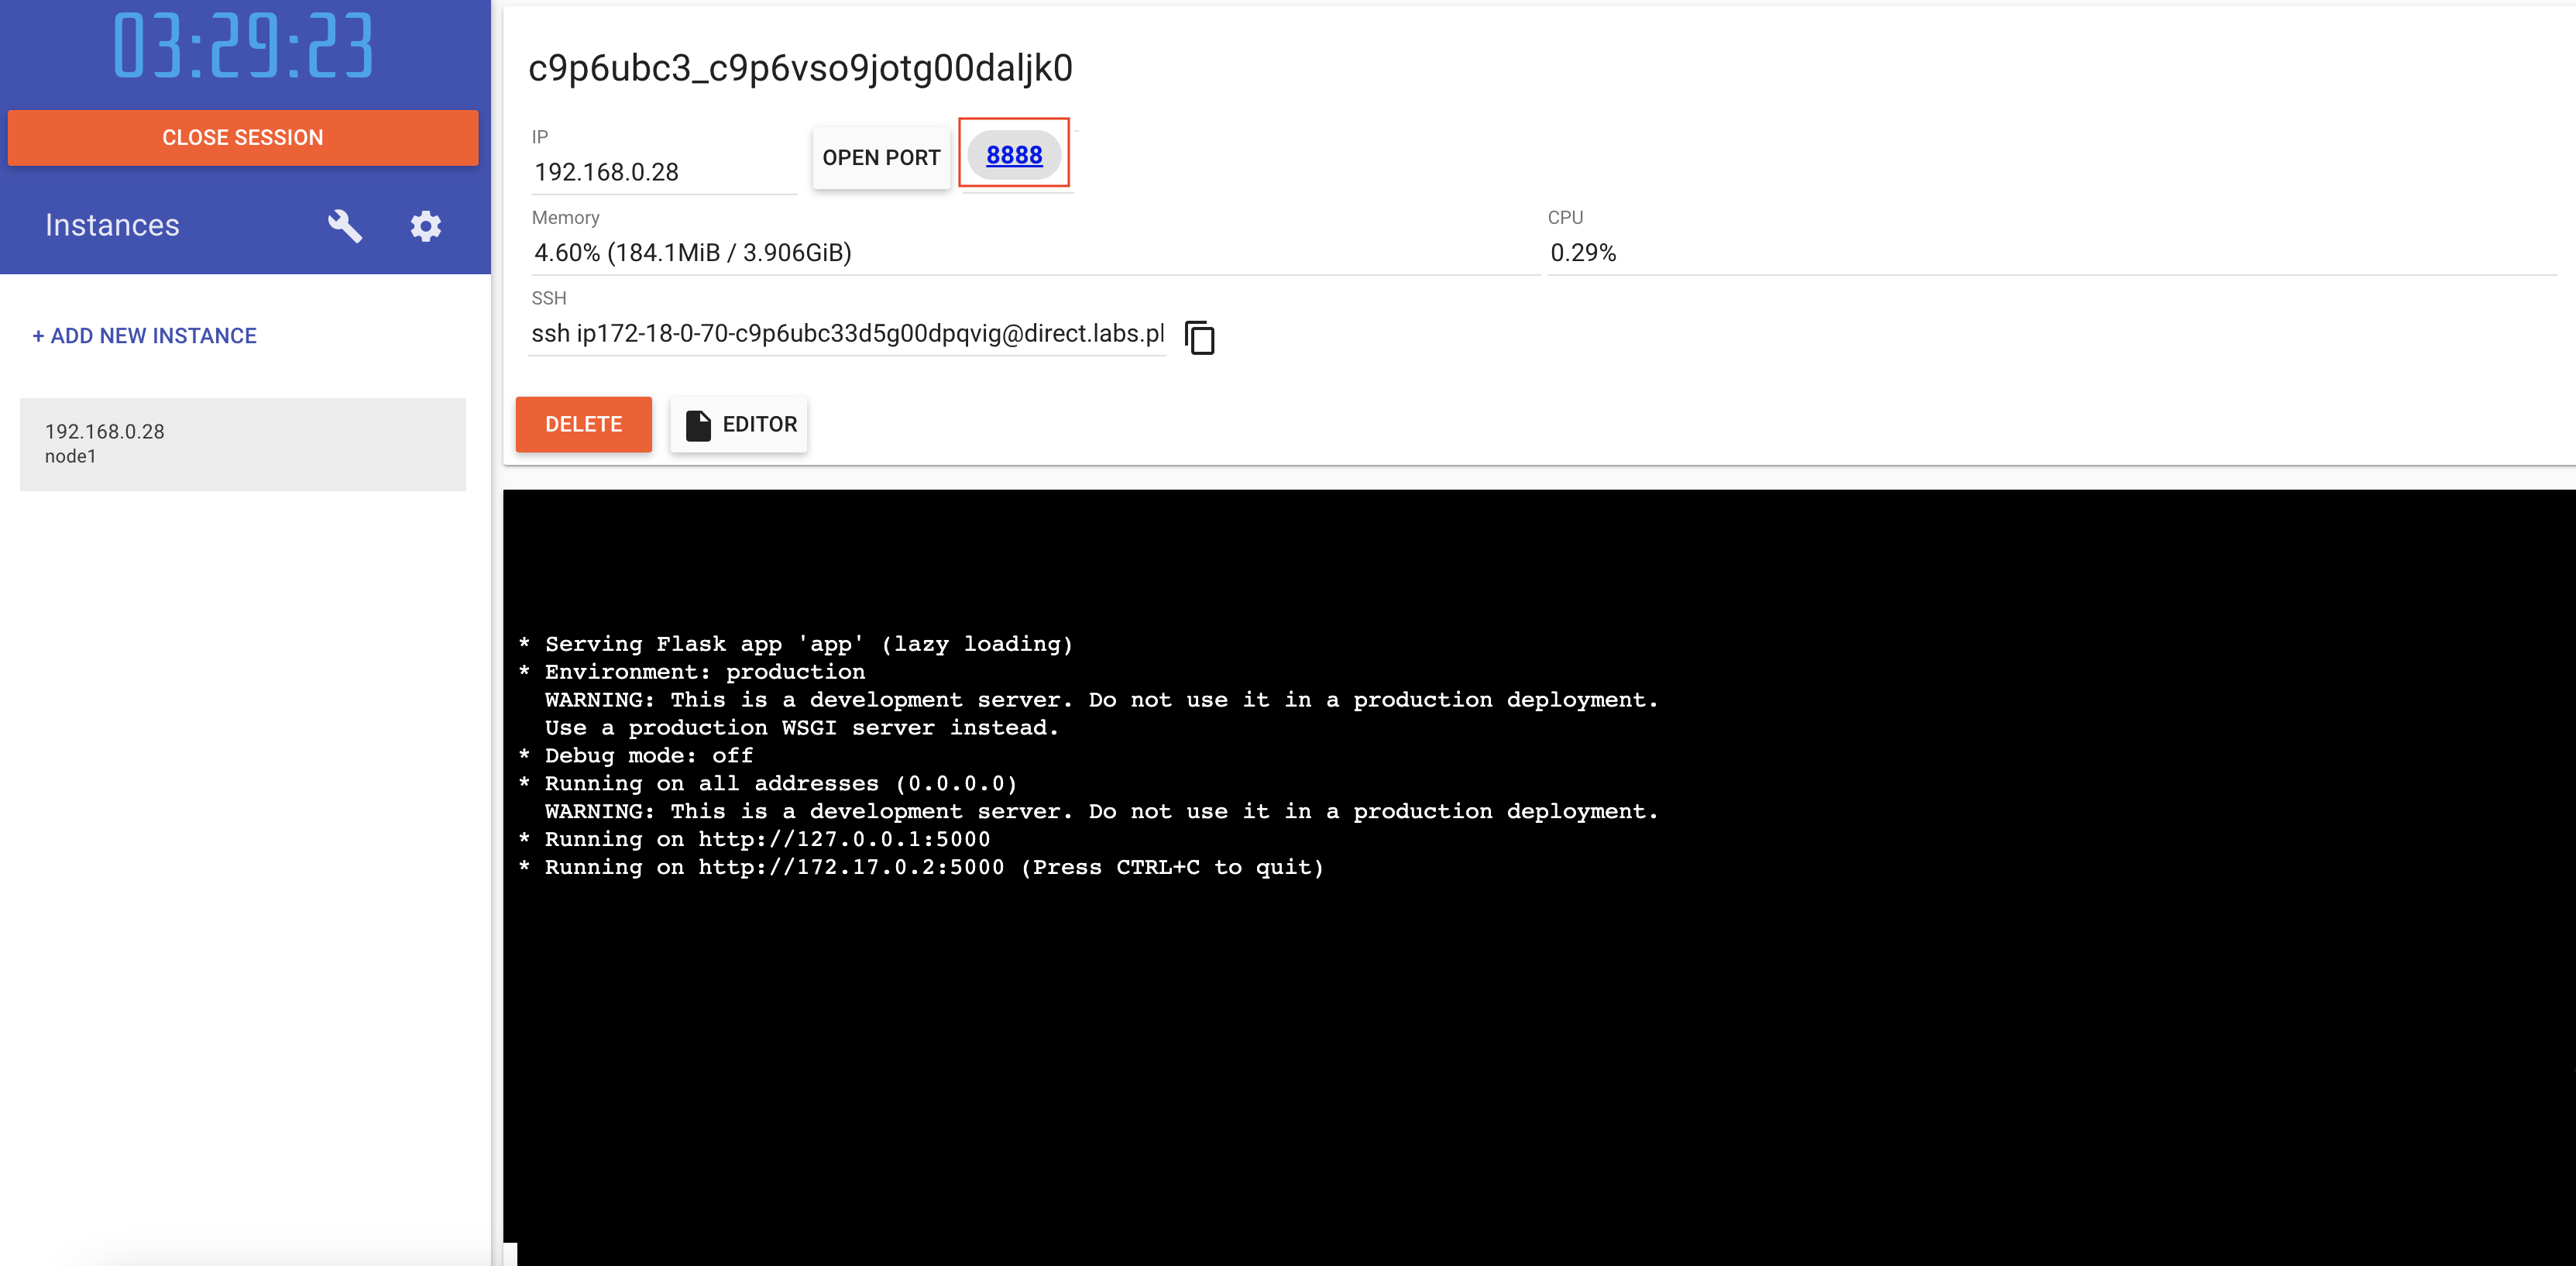
- build a Docker image entitled myflaskimage based on the provided Dockerfile
- run a container based on your image on port 8888
- check http://localhost:8888 to see if your container was started successfully
03. [30p] Writing a Dockerfile
Subtasks
- go to the node_app folder from the lab archive, which contains the source files for a simple NodeJS application
- write a Dockerfile that will be used to create an image by following the steps below:
- start from the latest version of the official NodeJS image, node:21-alpine3.18
- copy the file package.json from the local host to the current directory in the new image (./); this file is intended to specify the dependencies of the NodeJS application (for example, the Express.js framework)
- run the command npm install to install the dependencies in the file from the previous step
- copy the source file server.js to the working directory /usr/src/app/
- expose port 8080
- set the command to run the application; you will run the node binary to execute the /usr/src/app/server.js file
- use the previously written Dockerfile to create an image called mynodeimage
- start a container running image mynodeimage on port 12345 in detached (daemon) mode
- verify that your application works correctly by going to http://localhost:12345 (you should see a “Hello World” text)
04. [30p] Publishing an image
Subtasks
- create a Docker Hub account
- publish one of your previous images (either the Flask app, or the NodeJS app) to your Docker Hub registry
- run a container using the image from the registry

