Create your first project
Let's create a basic app that displays a message.
Android Studio → File → New Project
Why do you need a package name?
- It is used for uniquely identifying your application both for publishing but also by the system, at install time
Why does the package name begin with com?
- The convention is
com.companyname.applicationname, so, it's the reversed domain name, considered unique between publishers/companies. - The name also follows the java packages naming conventions
What language?
- During these sessions we will use Java
- You can give Kotlin a try, but, since we have only 4 sessions and a lot of content, we advise using a language you already know, rather than a new one
- Kotlin is a new OOP language, 100% interoperable with Java with a less verbose syntax, null-safety, streams and concepts added in later versions of Java (Android uses Java 8, even though the most recently release one is 12).
- you can read more about it here. You can also try it in a web console with examples or on https://play.kotlinlang.org/
What API version?
- We recommend using a version >= M (API level 23)
- Bluetooth low energy support was added in API level 18, but its functionality was highly expanded and improved in the following versions
- There is also a tradeoff between using functionalities from newer apis vs supporting a larger userbase
Instant app support?
- Refers to the Google Instant Apps, we will not address them during this summer school, you can leave that box unticked.
- Do not confuse it to Android Studio's Instant Run feature, which allows you to run your updated code faster, without rebuilding the whole app and creating a new APK (Android apps are bundled into .apk files).
Androidx* artifacts?
- When installing the Android SDK, you are given a lot of options, basically all the versions. You can install the latest release one and it will allow you to target earlier APIs using its support libraries
- androidx is a recent replacement for those support libraries
- You can tick that box
Project structure
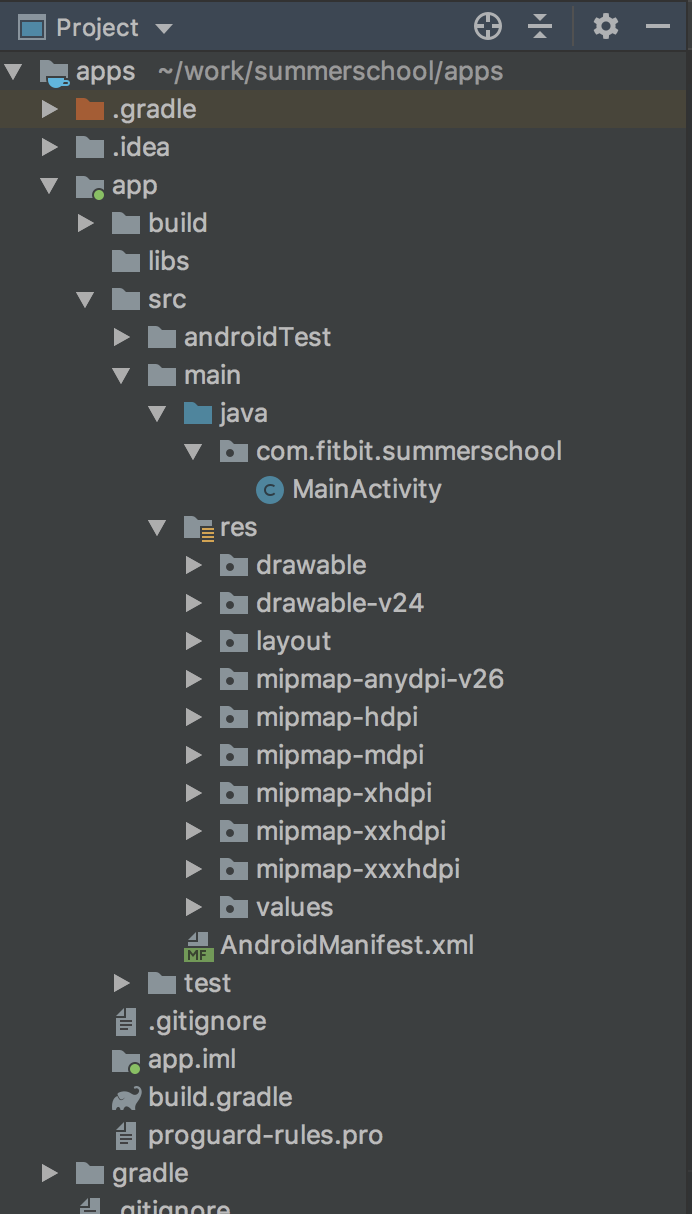
app → java → com.fitbit.summerschool → MainActivity
- The entry point view of your application. This is what users see when they launch your app. You can rename it if you want to, make sure you use the IDE's refactor option for renaming it, in order to automatically update all its usages.
- It is of type Activity, an Android component responsible for UI
- As seen in the screenshot, the project also includes a java → com.fitbit.summerschool for the unit tests you might create. Using unit tests you can check that a certain component (usually a method) behaves as intended.
manifest → AndroidManifest.xml
- All apps have this file, defining basic info about it (e.g. name)
- In it you need to declare all the Android framework components (Activities, Intents, Services etc, we discuss them in Android Session 1) that your app uses and all its app's permissions
- You can manually edit this file to include the components, or let the IDE automatically add them when you create the components from the menus (New → Activity instead of New → Java class). There are some attributes automatically set to these components that you might need to manually change for various reasons, we will mention them throughout the sessions.
app → res
- XML files for defining:
- layouts of your UI components
- string resources (e.g. the text you show on a button)
- dimens (e.g. the size of a button)
- styles
- the content of styles, dimens, strings can also be hardcoded directly where they are used, but that's not a recommended coding style. E.g. you may want all the user facing strings in that xml to make it easier to apply translations and support various languages.
- drawables - icons you use
Gradle Scripts
- two build.gradle files, one for the whole project and one for the app module, a project can have multiple modules.
- as you might have noticed, in the image above we used the Android view. Choosing the Project view, like in the image below, will show the actual filesystem structure.
- the module's build.gradle file contains the sdk targets and the dependencies on other libraries and modules.
Editing your activity's layout
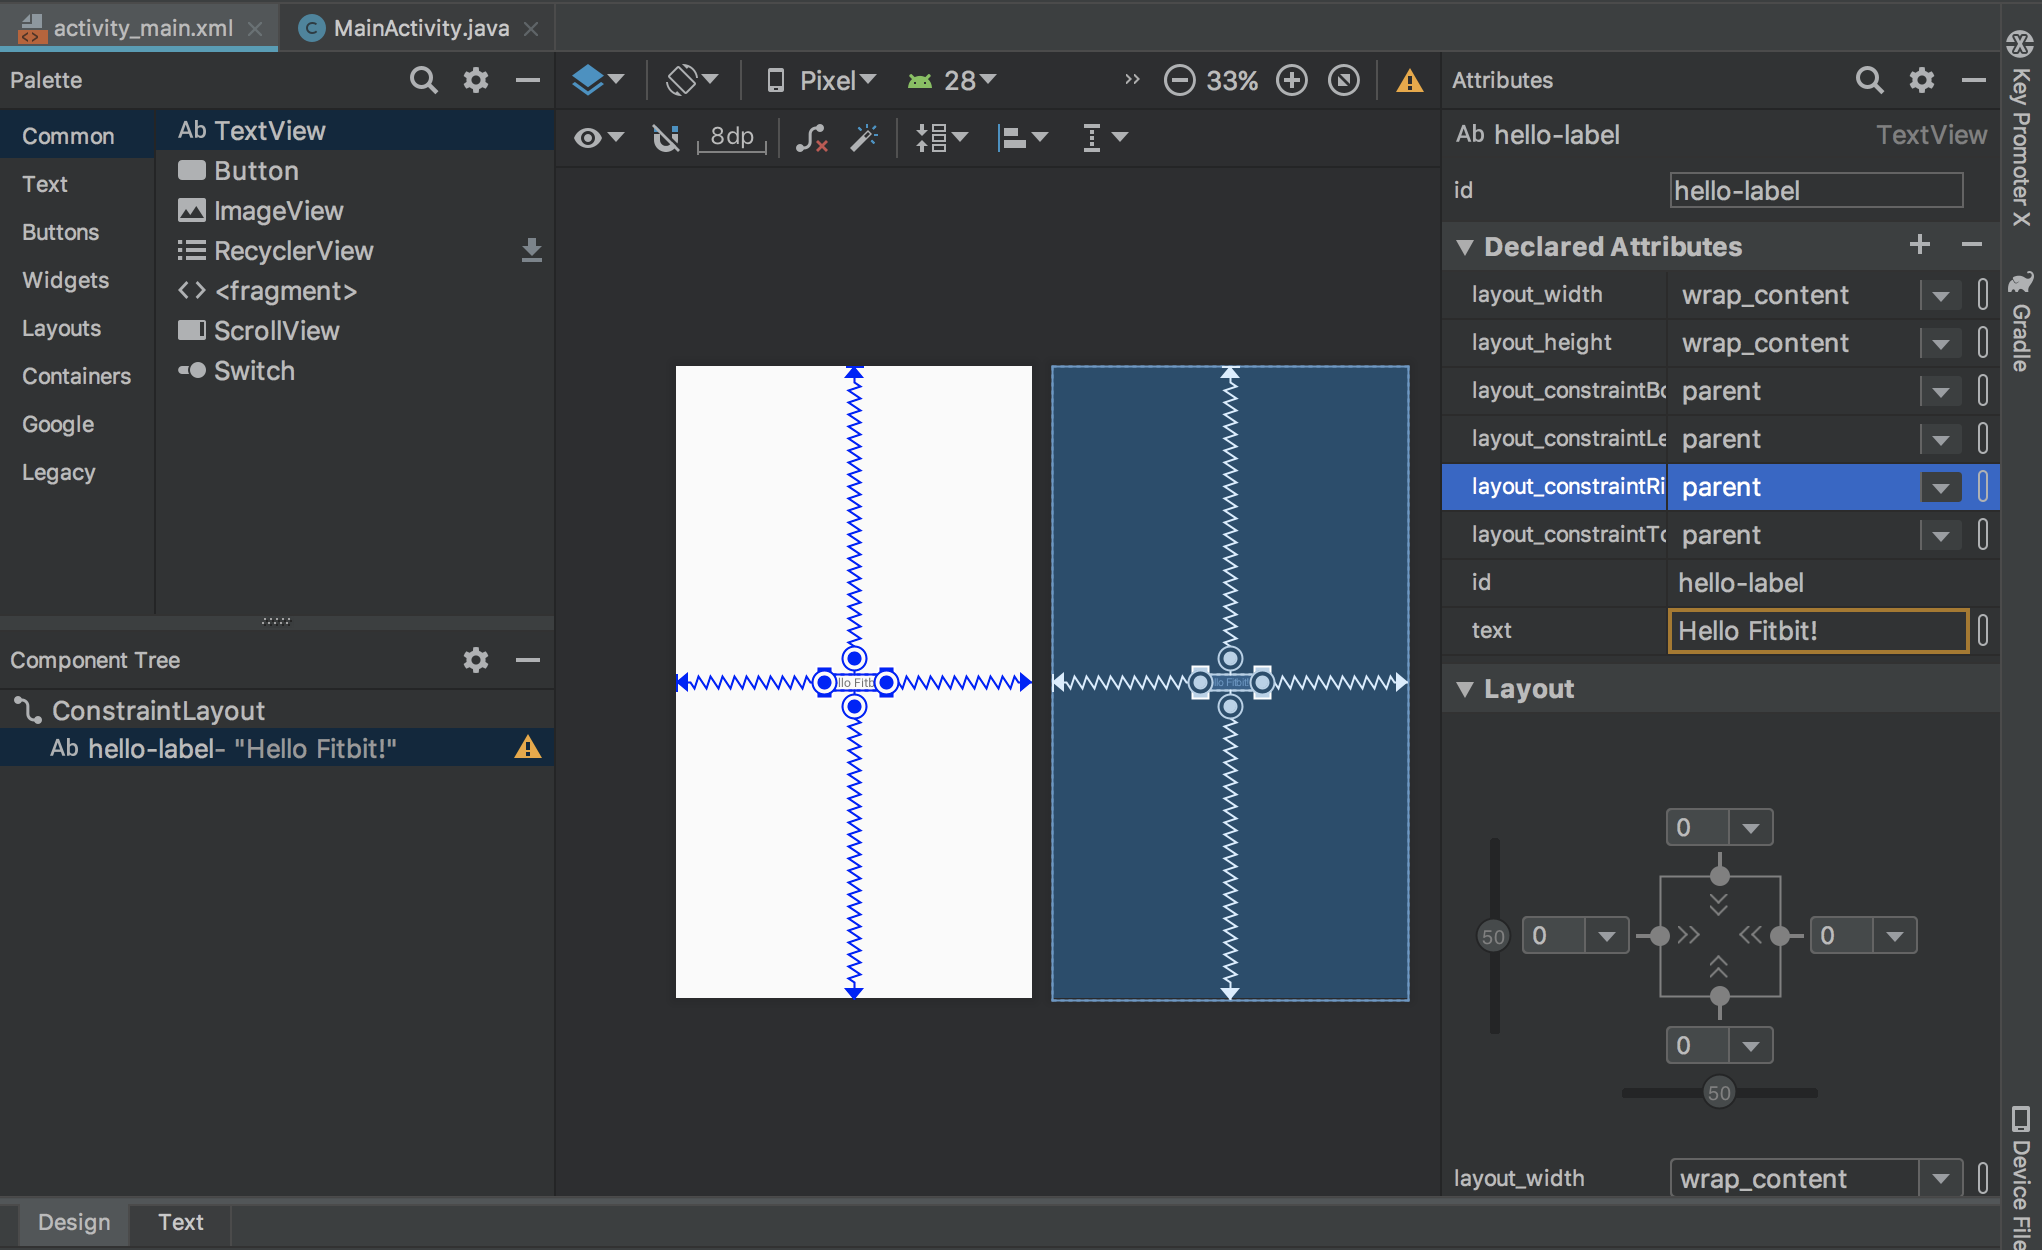
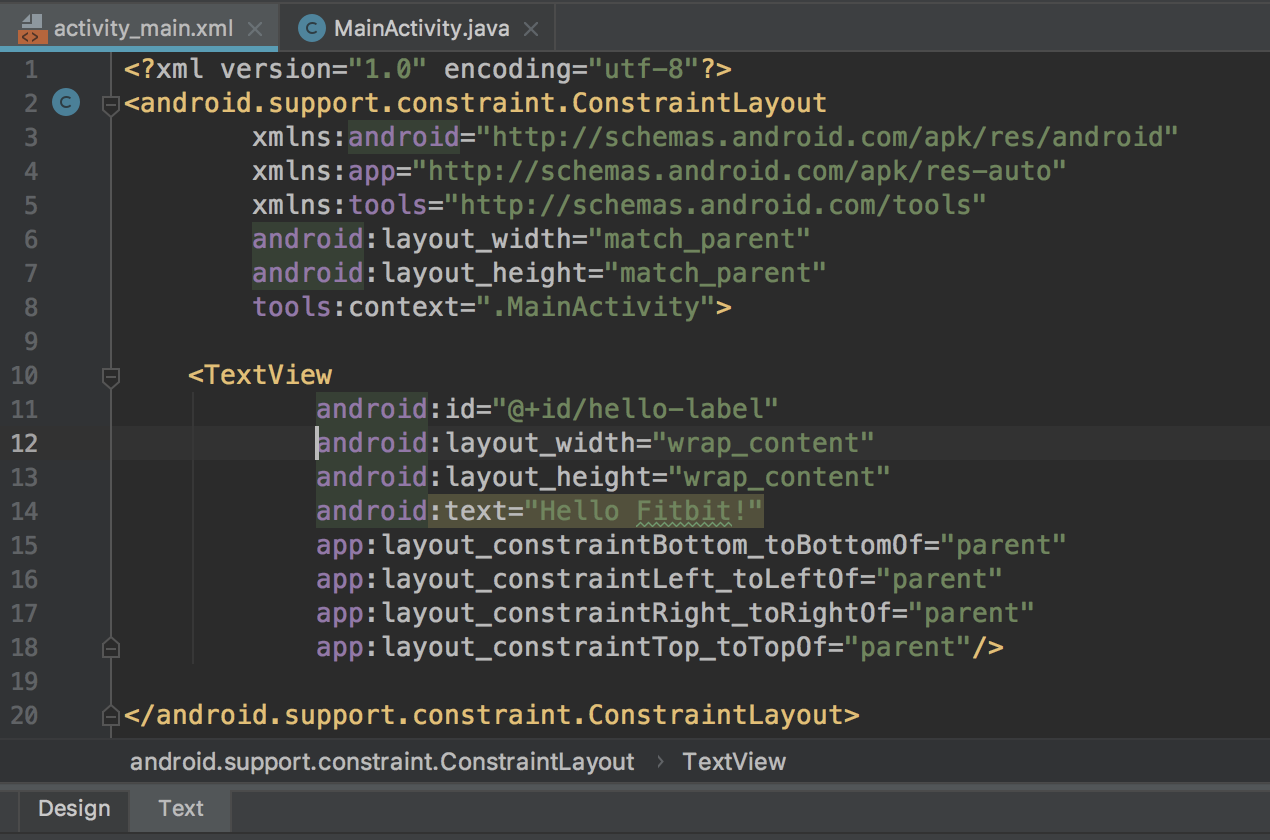
In the Java code of your MainActivity you will use components defined in its layout (e.g. objects for text views, buttons etc). The next images show the generated xml layout and its 'Design' panel. You can edit using both panels, it is a matter of choice.
In the above images the IDE shows a warning in both views that the string is not defined in a separate resources file. You can press option+Enter or alt+Enter and it will create that resource for you.
We edited the automatically included TextView widget and changed it into “Hello Fitbit”.
All UI components must be included inside a layout, here we use ContraintLayout. You can also nest layouts, having one inside of another, e.g. a ConstraintLayout inside a ScrollView layout.
In the MainActivity's code, you will see that Android Studio generated the following code:
package com.fitbit.summerschool;

import android.support.v7.app.AppCompatActivity;
import android.os.Bundle;

public class MainActivity extends AppCompatActivity {

    @Override
    protected void onCreate(Bundle savedInstanceState) {
        super.onCreate(savedInstanceState);
        setContentView(R.layout.activity_main);
    }
}
- Your class inherits AppCompatActivity. This, in turn, inherits the basic Activity provided by the Android framework. The AppCompatActivity is included is part of the Support library, that allow backward-compatibility with older versions. Using this type of activity, you can include newer UI features such as action bars to devices as old as API level 7 (the import is android.support.v7)
- All Activities have a series of lifecycle methods, called by the system when they app is launched, closed, put in background/foreground. The documentation offers the “classic” self explanatory diagram of these methods. The IDE currently generated only the method called when the activity is create:
onCreate() - It is required to call the method overriden from the hierarchy, otherwise this component cannot be constructed
savedInstanceState- the Bundle object in which we can persist the state of the activity in case it is destroyed and recreated, it is not necessary to use this, in case you don't this object is null.setContentView(R.layout.main_activity)- MUST also be called in order to set the layout defined in the xml. R is a class provided by the Android framework that maps the ids of the resources you declare in the xml files (layouts, widgets, strings etc). The system automatically generates an object for each subfolder in your app's res/ folder.
Resources
- Android Developer guides:


