
Lab 04 - Docker
Objectives
- Understand what a software container is
- Get familiar with the Docker environment
- Learn how to build, publish, and deploy containers
Contents
Tasks
Introduction
Docker is a software container platform used for packaging and running applications both locally and on cloud systems, eliminating problems such as “it works on my computer”. Docker can therefore be seen as an environment that allows containers to run on any platform, and it is based on containerd. As a benefit, it provides faster compilation, testing, deployment, updating, and error recovery than the standard application deployment mode.
Docker provides a uniform development and production environment, where the compatibility of applications with the operating system is no longer a problem, and there are no more conflicts between the library/package versions on the host system. Containers are ephemeral, so an error or failure in one of them does not cause the entire system to crash. They help ensure strict consistency between the development environment and the production environment.
Docker also offers maximum flexibility. If, in a large project, we need new software tools because certain requirements change, we can pack them in containers and then link them very easily to the system. If we need to replicate the infrastructure to another medium, we can reuse Docker images saved in the registry (a kind of container repository). If we need to update certain components, Docker allows us to rewrite images, which means that the latest container versions will always be released.
Images and containers
Docker containers are based on images, which are standalone lightweight executable packages that contain everything needed to run software applications, including code, runtime, libraries, environment variables, and configuration files. Images vary in size, do not contain full versions of operating systems, and are cached locally or in a registry. A Docker image has a union file system, where each change to the file system or metadata is considered a layer, with several such layers forming an image. Each layer is uniquely identified (by a hash) and stored only once.
A container is an instance of an image, that is, what the image becomes in memory when it is executed. It runs completely isolated from the host environment, accessing its files and ports only if it is configured to do so. Containers run native applications on the core of the host machine, performing better than virtual machines, which have access to the host's resources through a hypervisor. Each container runs in a discrete process, requiring as much memory as any other executable. From a file system standpoint, a container is an additional read/write layer over the image's layers.


In the image above (taken from the official Docker documentation), virtual machines run “guest” operating systems, which consume a lot of resources. The resulting image thus takes up a lot of space, containing operating system settings, dependencies, security patches, etc. Instead, containers can share the same kernel, and the only data that must be in a container image is the executable and the packages it depends on, which do not need to be installed on the host system at all. If a virtual machine abstracts hardware resources, a Docker container is a process that abstracts the base on which applications run within an operating system, and isolates operating system software resources (memory, network and file access, etc.).
Docker's Architecture
Docker has a client-server architecture, as shown in the image below (taken from the official Docker documentation). The Docker client communicates via a REST API (over UNIX sockets or over a network interface) with the Docker daemon (server), which is responsible for creating, running, and distributing Docker containers. The client and daemon can run on the same system or on different systems. A Docker registry is used to store images.

Installation
Docker is available in two versions: Community Edition (CE) and Enterprise Edition (EE). Docker CE is useful for developers and small teams who want to build container-based applications. On the other hand, Docker EE was created for enterprise development and IT teams that write and run critical business applications on a large scale. The Docker CE version is free, while EE is available with a subscription. In this lab, we will use Docker Community Edition. Docker is available on both desktop (Windows, macOS) and Cloud (Amazon Web Services, Microsoft Azure) or server (CentOS, Fedora, Ubuntu, Windows Server 2016, etc.) platforms.
Linux
The commands below are for Ubuntu. For other Linux variants (Debian, CentOS, Fedora), you can find more information on the official Docker documentation page.
To install Docker CE, you need one of the following versions of Ubuntu: Ubuntu Mantic 23.10, Ubuntu Jammy 22.04 (LTS), Ubuntu Focal 20.04 (LTS). Docker CE has support for the following architectures: x86_64, amd64, armhf, arm64, s390x (IBM Z), and ppc64le (ppc64el).
The recommended Docker CE installation involves using the official repository, because all the subsequent updates are then installed automatically. When installing Docker CE on a machine for the first time, it is necessary to initialise the repository:
$ sudo apt-get update
$ sudo apt-get install ca-certificates curl gnupg lsb-release
$ curl -fsSL https://download.docker.com/linux/ubuntu/gpg | sudo gpg --dearmor -o /usr/share/keyrings/docker-archive-keyring.gpg
$ echo \
  "deb [arch=$(dpkg --print-architecture) signed-by=/usr/share/keyrings/docker-archive-keyring.gpg] https://download.docker.com/linux/ubuntu \
  $(lsb_release -cs) stable" | sudo tee /etc/apt/sources.list.d/docker.list > /dev/null
Next, Docker CE can be installed:
$ sudo apt-get update
$ sudo apt-get install docker-ce docker-ce-cli containerd.io
Windows and MacOS
Because Docker did not initially have native support for Windows and MacOS, Docker Toolbox was introduced, which can launch a virtualised Docker environment (more specifically, it uses a VirtualBox machine as the basis of the Docker environment). Recently, Docker Toolbox was marked as “legacy” and was replaced by Docker Desktop for Mac and Docker Desktop for Windows, which offer similar features with better performance. Furthermore, Windows Server 2016 and Windows 10 now support native Docker for the x86_64 architecture.
Testing the installation
To check if the installation was successful, we can run a simple Hello World container:
$ docker container run hello-world

Unable to find image 'hello-world:latest' locally
latest: Pulling from library/hello-world
c1ec31eb5944: Pull complete
Digest: sha256:d000bc569937abbe195e20322a0bde6b2922d805332fd6d8a68b19f524b7d21d
Status: Downloaded newer image for hello-world:latest

Hello from Docker!
This message shows that your installation appears to be working correctly.

To generate this message, Docker took the following steps:
 1. The Docker client contacted the Docker daemon.
 2. The Docker daemon pulled the "hello-world" image from the Docker Hub.
    (amd64)
 3. The Docker daemon created a new container from that image which runs the
    executable that produces the output you are currently reading.
 4. The Docker daemon streamed that output to the Docker client, which sent it
    to your terminal.

To try something more ambitious, you can run an Ubuntu container with:
 $ docker run -it ubuntu bash

Share images, automate workflows, and more with a free Docker ID:
 https://hub.docker.com/

For more examples and ideas, visit:
 https://docs.docker.com/get-started/
The execution output above shows us the steps Docker takes in the background when running this container. Specifically, if the image we want to run in a container is not available locally, it is pulled from the registry, and then a new container is created based on that image, where the desired application is running.
Running a container
We have seen above how we can run a Hello World in a simple container, but we can run containers from much more complex images. We can create our own image (as we will see later) or download an image from a public registry, such as Docker Hub. It contains public images, ranging from operating systems (Ubuntu, Alpine, Amazon Linux, etc.) to programming languages (Java, Ruby, Perl, Python, etc.), web servers (NGINX, Apache), and more.
For this lab, we will use Alpine Linux, which is a lightweight Linux distribution (with a size of barely 5 MB). The first step is to download the image from a Docker registry (in our case, Docker Hub):
$ docker image pull alpine
To see all the images present on our system, we can run the following command:
$ docker image ls

REPOSITORY      TAG         IMAGE ID        CREATED         SIZE
alpine          latest      05455a08881e    3 weeks ago     7.38MB
It can be seen above that the downloaded image has the name alpine and the tag latest. An image tag is a label that generally designates the version of the image, and latest is an alias for the latest version, set automatically when no tag is explicitly specified.
Once the image is downloaded, we can run it in a container. One way to do this is by specifying a command to run inside the container (in our case, on the Alpine Linux operating system):
$ docker container run alpine ls -l

total 56
drwxr-xr-x    2 root     root          4096 Jan 26 17:53 bin
drwxr-xr-x    5 root     root           340 Feb 23 10:48 dev
drwxr-xr-x    1 root     root          4096 Feb 23 10:48 etc
drwxr-xr-x    2 root     root          4096 Jan 26 17:53 home
[...]
In the previous example, Docker finds the specified image, creates a container from it, starts it, and then runs the command inside it. If we want interactive access inside the container, we can use the following command:
$ docker run -it alpine
If we want to see which containers are currently running, we can use the docker container ls command. If we want to see the list of all the containers we ran, we also use the -a flag:
$ docker container ls -a

CONTAINER ID        IMAGE          COMMAND        CREATED             STATUS                         NAMES
96e583b80c13        alpine         "/bin/sh"      3 seconds ago       Exited (0) 1 second ago        fervent_ishizaka
d3f65a167db3        alpine          "ls -l"       42 seconds ago      Exited (0) 41 seconds ago      strange_ramanujan
To run an image in a background container, we can use the -d flag. At startup, the new container's ID will be displayed, which we can then later use to attach to the container, stop it, delete it, etc .:
$ docker run -d -it alpine

7919fb6e13ab9497fa12fa455362cb949448be207ad08e08e24a675a32c12919
$ docker container ls

CONTAINER ID   IMAGE     COMMAND     CREATED          STATUS         PORTS     NAMES
7919fb6e13ab   alpine    "/bin/sh"   10 seconds ago   Up 9 seconds             elastic_knuth
$ docker attach 7919fb6e13ab

/ # exit
$ docker stop 7919fb6e13ab

7919fb6e13ab
$ docker container ls

CONTAINER ID      IMAGE        COMMAND        CREATED             STATUS            PORTS     NAMES
$ docker rm 7919fb6e13ab

7919fb6e13ab
$ docker container ls -a

CONTAINER ID      IMAGE        COMMAND        CREATED             STATUS            PORTS     NAMES
Creating an image
So far, we only ran containers based on existing images, but now we will see how we can create and publish our own application. During the Docker labs, we will go through an entire cloud application hierarchy. For this particular lab, we will start from the bottom level of this hierarchy, which is represented by the containers. Above this level, there are the services, which define how the containers behave in production, and at the highest level there is the service stack, which defines the interactions between services. The sources for this example can be found in the flask_app folder of the lab archive.
In this example, we will create a web application using Flask (as studied in lab 2 and lab 3), which displays a random picture each time its main page is accessed. The application's code can be found in a file called app.py, which looks like this:
- app.py
from flask import Flask, render_template
import random

app = Flask(__name__)

images = [
    "https://i.pinimg.com/736x/8f/2a/30/8f2a30993c405b083ba8820ae6803b93.jpg",
    "https://images.g2crowd.com/uploads/product/image/large_detail/large_detail_1528237089/microsoft-azure-biztalk-services.jpg",
    "https://aptira.com/wp-content/uploads/2016/09/kubernetes_logo.png",
    "https://www.opsview.com/sites/default/files/docker.png"
]

@app.route('/')
def index():
    url = random.choice(images)
    return render_template('index.html', url=url)

if __name__ == "__main__":
    app.run(host="0.0.0.0")
As you can see in the Python file (and as you learned in previous labs), the web page is based on a template found in the index.html file, which should be located in the templates folder:
- index.html
<html>
  <head>
    <style type="text/css">
      body {
        background: black;
        color: white;
      }
      div.container {
        max-width: 500px;
        margin: 100px auto;
        border: 20px solid white;
        padding: 10px;
        text-align: center;
      }
      h4 {
        text-transform: uppercase;
      }
    </style>
  </head>
  <body>
    <div class="container">
      <h4>Cloud image of the day</h4>

      <img src="{{url}}" />
    </div>
  </body>
</html>
We also need a requirements.txt file, where we specify the Python packages to be installed in the image we are creating:
- requirements.txt
Flask>=2.2.2
An image is defined by a file called Dockerfile, which specifies what happens inside the container we want to create, where access to resources (such as network interfaces or hard disks) is virtualised and isolated from the rest of the system. With this file, we can specify port mappings, files that will be copied to the container when it is run, and so on. A Dockerfile is somewhat similar to a Makefile, and each line in it describes a layer in the image. Once we have defined a correct Dockerfile, our application will always behave identically, no matter in what environment it is run. An example of a Dockerfile for our application is as follows:
- Dockerfile
FROM alpine:edge

RUN apk add --update py3-pip
RUN python3 -m venv /venv

ENV PATH="/venv/bin:$PATH"

COPY requirements.txt /usr/src/app/
RUN pip install --no-cache-dir -r /usr/src/app/requirements.txt

COPY app.py /usr/src/app/
COPY templates/index.html /usr/src/app/templates/

EXPOSE 5000

CMD ["python3", "/usr/src/app/app.py"]
In the above file, we have the following commands:
- FROM - specifies an image which our new image is based on (in our case, we start from a basic Alpine image found on Docker Hub, where we will run our Flask app)
- COPY - copies files from a local directory to the image we are creating
- RUN - runs a command (in the example above, we first install the pip Python package installer, then we install the Python packages listed in the requirements.txt file, i.e., Flask)
- ENV - sets and environment variable
- EXPOSE - exposes a port outside the container
- CMD - specifies a command that will be run when the container is started (in this case, we run app.py with Python).
Finally, we end up with the following file structure:
$ tree
.
├── app.py
├── requirements.txt
└── templates
    └── index.html
To build an image for our Flask application, we run the command below in the current directory (the -t flag is used to tag the image):
$ docker build -t testapp .

[+] Building 12.6s (12/12) FINISHED
=> [internal] load .dockerignore
 => => transferring context: 2B
 => [internal] load build definition from Dockerfile
 => => transferring dockerfile: 577B
 => [internal] load metadata for docker.io/library/alpine:edge
 => [1/7] FROM docker.io/library/alpine:edge@sha256:9f867[...]
 => => resolve docker.io/library/alpine:edge@sha256:9f867[...]
 => => sha256:91988[...] 1.47kB / 1.47kB
 => => sha256:dccce[...] 3.41MB / 3.41MB
 => => sha256:9f867[...]a5cc0 1.85kB / 1.85kB
 => => sha256:60eda[...] 528B / 528B
 => => extracting sha256:dccce[...]
 => [internal] load build context
 => => transferring context: 2.01kB
 => [2/7] RUN apk add --update py3-pip
 => [3/7] RUN python3 -m venv /venv
 => [4/7] COPY requirements.txt /usr/src/app/
 => [5/7] RUN pip install --no-cache-dir -r /usr/src/app/requirements.txt
 => [6/7] COPY app.py /usr/src/app/
 => [7/7] COPY templates/index.html /usr/src/app/templates/
 => exporting to image
 => => exporting layers
 => => writing image sha256:c82b4[...]
 => => naming to docker.io/library/testapp
 [...]
To check if the image was created successfully, we use the following command:
$ docker images

REPOSITORY    TAG       IMAGE ID       CREATED         SIZE
testapp       latest    c82b48d0b86e   9 minutes ago   101MB
We can get more details about the new image using the following command:
$ docker image inspect testapp

[
    {
        "Id": "sha256:c82b48d0b86e9a4113495f3f2d97d7b336d6f662ce38105cf1be8af6f3d8ba44",
        "RepoTags": [
            "testapp:latest"
        ],
        "RepoDigests": [],
        "Parent": "",
        "Comment": "buildkit.dockerfile.v0",
        "Created": "2024-02-23T10:54:09.271834361Z",
        "Container": "",
        [...]
        "DockerVersion": "",
        "Author": "",
        "Config": {
            [...]
            "ExposedPorts": {
                "5000/tcp": {}
            },
            "Tty": false,
            "OpenStdin": false,
            "StdinOnce": false,
            "Env": [
                "PATH=/venv/bin:/usr/local/sbin:/usr/local/bin:/usr/sbin:/usr/bin:/sbin:/bin"
            ],
            "Cmd": [
                "python3",
                "/usr/src/app/app.py"
            ],
            [...]
        },
        "Architecture": "amd64",
        "Os": "linux",
        "Size": 101076711,
        [...]
    }
]
The image can now be found in the local Docker image registry and can be run with the following command:
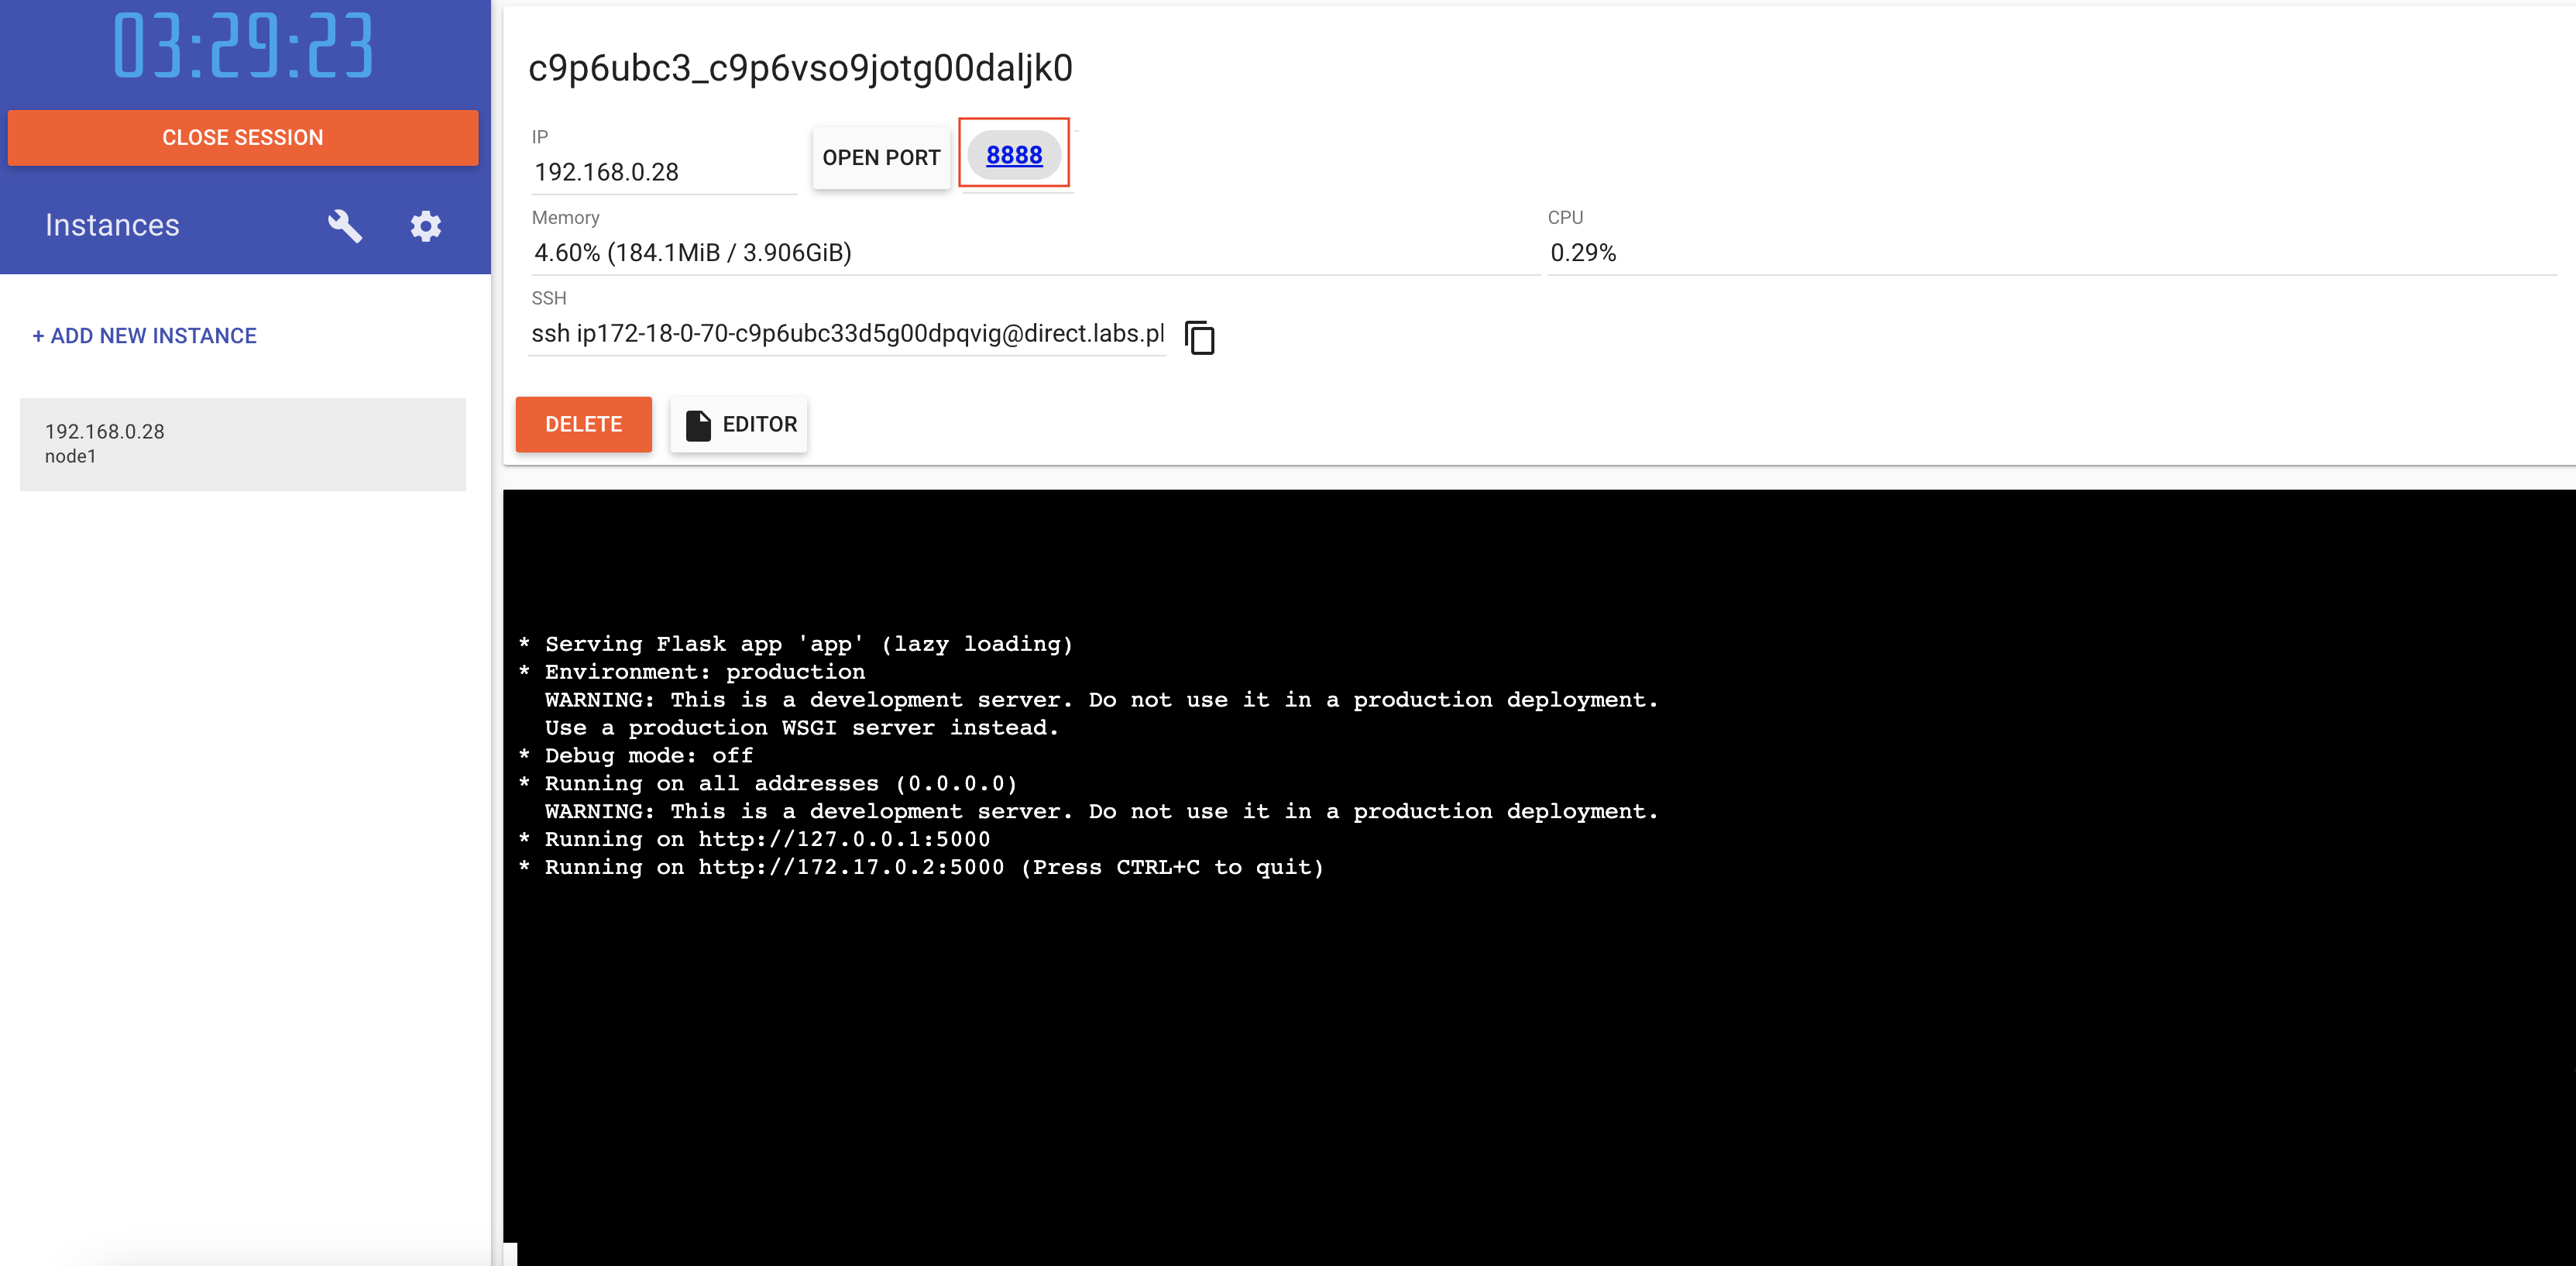
$ docker container run -p 8888:5000 testapp

* Serving Flask app 'app'
 * Debug mode: off
 * Running on all addresses (0.0.0.0)
 * Running on http://127.0.0.1:5000
 * Running on http://172.17.0.2:5000
[...]
By accessing the address http://127.0.0.1:8888 from a web browser, we will see the web application we have created.
Publishing an image to a registry
Previously, we created a Docker image that we ran locally in a container. In order to be able to use the image created in any other system, it is necessary to publish it, i.e., to upload it to a registry in order to be able to deploy containers based on it in production. A registry is a collection of repositories, and a repository is a collection of images (similar to GitHub, except that, in a Docker registry, the code is already built). There are many registries for Docker images (Docker Hub, Gitlab Registry, etc.), but in this lab we will use the public Docker registry, since it is free and pre-configured.
We will start from the previous application. The first step in publishing an image is to create an account at https://hub.docker.com. Next, logging in from the local machine is done by the following command:
$ docker login

Login with your Docker ID to push and pull images from Docker Hub. If you don't have a Docker ID, head over to https://hub.docker.com to create one.
Username:
Password:
Login Succeeded
We can specify the username and password directly in the command, so the above command can be written as (where the default server, if we choose to omit that particular parameter, is Docker Hub):
$ docker login [–u <USER> –p <PASSWORD>] [SERVER]
Before publishing the image to the registry, it must be tagged with the username/repository:tag format. The tag is optional, but it is useful because it denotes the version of a Docker image. We use the following command to tag an image (in the example below, the user is mobylab, the repository is iapp, and the tag is example):
$ docker tag testapp mobylab/ia1:example
$ docker images

REPOSITORY    TAG       IMAGE ID       CREATED          SIZE
testapp       latest    c82b48d0b86e   16 minutes ago   101MB
mobylab/ia1   example   c82b48d0b86e   16 minutes ago   101MB
alpine        latest    05455a08881e   3 weeks ago      7.38MB
hello-world   latest    d2c94e258dcb   9 months ago     13.3kB
Once the image is tagged, it can be published to the registry:
$ docker push mobylab/ia1:example
From this point on, the image will be visible on https://hub.docker.com, where it can be pulled and run on any host, server or cloud system:
$ docker run -p 8888:5000 mobylab/ia1:example

Unable to find image 'mobylab/ia1:example' locally
example: Pulling from mobylab/ia1
dcccee43ad5d: Pull complete
[...]
dc5f08788709: Pull complete
Digest: sha256:72824[...]
Status: Downloaded newer image for mobylab/ia1:example
 * Serving Flask app 'app'
 * Debug mode: off
 * Running on all addresses (0.0.0.0)
 * Running on http://127.0.0.1:5000
 * Running on http://172.17.0.2:5000
[...]
Useful commands
System
$ docker <COMMAND> --help  # shows complete information about a command
$ docker version           # shows Docker's version and other minor details
$ docker info              # shows complete Docker information
$ docker system prune      # clears space by deleting unused components
Image interaction
$ docker image pull <IMAGE>.      # downloads an image to the local cache
$ docker build -t <TAG> .         # builds an image from a Dockerfile located in the current folder

$ docker image ls                 # lists the images in the local cache
$ docker images                   # lists the images in the local cache

$ docker image rm <IMAGE>         # deletes an image from the local cache
$ docker rmi <IMAGE>              # deletes an image from the local cache

$ docker image inspect <IMAGE>    # shows information about an image
Container interaction
$ docker container run <IMAGE> [COMMAND]    # runs a container and optionally sends it a starting command
$ docker container run -it <IMAGE>          # runs a container in interactive mode
$ docker container run -d <IMAGE>           # runs a container in the background (as a daemon)

$ docker exec -it <IMAGE> <COMMAND>         # starts a terminal in a running container and executes a command

$ docker container ls                       # lists all running containers
$ docker container ls -a                    # lists all containers that were run or are running
$ docker container inspect <ID>             # shows information about a container

$ docker attach <ID>                        # attaches to a container
$ docker stop <ID>                          # stops a container
$ docker restart <ID>                       # restarts a container
$ docker rm <ID>                            # deletes a container

$ docker ps                                 # lists running containers
$ docker logs <ID>                          # shows logs from a container
$ docker top <ID>                           # shows the processes running in a container
Working with a registry
$ docker login [–u <USER> –p <PASSWORD>] [SERVER]   # logs a user into a registry
$ docker tag <IMAGE> <USER/REPOSITORY:TAG>          # tags an image for registry push
$ docker push <USER/REPOSITORY:TAG>                 # pushes an image to a registry
Tasks
00. [00p] Testing the Docker installation
Subtasks
- start a container that runs the official hello-world image and check that everything functions correctly
01. [20p] Running containers
Subtasks
- pull the busybox image from the official Docker registry to the local cache
- run a busybox container that executes the uptime command
- run an interactive busybox container; once you enter it, run the command wget google.com, then exit
- run a busybox detached interactive container (daemon); once you have started it, attach to it and run the id command, then exit
- delete all containers and images created at the previous points
02. [20p] Building an image
Subtasks
- go to the flask_app folder from the lab archive
- modify the images array in the app.py file to make the application display other images of your choice
- modify the templates/index.html file to display a different title related to your chosen images (i.e., change line 22)
- build a Docker image entitled myflaskimage based on the provided Dockerfile
- run a container based on your image on port 8888
- check http://localhost:8888 to see if your container was started successfully
03. [30p] Writing a Dockerfile
Subtasks
- go to the node_app folder from the lab archive, which contains the source files for a simple NodeJS application
- write a Dockerfile that will be used to create an image by following the steps below:
- start from the latest version of the official NodeJS image, node:21-alpine3.18
- copy the file package.json from the local host to the current directory in the new image (./); this file is intended to specify the dependencies of the NodeJS application (for example, the Express.js framework)
- run the command npm install to install the dependencies in the file from the previous step
- copy the source file server.js to the working directory /usr/src/app/
- expose port 8080
- set the command to run the application; you will run the node binary to execute the /usr/src/app/server.js file
- use the previously written Dockerfile to create an image called mynodeimage
- start a container running image mynodeimage on port 12345 in detached (daemon) mode
- verify that your application works correctly by going to http://localhost:12345 (you should see a “Hello World” text)
04. [30p] Publishing an image
Subtasks
- create a Docker Hub account
- publish one of your previous images (either the Flask app, or the NodeJS app) to your Docker Hub registry
- run a container using the image from the registry
