Lecture 10: Cross platform mobile development
Usually when we talk about mobile development and Smartphone we talk about:
- Android (78.2% market share as of 3rd quarter of 2014)
- iPhone (17.5% market share)
- Windows Phone (3.0% market share)
- BlackBerry (0.6% market share)
where the number of smartphone users was already up to 1.64 billion in 2014 and is prognosed to surpass 2 billion by 2016. In this situation we can see why even a 1% of the market ( approx. 16 million by the end of 2014 ) is huge and can't be ignored. Thus most of the mobile development companies need to develop their app for each of those platforms if they want to maximize their profits.
The main issue with launching an app for multiple platforms is the native SDK offered by these vendors. Each of them is totally different with it's own functionalities and API calls and sometimes with it's own coding language (Objective C used only by iOS). In order to launch an app for multiple platforms a developer must implement the same logic on all these platforms and then updates each of these source codes which can end up in a lot of management costs.
In order to solve these problem (especially for small apps) cross development platforms were made. One of the most notable ones over the years is Apache Cordova / Phoengap project and other projects based on it like Intel® XDK, Ionic or appery.io
These platforms allow you to develop your APP in HTML5/CSS3/javascript just like any other web app. The difference is that there is a cordova.js library that allows you via javascript to call native functions of the phone. This is done via plugins which do need to be implemented in the native code and all are called via the same javascript function and respond in a similar manner. For example the Vibration plugin will allow the phone to vibrate by calling navigator.phone.vibrate(time in ms), but actually the plugin is a collection of native codes for each mobile platform and which you make the javascript call the native code is the one that is run. Which native code from the plugin will be bundled in the app is chose at compile time by setting for which platform we are making the build.
PhoneGap Desktop
In order to simplify fast prototyping of apps Adobe created a Phoengap Desktop App and a mobile app ( iOS, Android, Windows) which can be paired together to directly view your app one the phone without the need to compile it.
Once installed and launched in order to create a new project:
- Click the ”+” button in the top left corner
- Select “Create new PhoneGap project”
- Click “Choose” button and select where you want the project to be stored in your PC
- Give your project a name
- Assign a project ID (this is optional and not required for our lessons)
- Once the project is created launch the mobile App on your phone and type in the IP of the PC on which you are working
- Click Connect
- Now you should be able to see the app which you just created and is the PhoneGap template App
The IoT template app
Even though PhoenGap simplifies and accelerates the development of mobile apps a lot developers still need a good grasp off:
- HTML5
- CSS3
- Javascript
- Single Page App development
In order to simplify things you will be working on IoT template which will already have made the basic design building blocks for you (quite similar to jQuery Mobile). The template is made for portrait (vertical) device orientation and offers basic features like a side menu, virtual pages and other basic design blocks. After downloading the template, use it to overwrite the PhoneGap default project template.
Template blocks
Pages
Since the content of your app must be written in a single html file managing different screens of content can be problematic, thus the most basic element offered by the IoT template is the page.
  <div id="app">
    <div id="content">
     <div id="page-one-id" data-role="page">
       Page 1
     </div>
     <div id="page-two-id" data-role="page">
       Page 2
     </div>
    </div>
  </div>
All pages must be inside the content area of the app. The content area of the app is marked by the <div> element with the id=“content”. By default the first page in your code will be shown while the rest of the pages will be hidden. The content of the app should be logically divided between pages. All data related to a certain subject/ functionality should be found on the same page. In order to bring up a hidden page an anchor with id of the page must be clicked
<a href="#page-two-id">Show Page 2</a>
Or the app.showPage(id) javascript method must be called
app.showPage("page-two-id");
Side Menu
The Side Menu offered by the template will allow you to easily navigate between your main pages. It's made our of normal HTML anchors which should be used to set one of the pages as target. The side menu will always be the first element inside the div with the id=“app” followed by the content.
For example the following code:
  <div id="app">
  <div id="side-menu">
    <ul>
       <li data-action="close-menu">
         <i class="fa fa-times"></i> Close Menu
       </li>
       <li>
         <a href="#news">
           <i class="fa fa-newspaper-o"></i> News
         </a>
       </li>
       <li>
         <a href="#images">
           <i class="fa fa-picture-o"></i> Images
         </a>
       </li>
       <li>
         <i class="fa fa-tachometer"></i> Sensors
       </li>
     </ul>
  </div>
  </div>
will generate the following side menu
Buttons
One of the most common elements you are going to need in your apps are buttons. Buttons depending on context in html5 can be implemented by using anchor or button elements:
  <a class="btn flat">Anchor as button</a><br>
  <button class="btn flat">Flat button</button>
  <button class="btn flat btn-green">Flat button green</button>
  <button class="btn raised">Raised button</button>
  <button class="btn raised btn-green">Raised button green</button>
Cards
Cards will be your basic display element in your pages in order to display content and interact with the user

They allow you to display (each of the following elements is optional:
- one image (and force it to 16:9 ratio)
- one title
- content
- a footer with buttons/actions
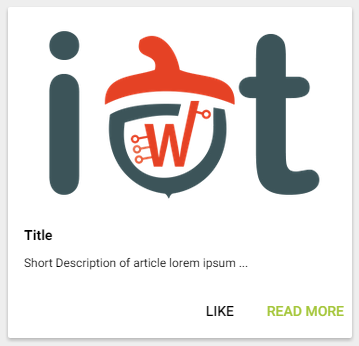
The following code:
	<div class="card">
		<div class="img-container">
			<img src="http://ocw.cs.pub.ro/courses/res/sigla_iot.png">
		</div>
		<h3 class="title">Title</h3>
		<div class="content">
			<p>Short Description of article lorem ipsum ...</p>
		</div>
		<footer style="text-align:right;">
			<a class="btn flat">LIKE</a>
			<a class="btn flat btn-green">READ MORE</a>
		</footer>
	</div>
will generate this card:
Icons
Bundled with the IoT template is the fontawesome icon pack which is mainly a collection of icons you can include in your app.
For a full list of icons consult this catalog. By clicking on the icon you will get the HTML code for that icon.
PhoneGap Build
In order to compile locally with cordova or PhoneGap you will need to have installed the native SDK for each platform you're going to make a build for. This can be quite problematic since certain SDK are available only on certain operating systems. This is where the Adobe PhoneGap Build service comes in play. With a free Adobe account you are allowed to upload a single private app and build it for iOS, Android and Windows 8. There are some limitations for free accounts though: only 1 private app and no custom plugins. Even if there are no custom plugins allowed, you may use any any of the core cordova/phonegap plugins or custom plugins that are publicly available (git hub, npm or phonegap plugin repository ). Since those plugins are available publicly and phonegap build will get them from their own repository all you need to upload is an archive with your www folder of the project with one small change. You will need to move the config.xml file from your project's root folder into your www folder.


