Table of Contents
Pudak NURBERDIYEV - Led-cube-4x4x4
Autorul poate fi contactat la adresa: Login pentru adresa
Introducere
It is made of 64 leds. It is for fun. Looks beautiful at night. You can draw some shapes, visual shapes. Like rectangles, circles, letters anything you want. The Idea was that I was surfing on internet and found a video about led cube which has 8x8x8 leds. And I liked it very much. I put the link at bottom of the page. It is very useful because at shops or supermarkets you can attract people by writing some ads or names of shops by leds, or you can make something interesting. If you make with more leds like 8x8x8 or 16x16x16 it will definitely attrack people.


Descriere generală

A person implements program in whatever language he wants like win-avr. Then sends it to atmega324 which keeps the program all the time. And microcontroller controls led cube with its pins.
Hardware Design
Lista de piese pentru realizarea modulului “LED CUBE 4x4x4”
- 64 LED-uri cu diametrul de 5 mm
- 16 Rezistente 100ohm
- 4 Rezistente 2k2ohm
- 4 Tranzistor NPN BC639
- fire de legatura pentru conectare intre rezistene si led-uri
- 21 fire de legatura (mama-mama)
- Cablaj (etapa 1)
- Placuta de test
- 21 pini
scheme electrice
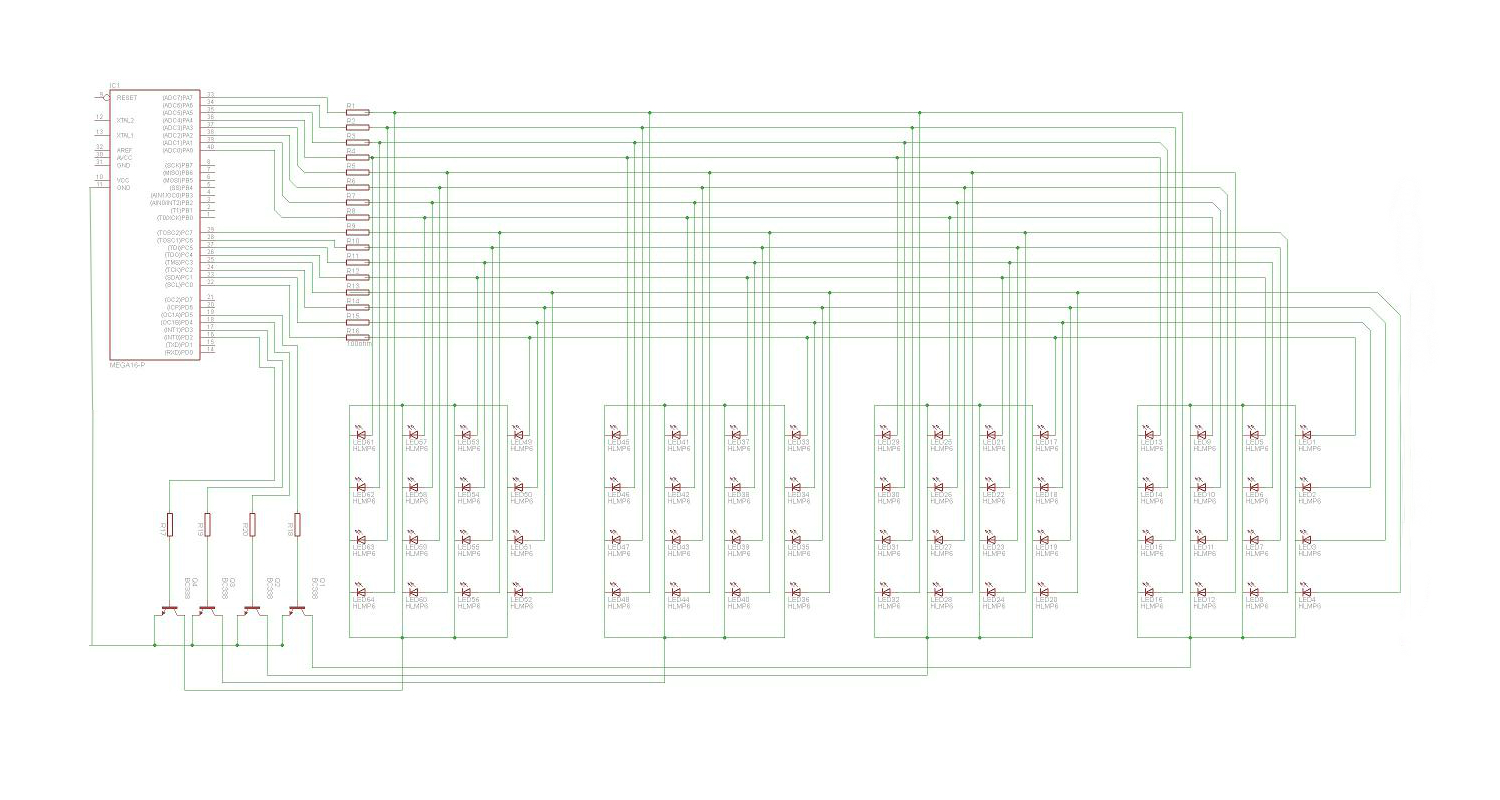
Explanation for this scheme is like this. If I have 64 leds then that means I have to use 64 resistors for each of them. Which costs much. That's why I use transistors. Now I have to use 16 resistors for each leds if you look at it like 4×4 matrix. Plus 4 strong resistors which comes from collector's of transistors. Those 4 strong (2k2) resistors are for each floors. For each floor I send minus signal and for 16 leds I transfer plus signals.
Software Design
For the part of software I used winAVR. And also for animation I used delay.h library. I used some pins from all ports. Because for PORT C it didn't work well. So I used PORT B as well. But generally PORT A for 16 resistors and PORT D for defining floors and ground.
I used bootloader for copying code to atmega. And Sublime Text2 for implementing code. I used linux because its cool ![]()
Here are some of my code it lights all leds from each floor after 1 sec consequently:
      PORTA = 0b00000000;
      PORTC = 0b00000000;
      PORTB = 0b00000000;
      PORTD = 0b00000000;

      //each line
      for(i=0;i<2;i++){
          PORTA = 0b0011111111;
          PORTC = 0b0011000011;
          PORTB = 0b0001111000;
          PORTD = 0b00010000; //start from top floor
          for (j = 0; j < 4; j++) {
              _delay_ms(4000);
              PORTD /= 2; // pass to floor-1
          }
      }
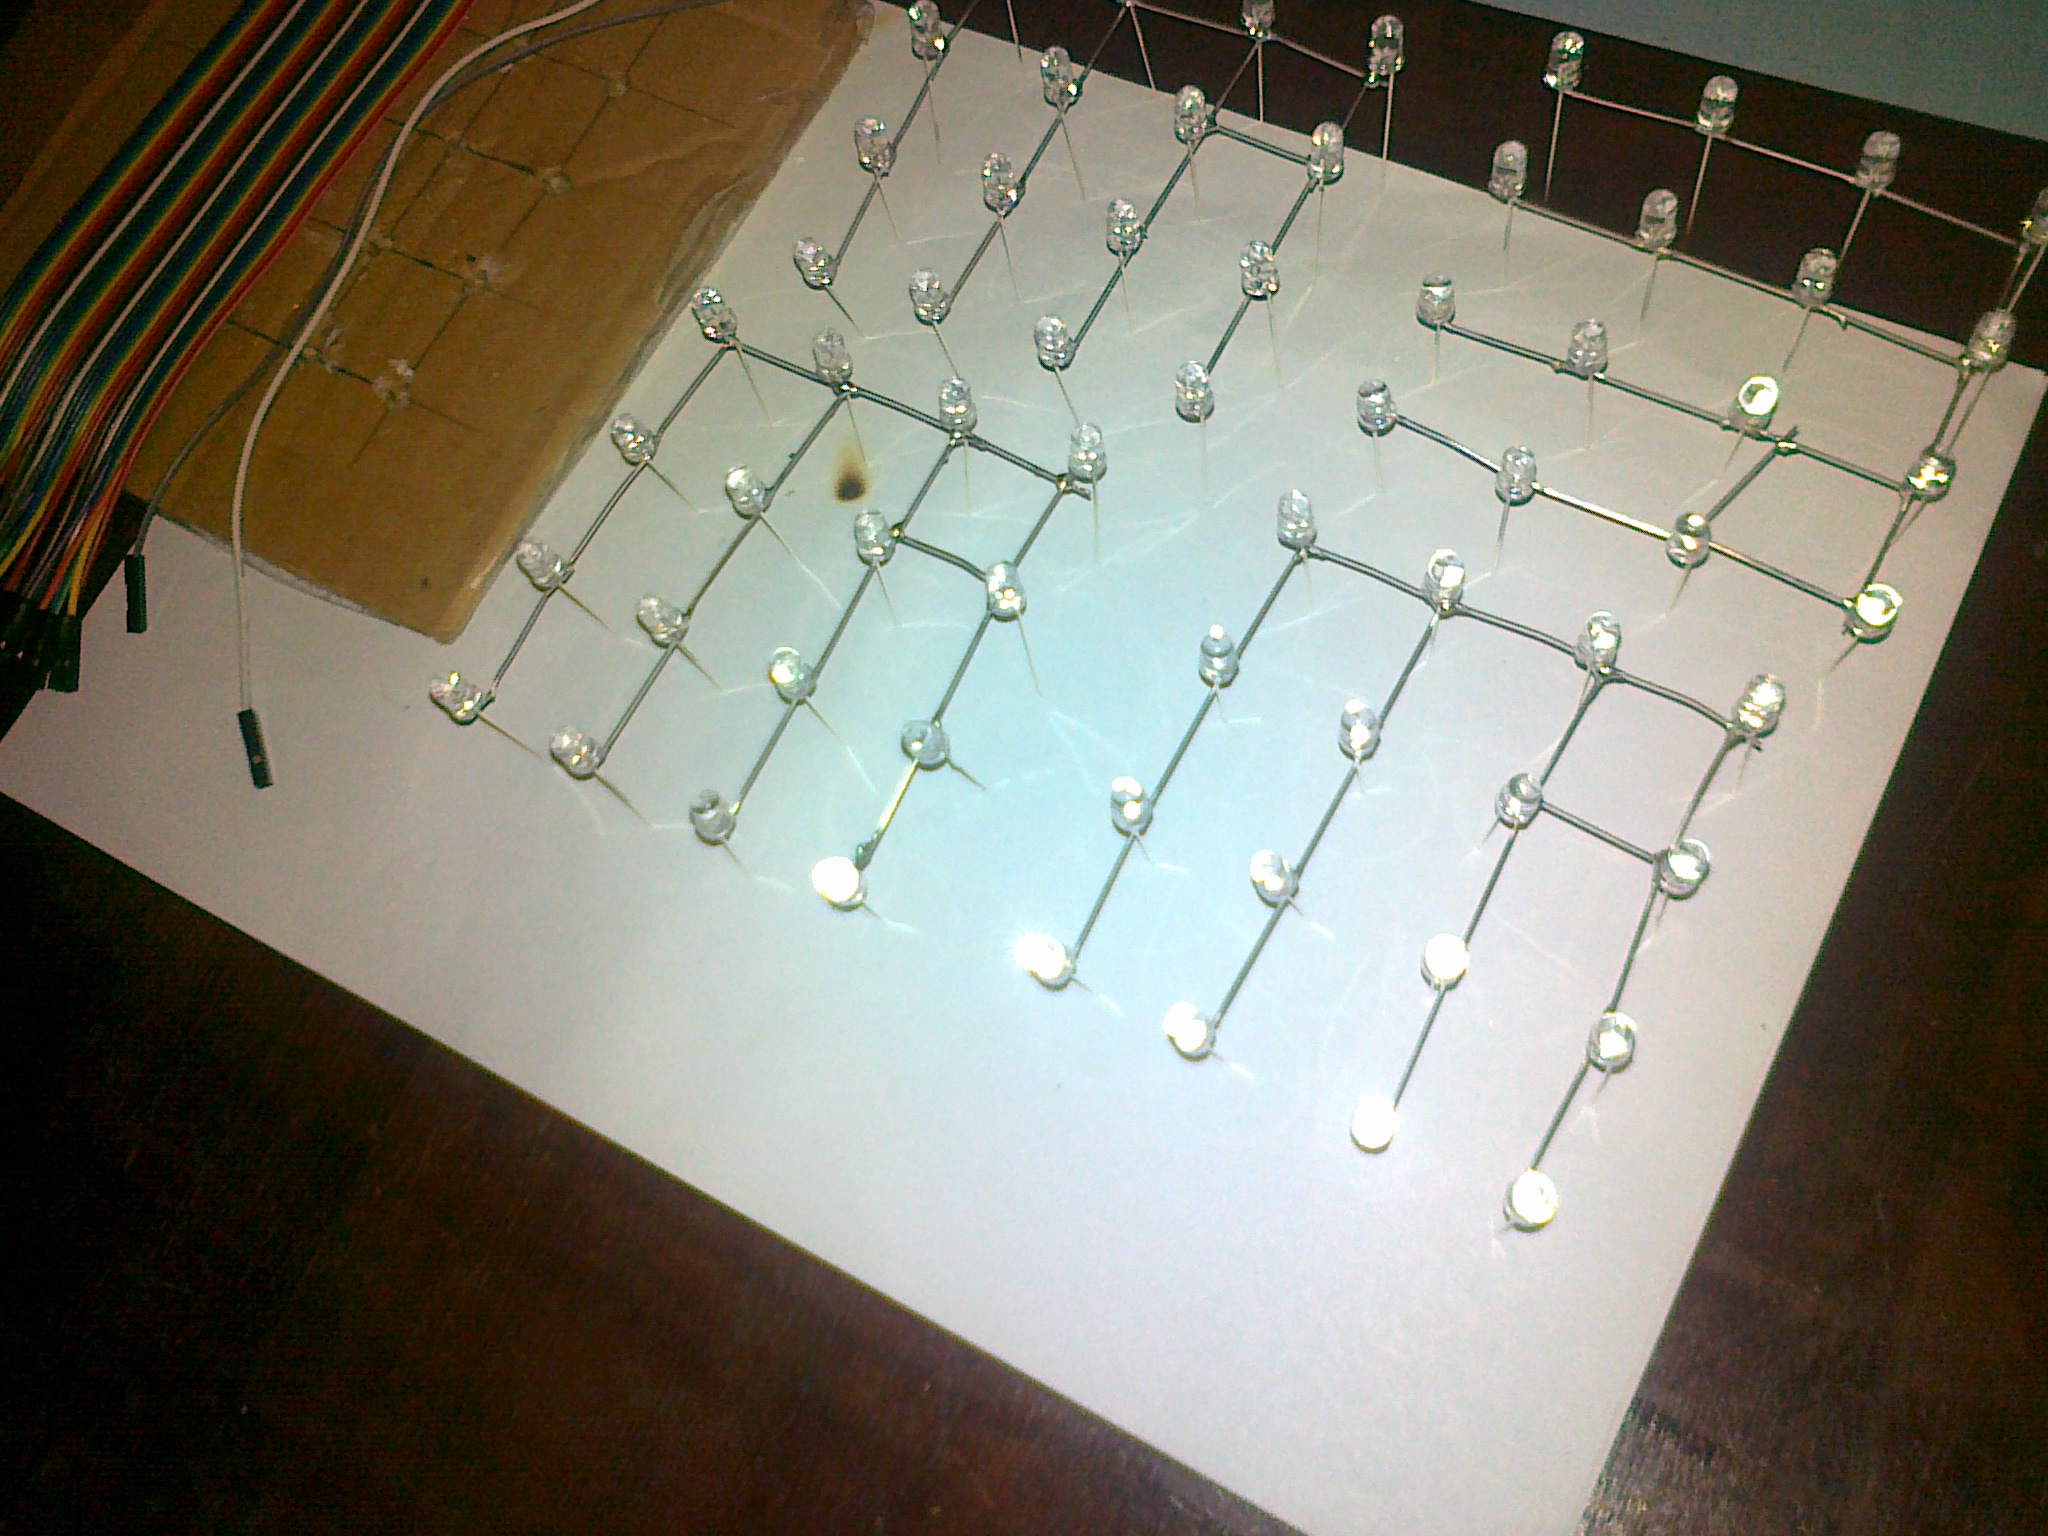
Rezultate Obţinute


Concluzii
It was an amazing project and fun. ![]() But It is difficult to do for juniors. Now I hope that in future I can do more complicated projects. Even if I had problems with some pins of PORT C. The most difficult part was soldering. Because I have to pay atention for each drop of solder. E.g if I connect accidentally plus and minus of one led then that floor is gone.
But It is difficult to do for juniors. Now I hope that in future I can do more complicated projects. Even if I had problems with some pins of PORT C. The most difficult part was soldering. Because I have to pay atention for each drop of solder. E.g if I connect accidentally plus and minus of one led then that floor is gone. ![]()
Download
Jurnal
- 20 Apr - 26 Apr: Buying motherboard, choosing project from last year's projects and creating a page on site
- 27 Apr - 3 May: Buying components for motherboard and other important components for led cube
- 4 May - 10 May: Soldering components for motherboard
- 11 May - 17 May: Drawing schema of led cube and Soldering components for test board
- 18 May - 24 May: Implementing codes for project, software program, and completing on wiki
- 25 May - 29 May: Testing and Presenting at EC hall
Bibliografie/Resurse
Software Projects from year 2013 and 2014 prj2013
For inspiration Led-Cube-8x8x8
For inspiration 2 LED-Cube-4x4x4
Hardware: Motherboard Cablaj imprimat 2015
Shop: Farnell
Street: Maica Domnului